Hérodiade: Foundations Revealed 2021

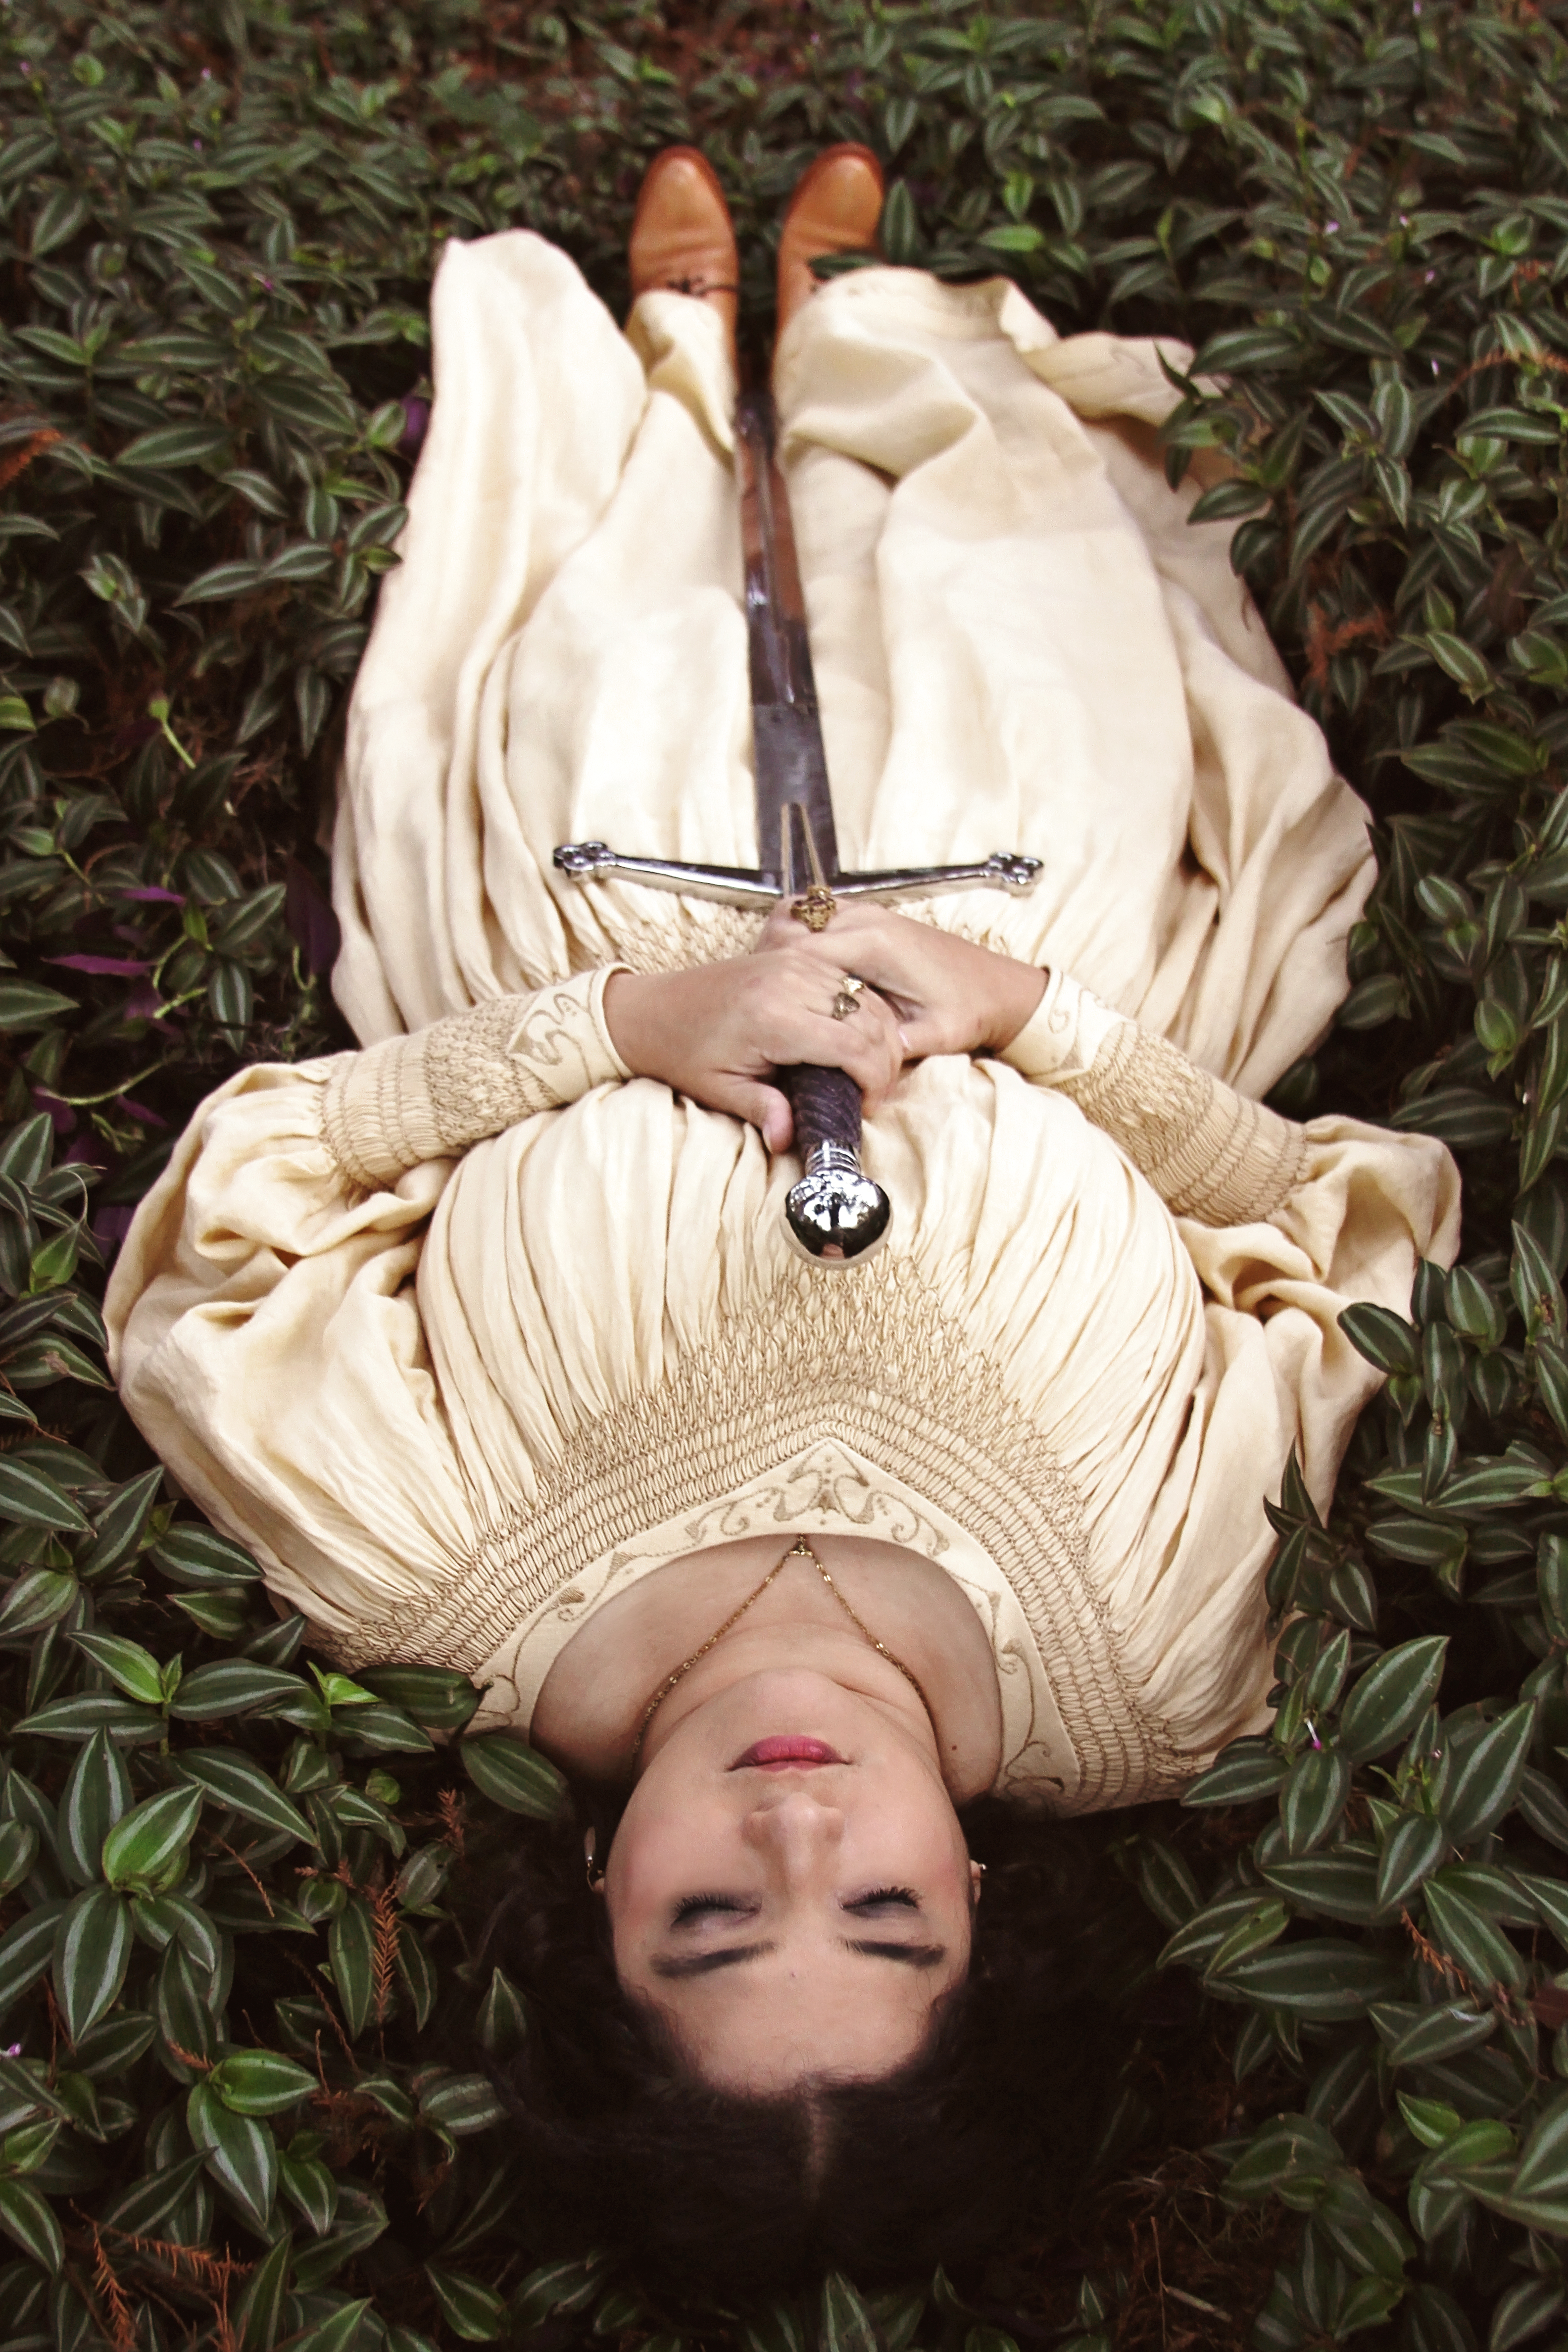
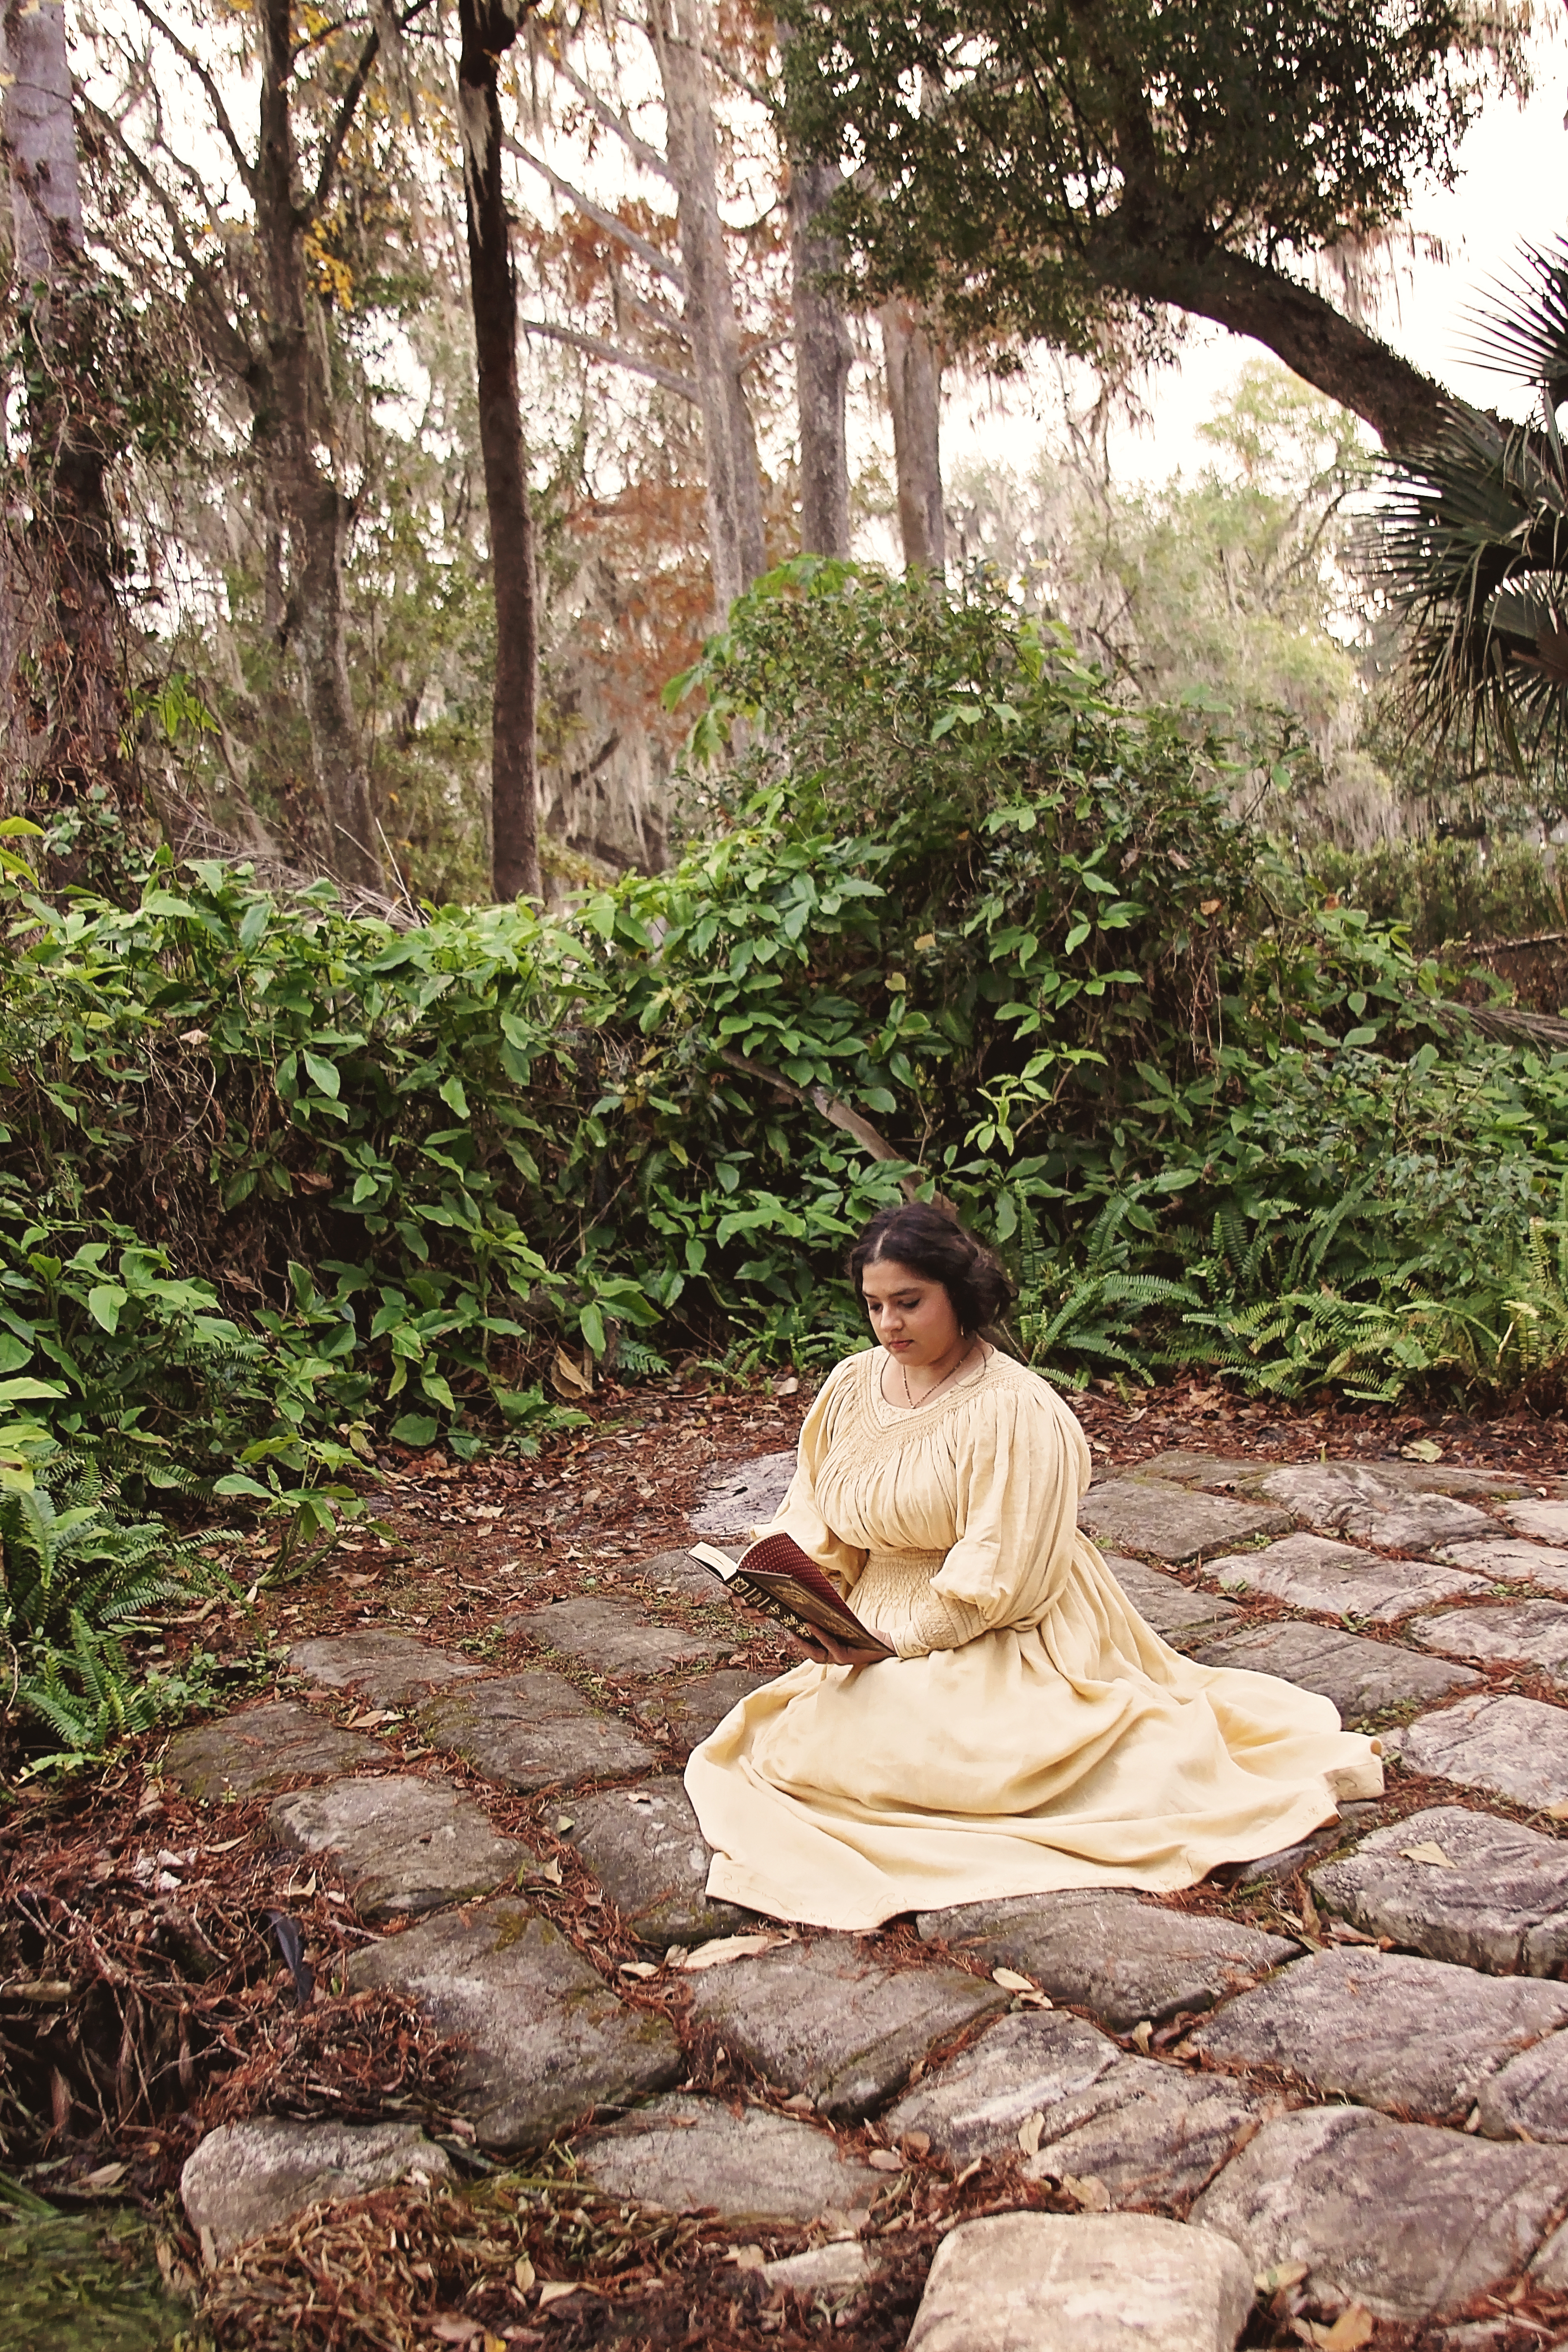
From Hérodiade “A voice from the distant past, an evocation, Is it not mine prepared for incantation? In the yellow folds of thought, still unexhumed, Lingering, and like an antique cloth perfumed”

Photos by Christa Newman

Inspiration:

The Yellow Book Volume XI, October, 1896.
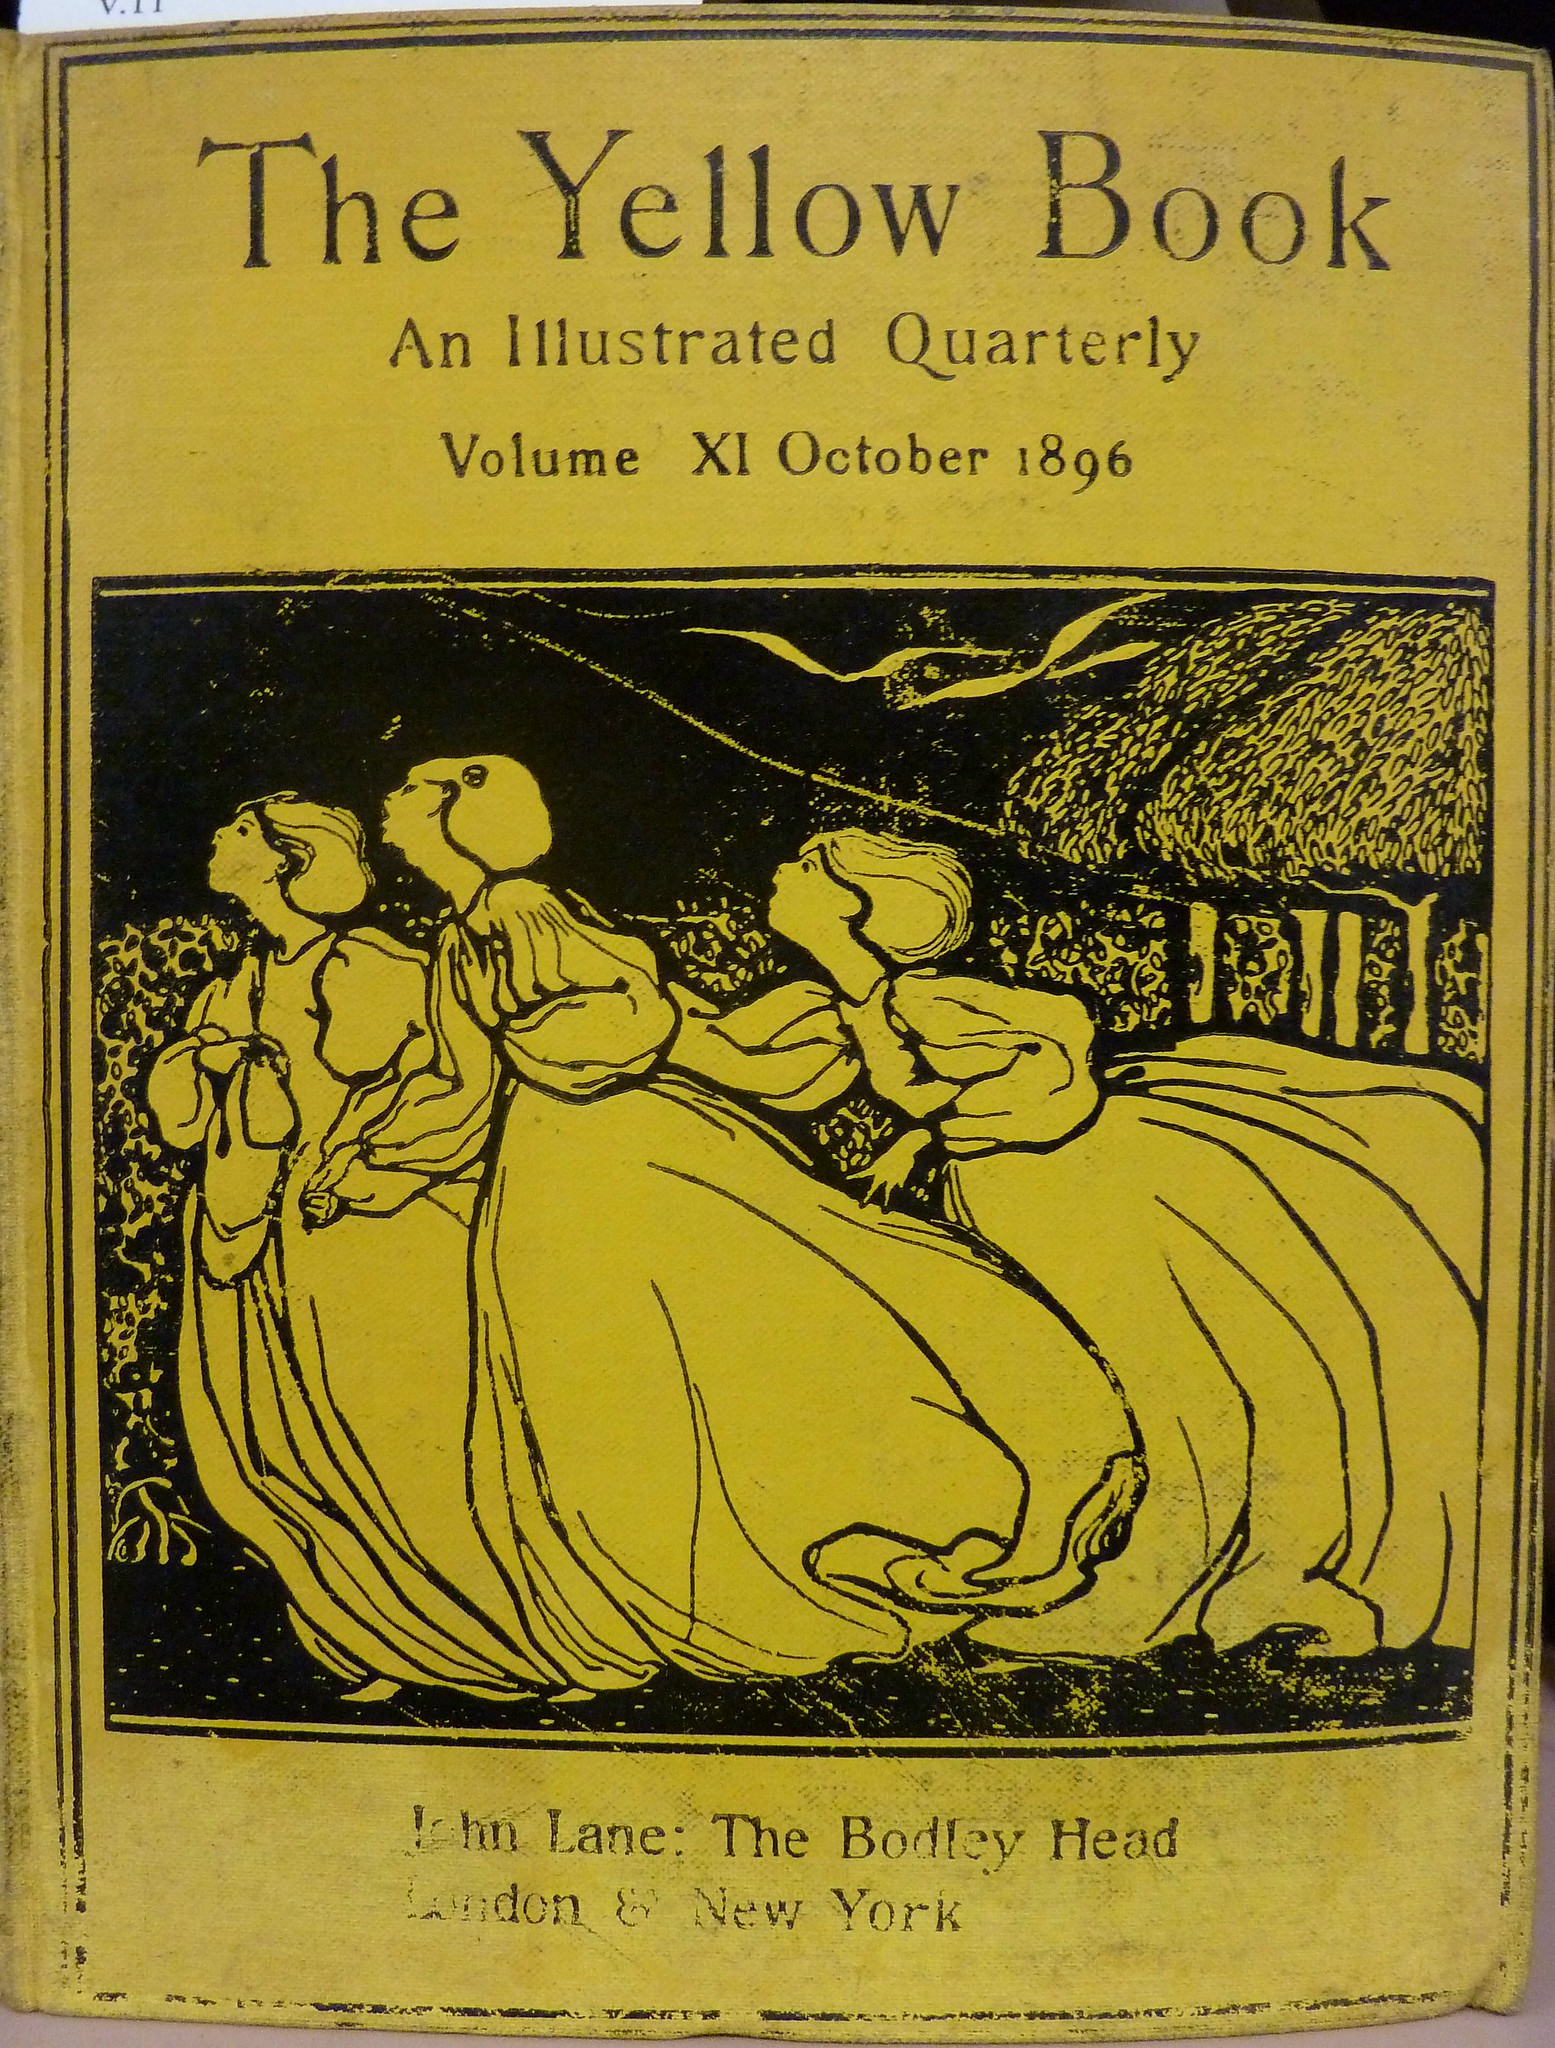
London: John Lane; The Bodley Head.
King’s Land Collection
John J. Burns Library, Boston College
Aesthetes and Decadents of the 1890s: An Anthology of British Poetry and Prose (9780897330442): Karl Beckson

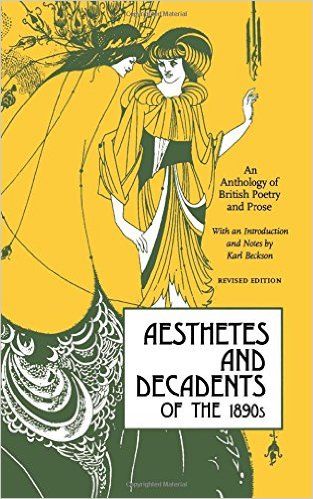
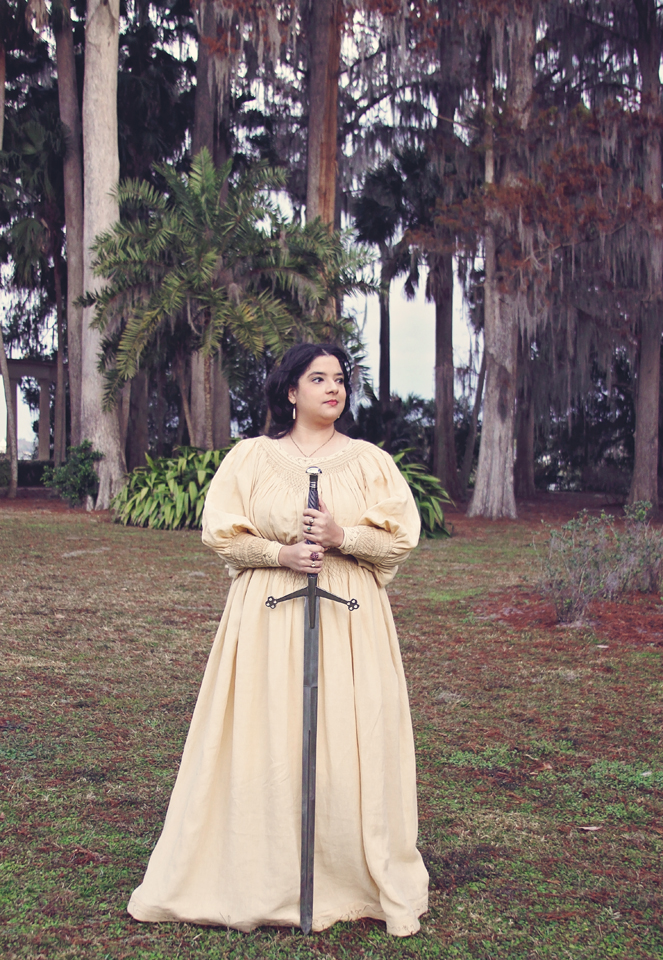
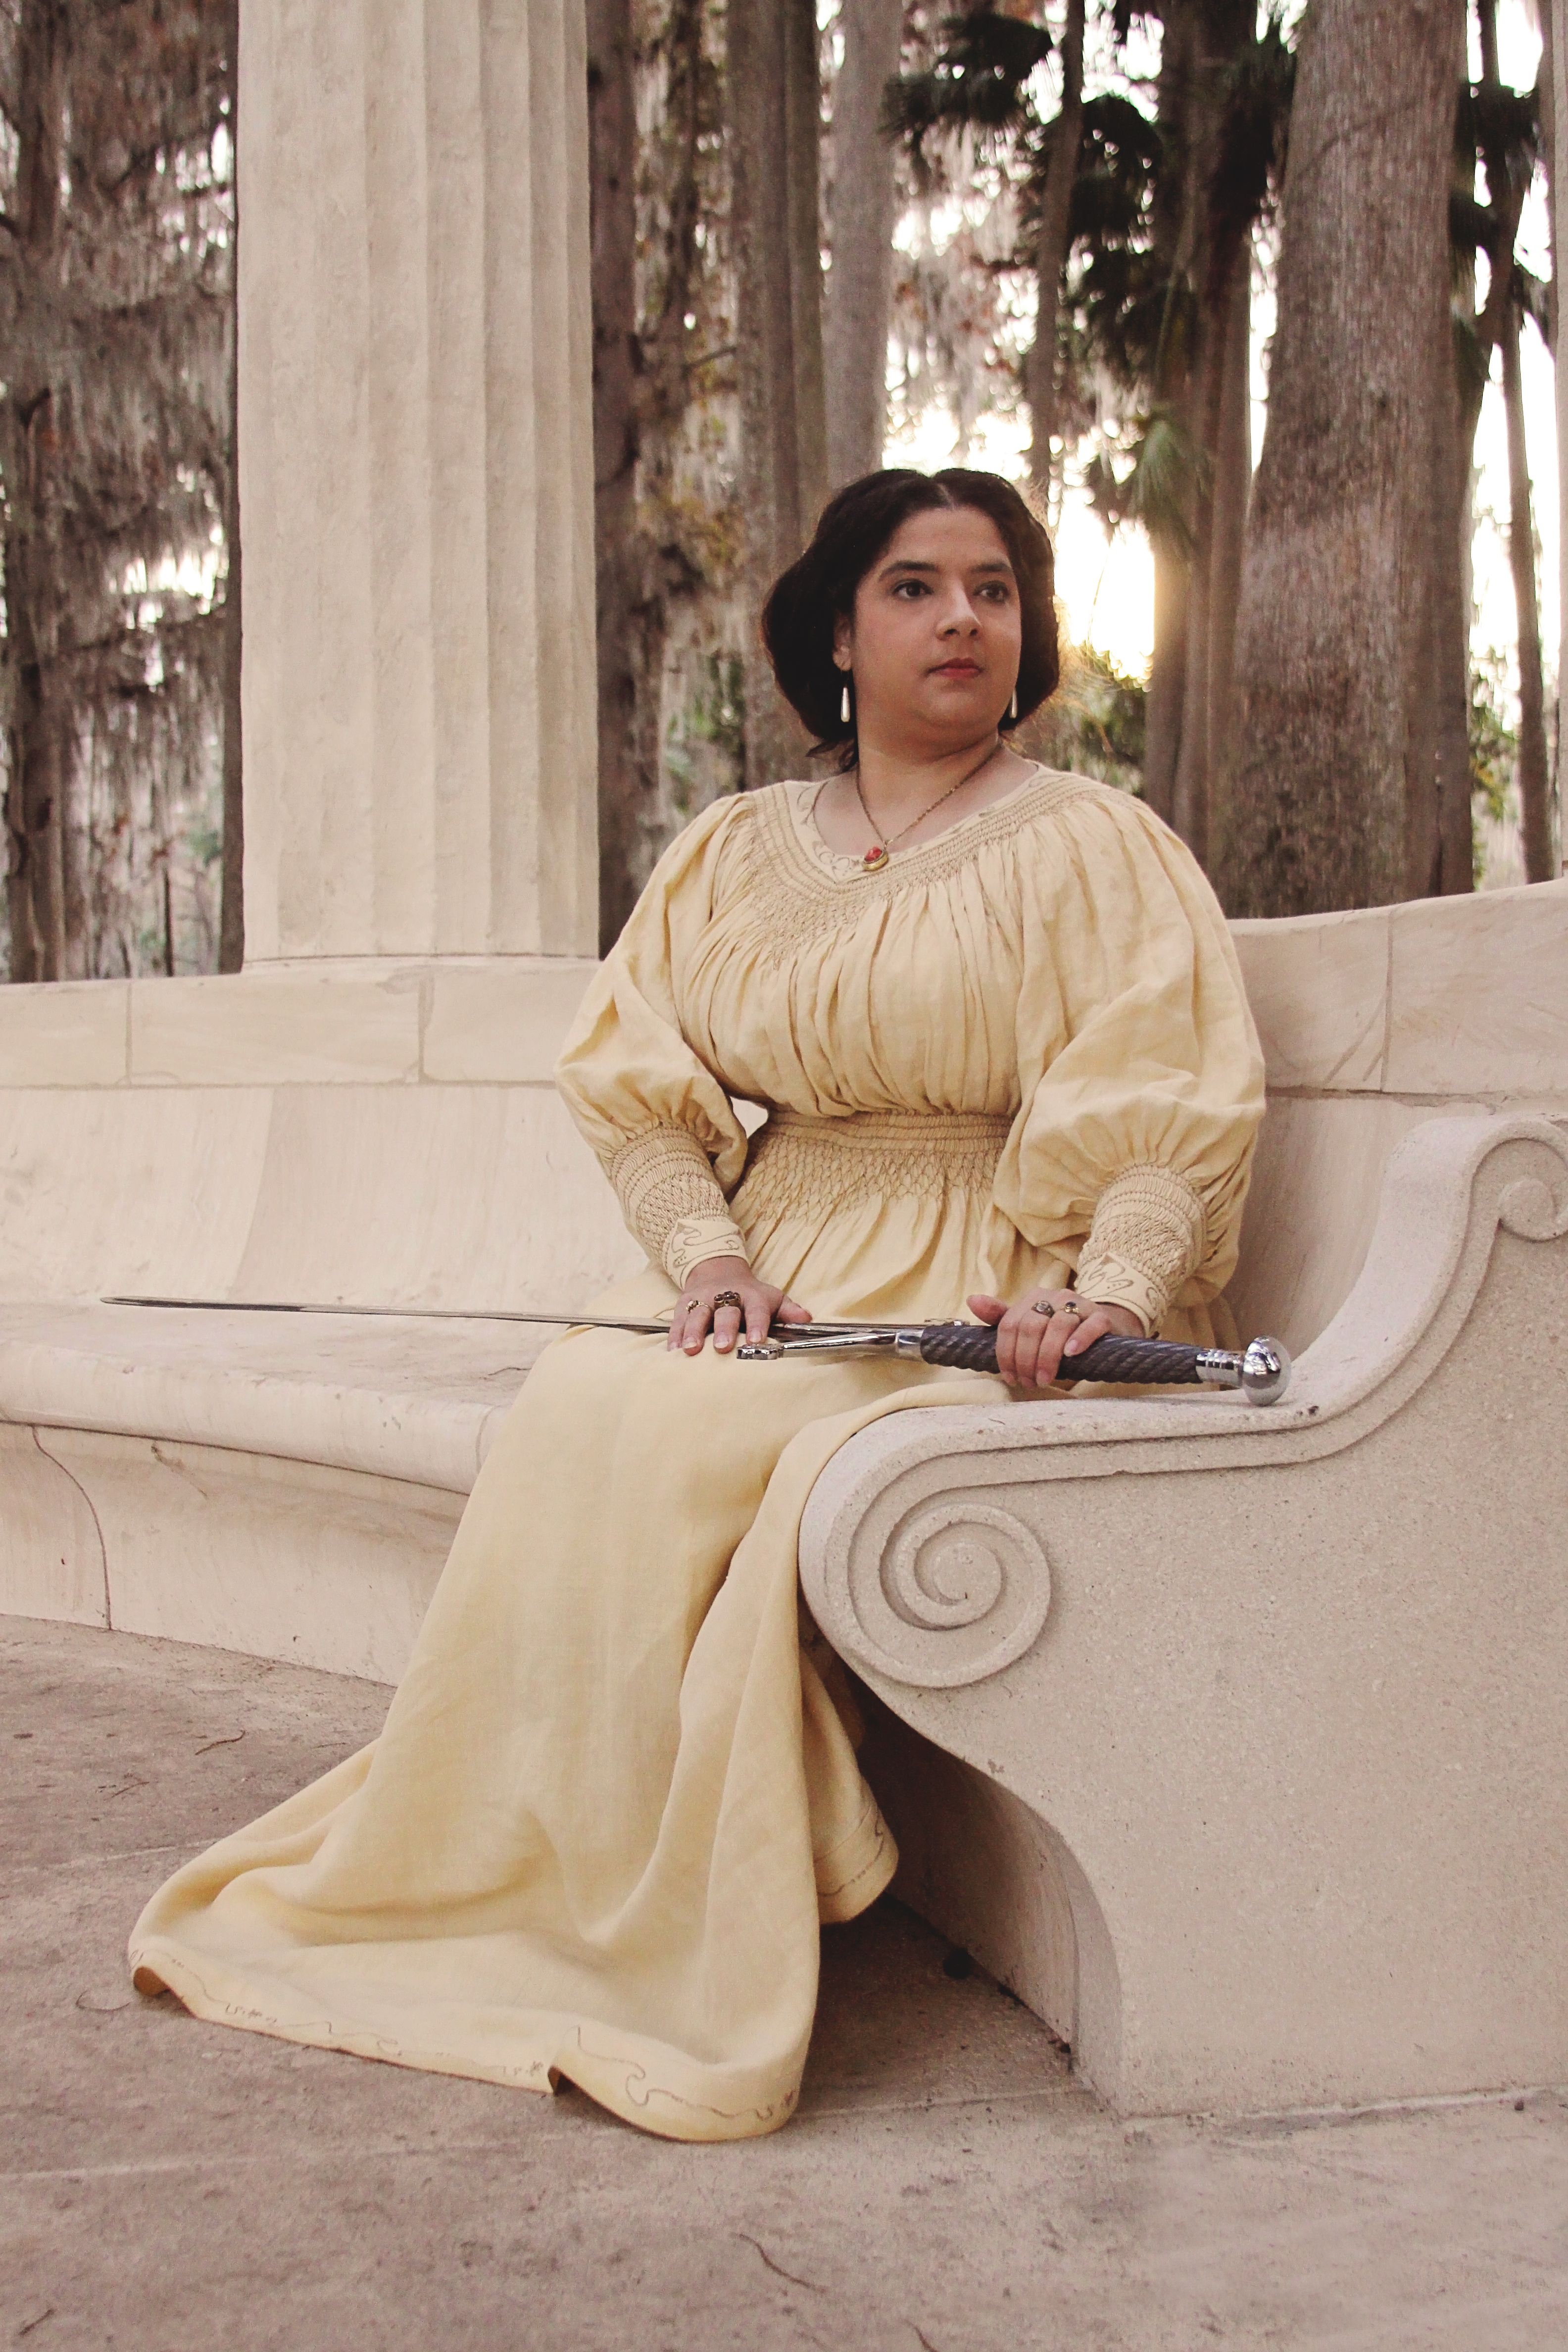
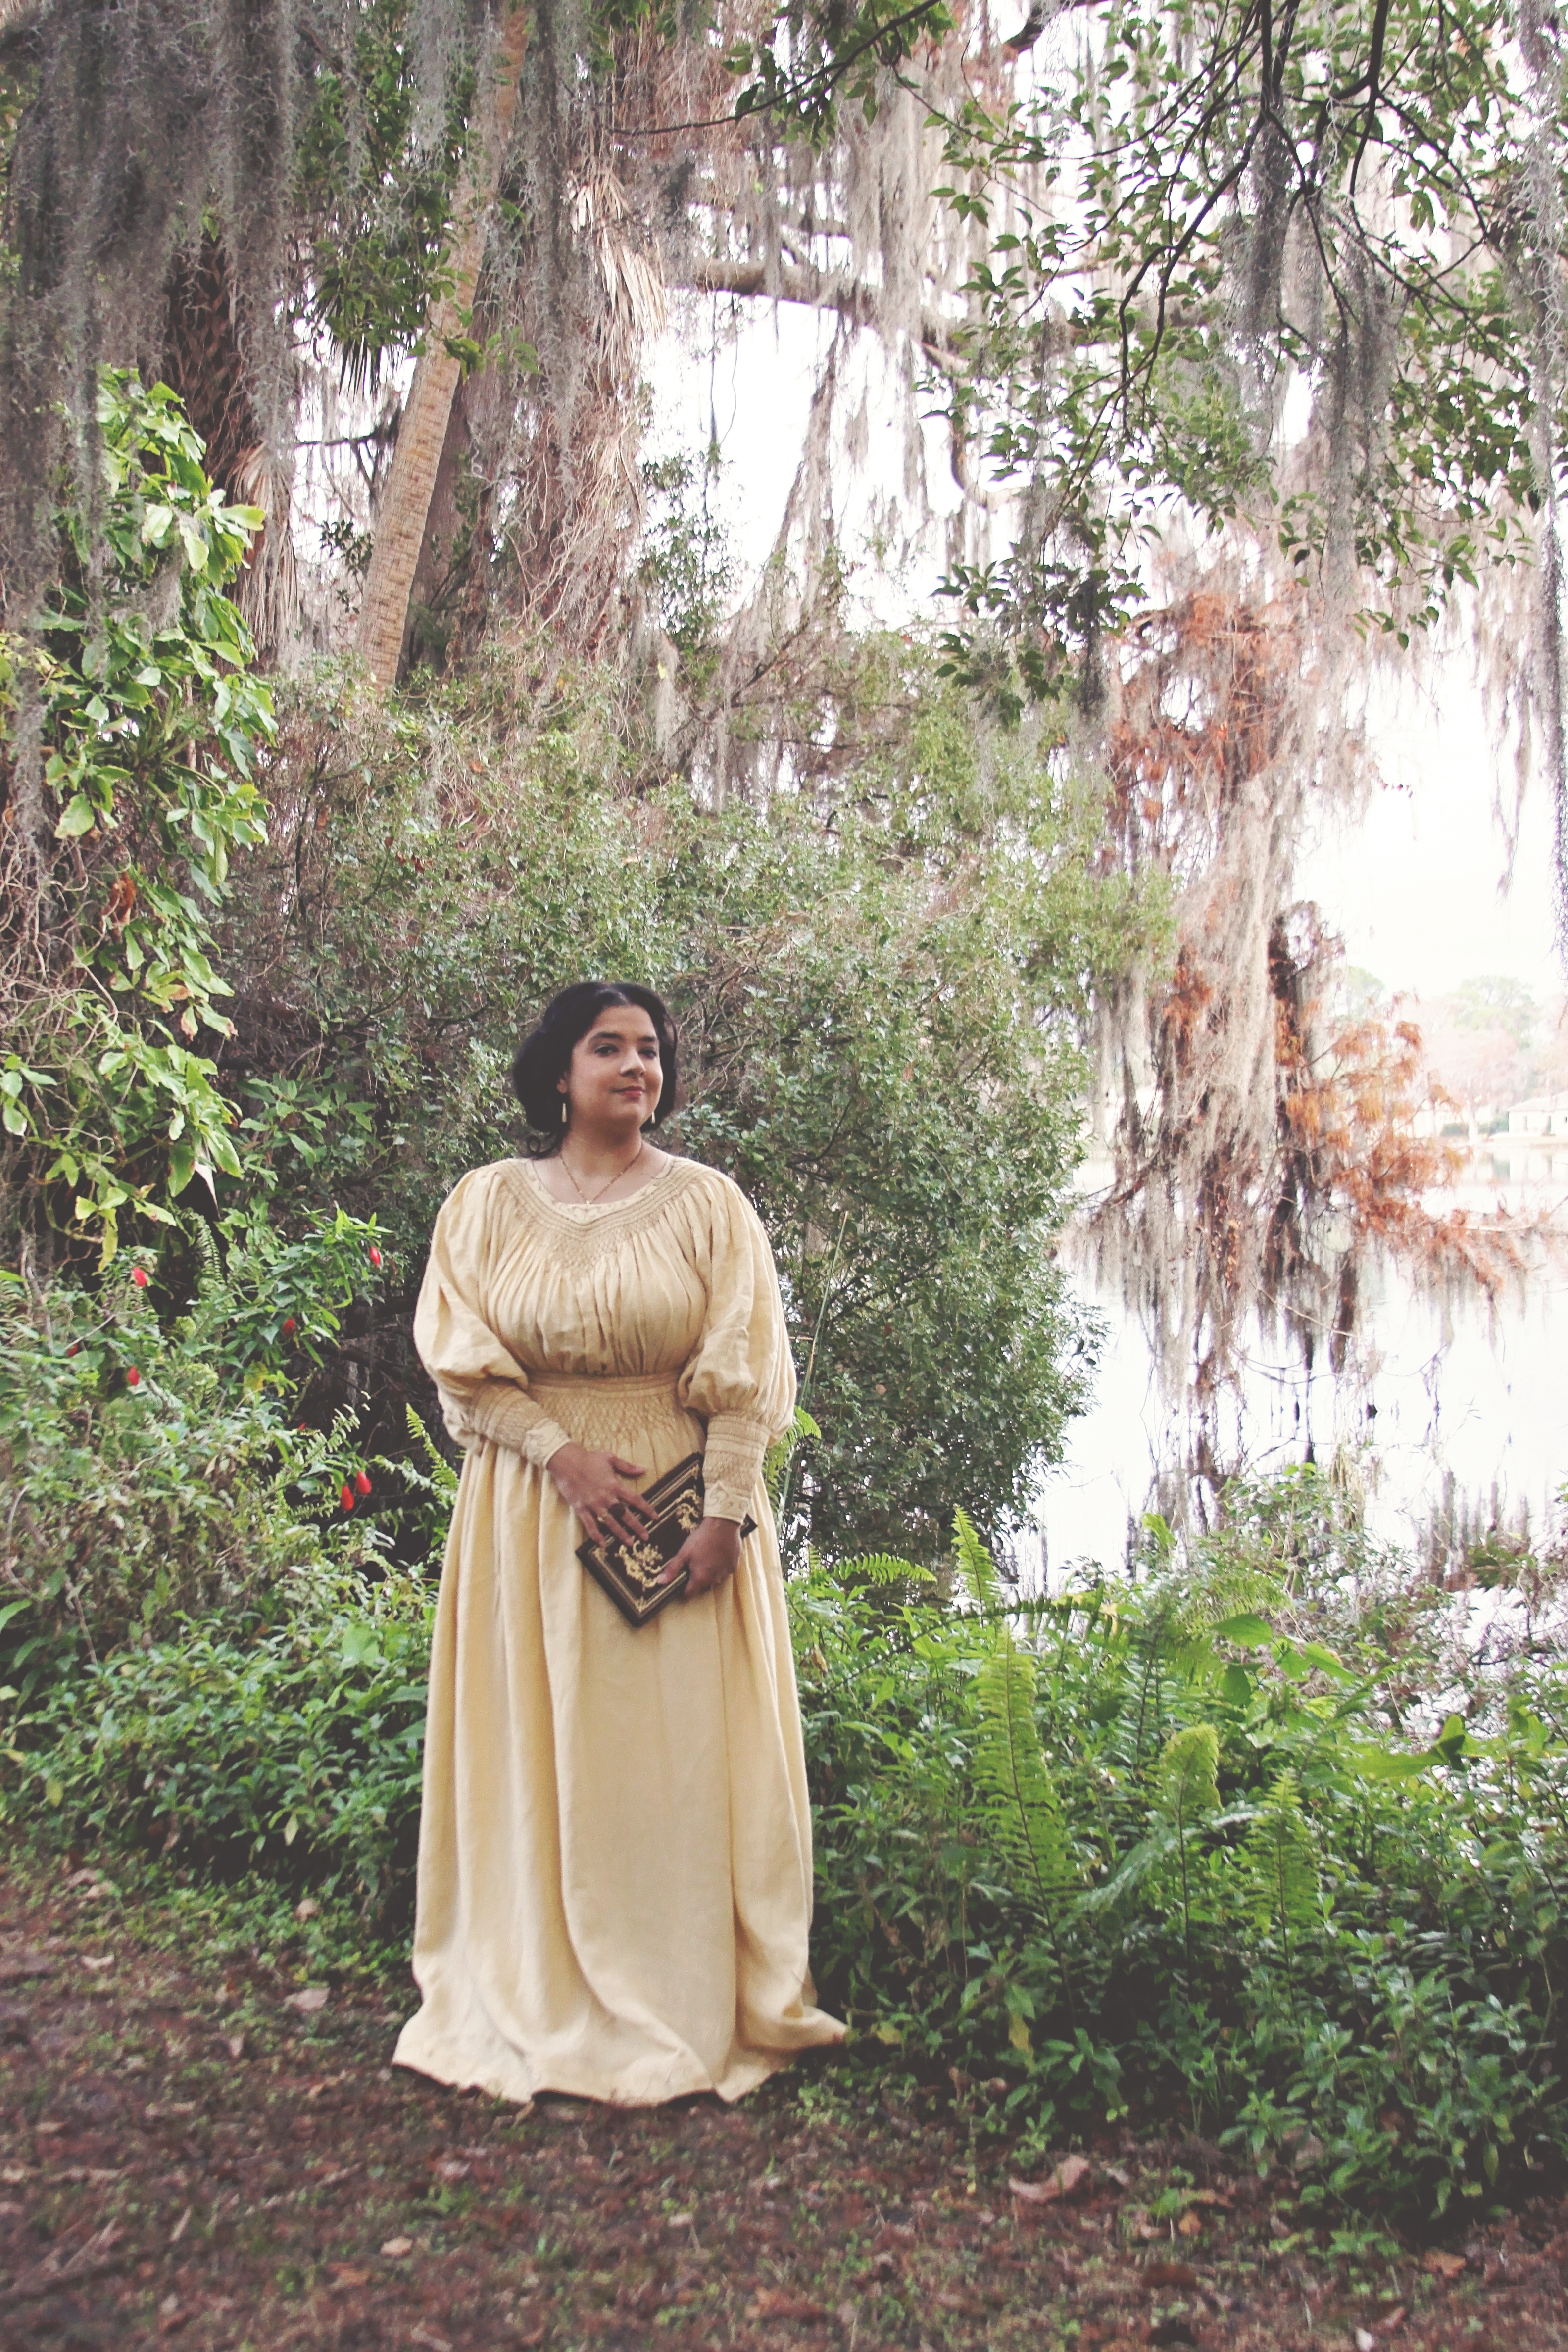
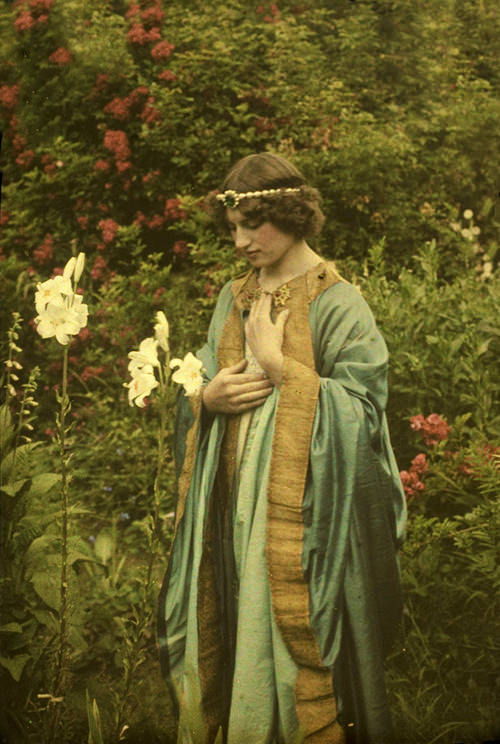
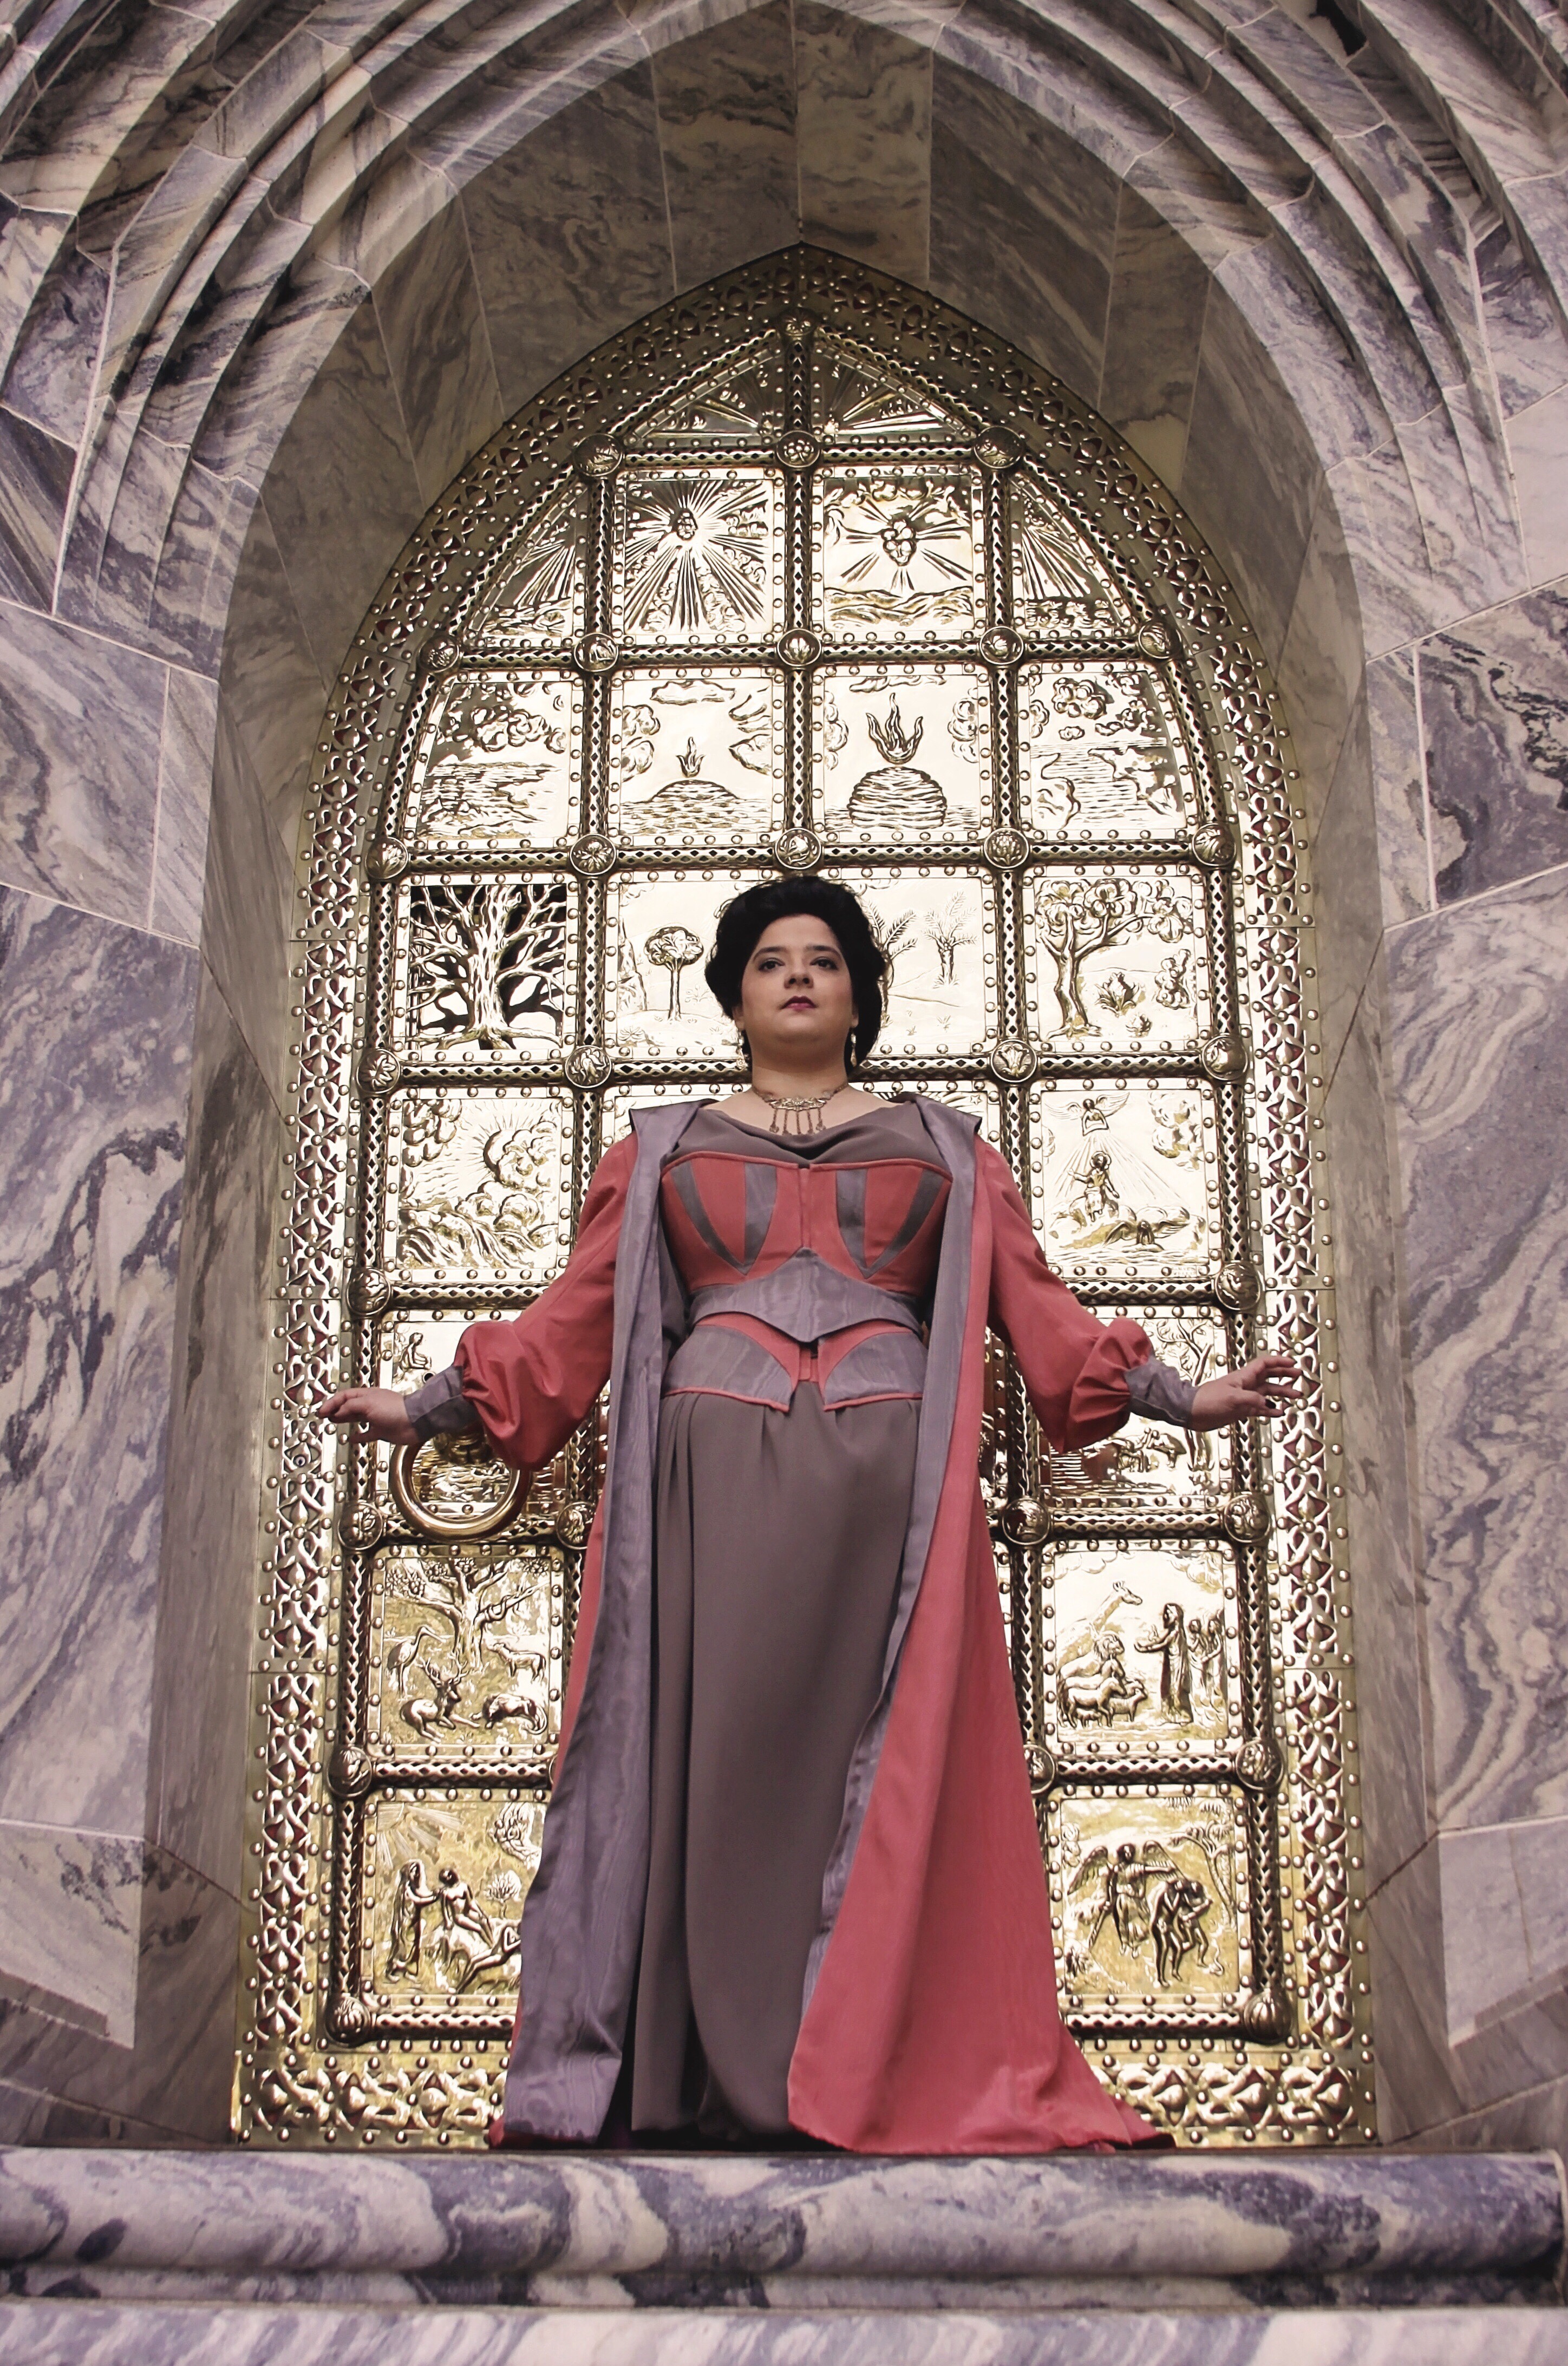
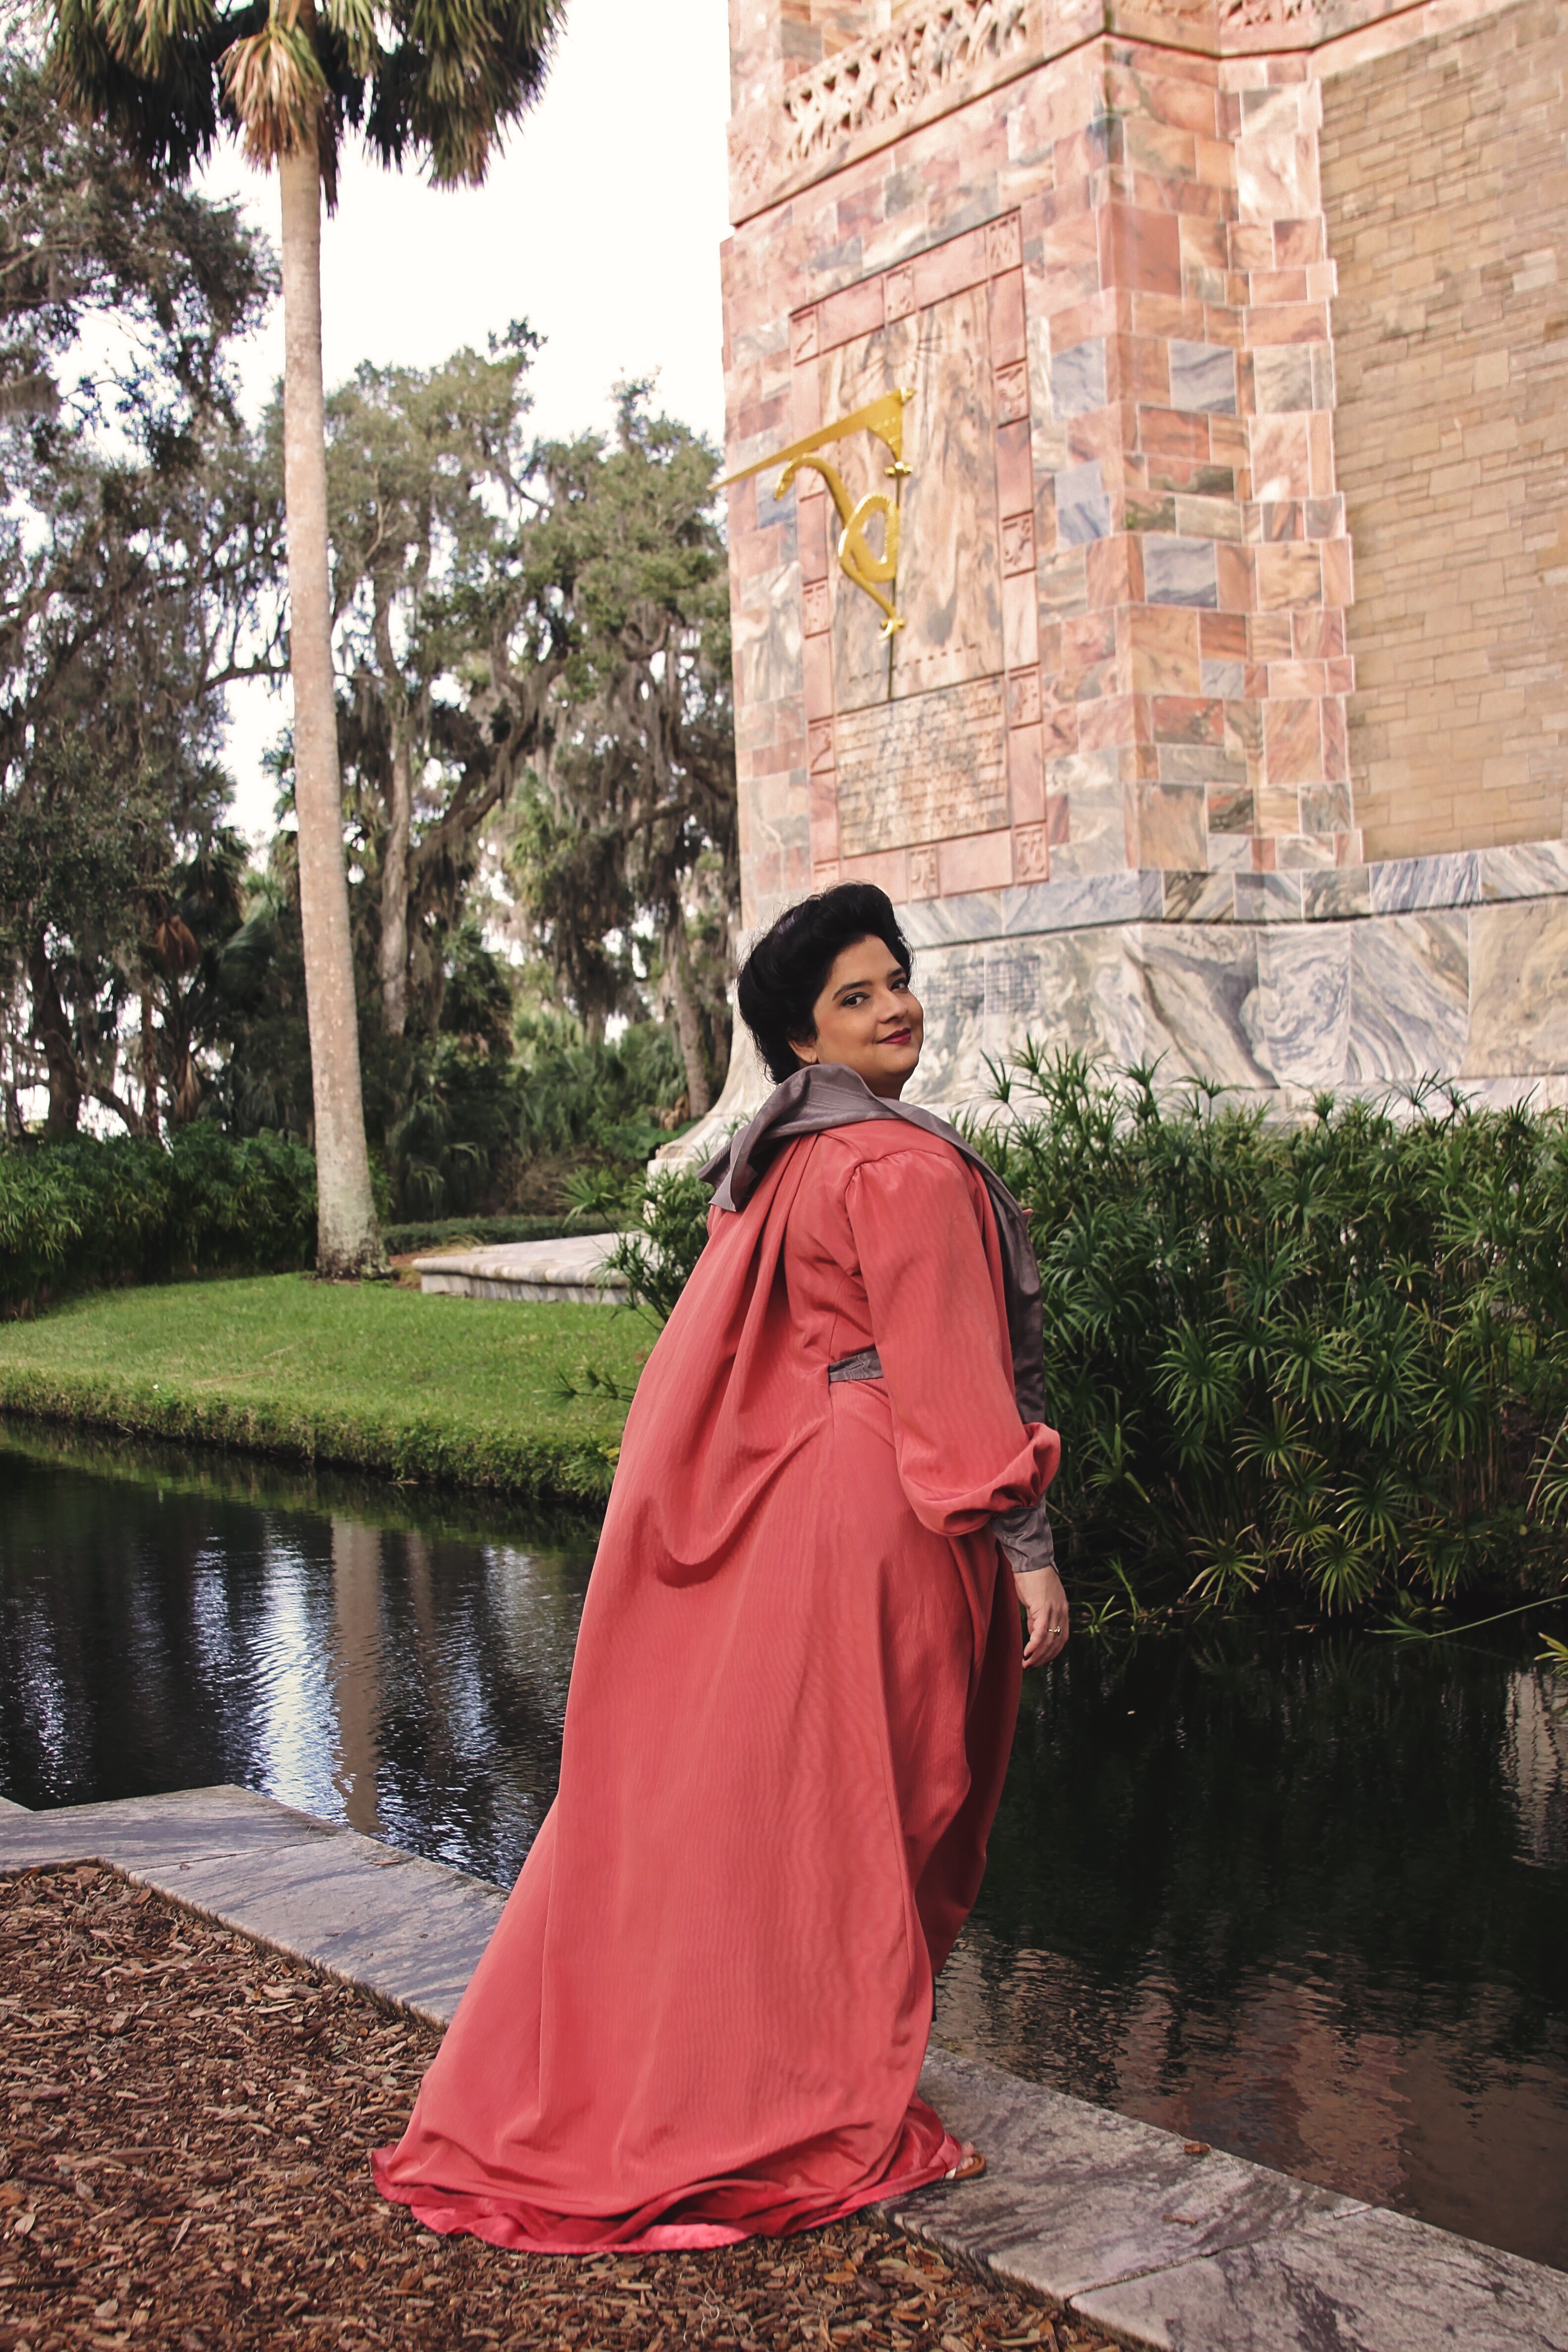
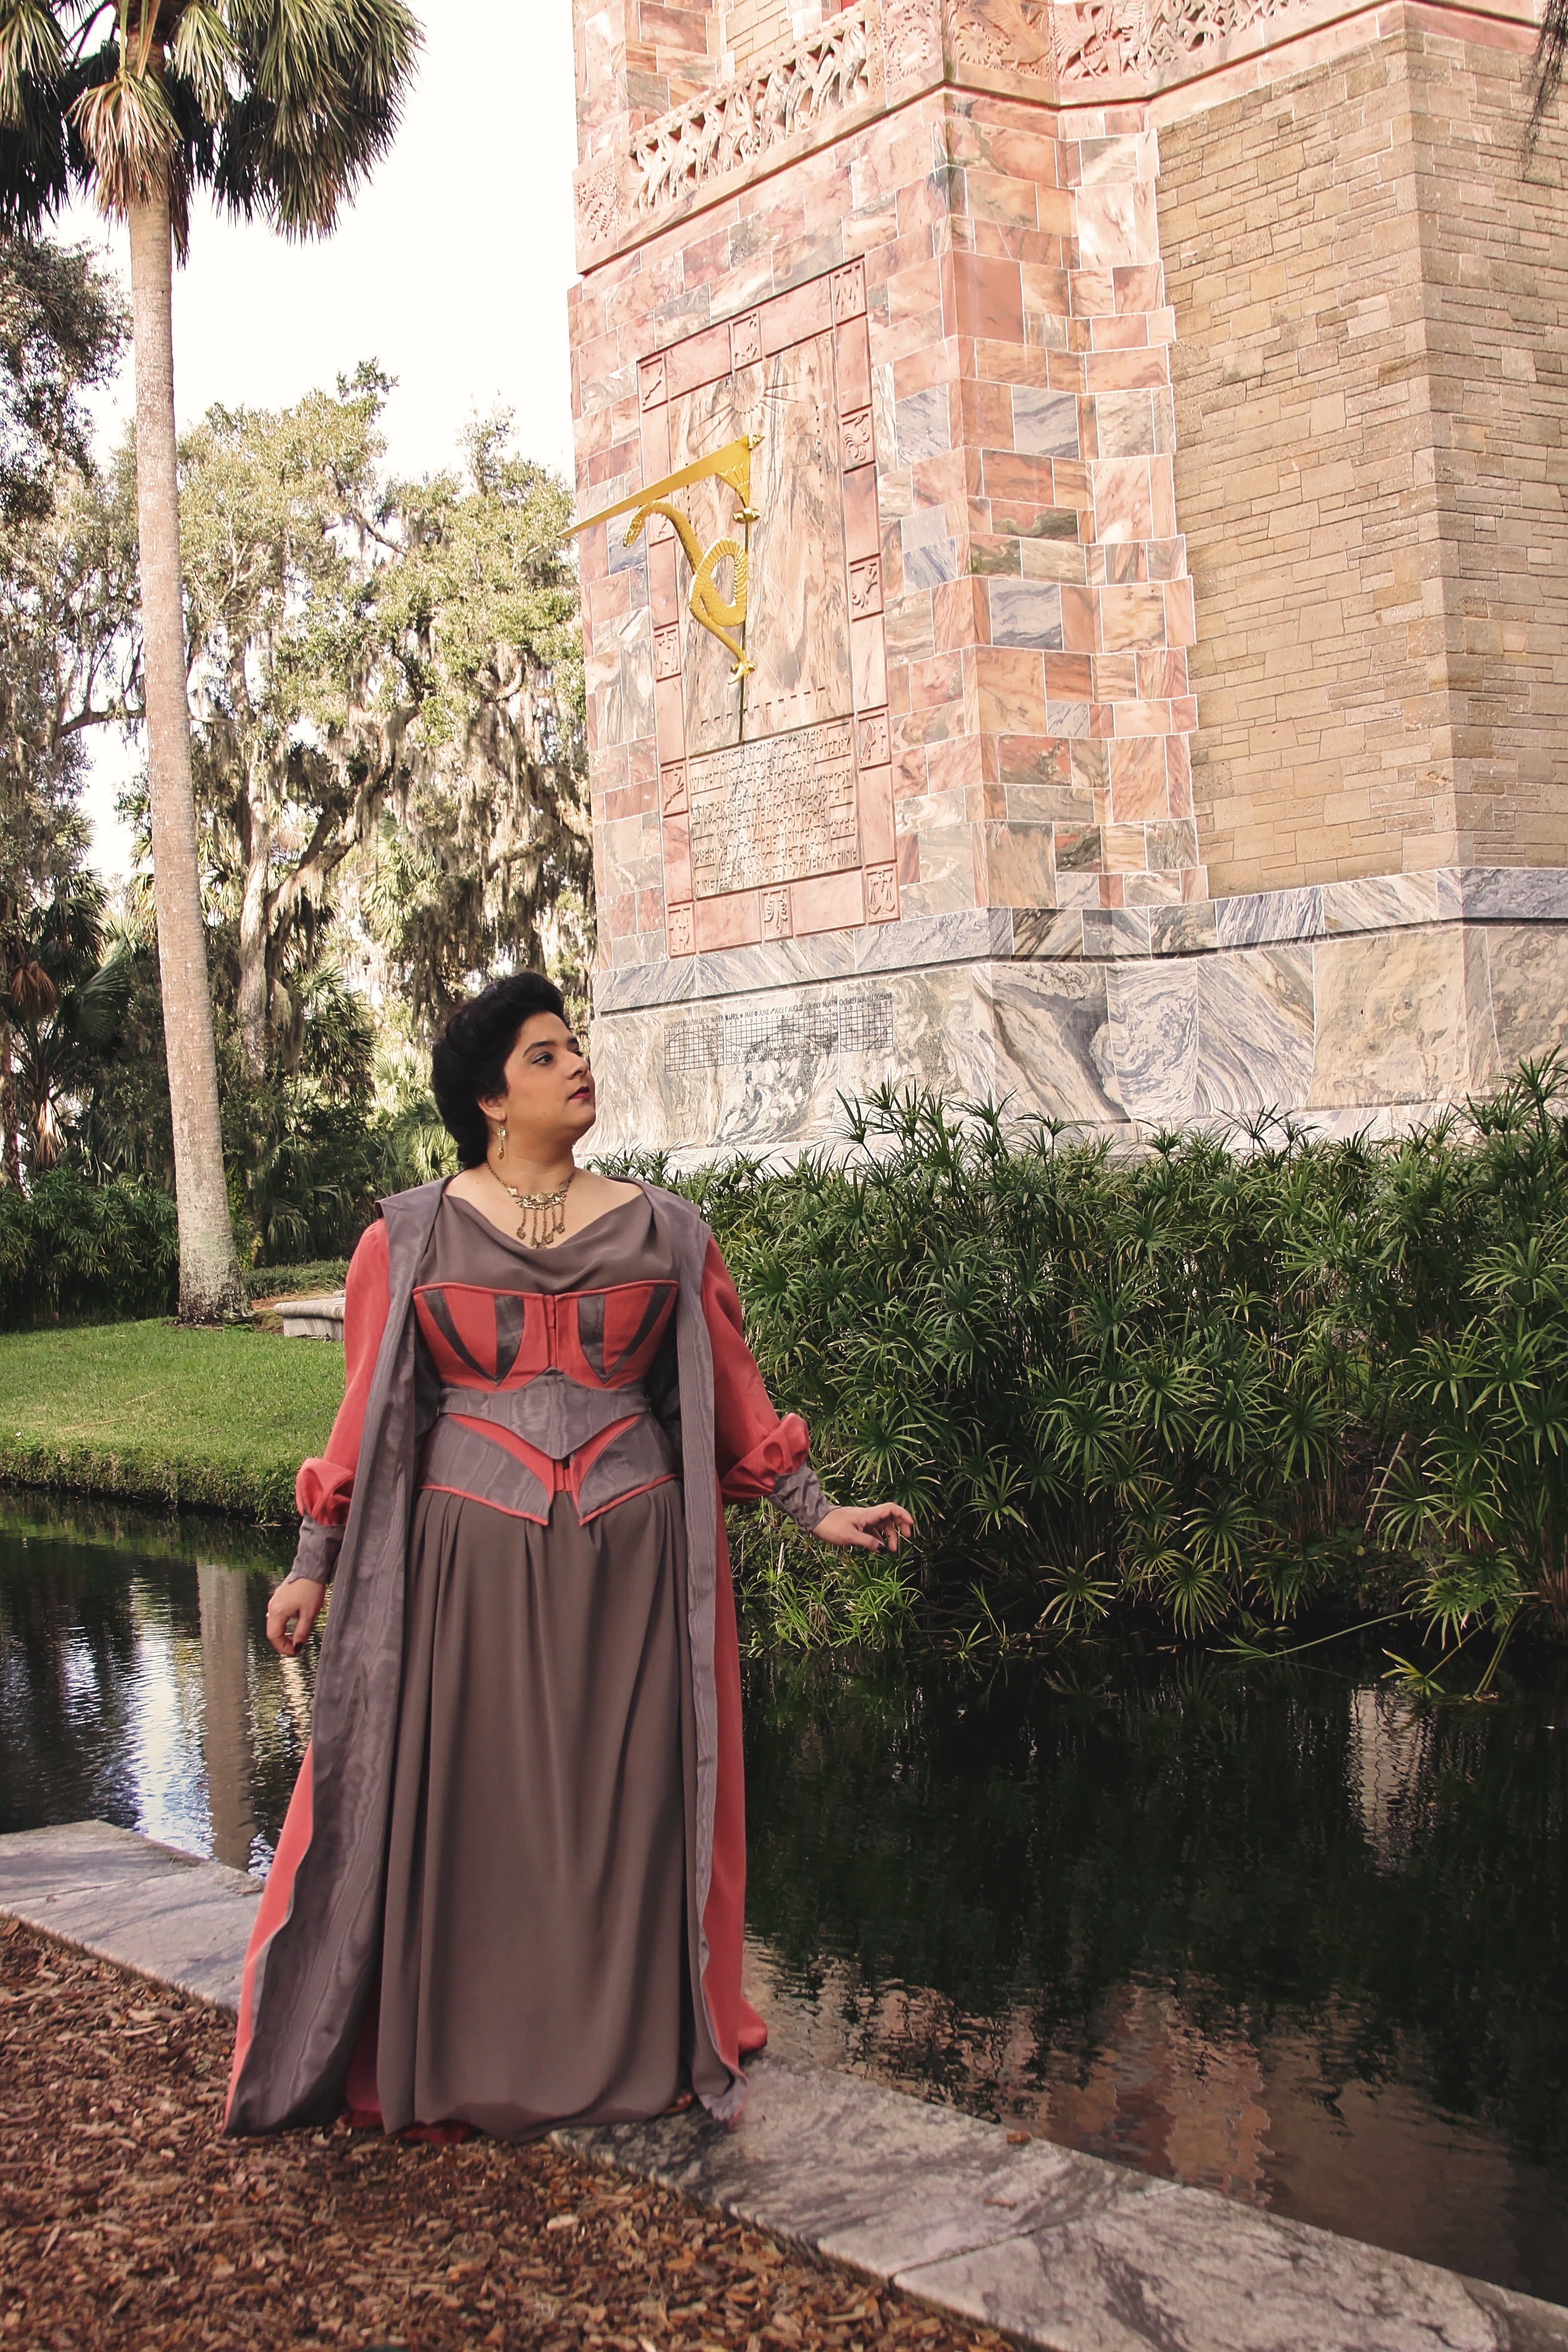
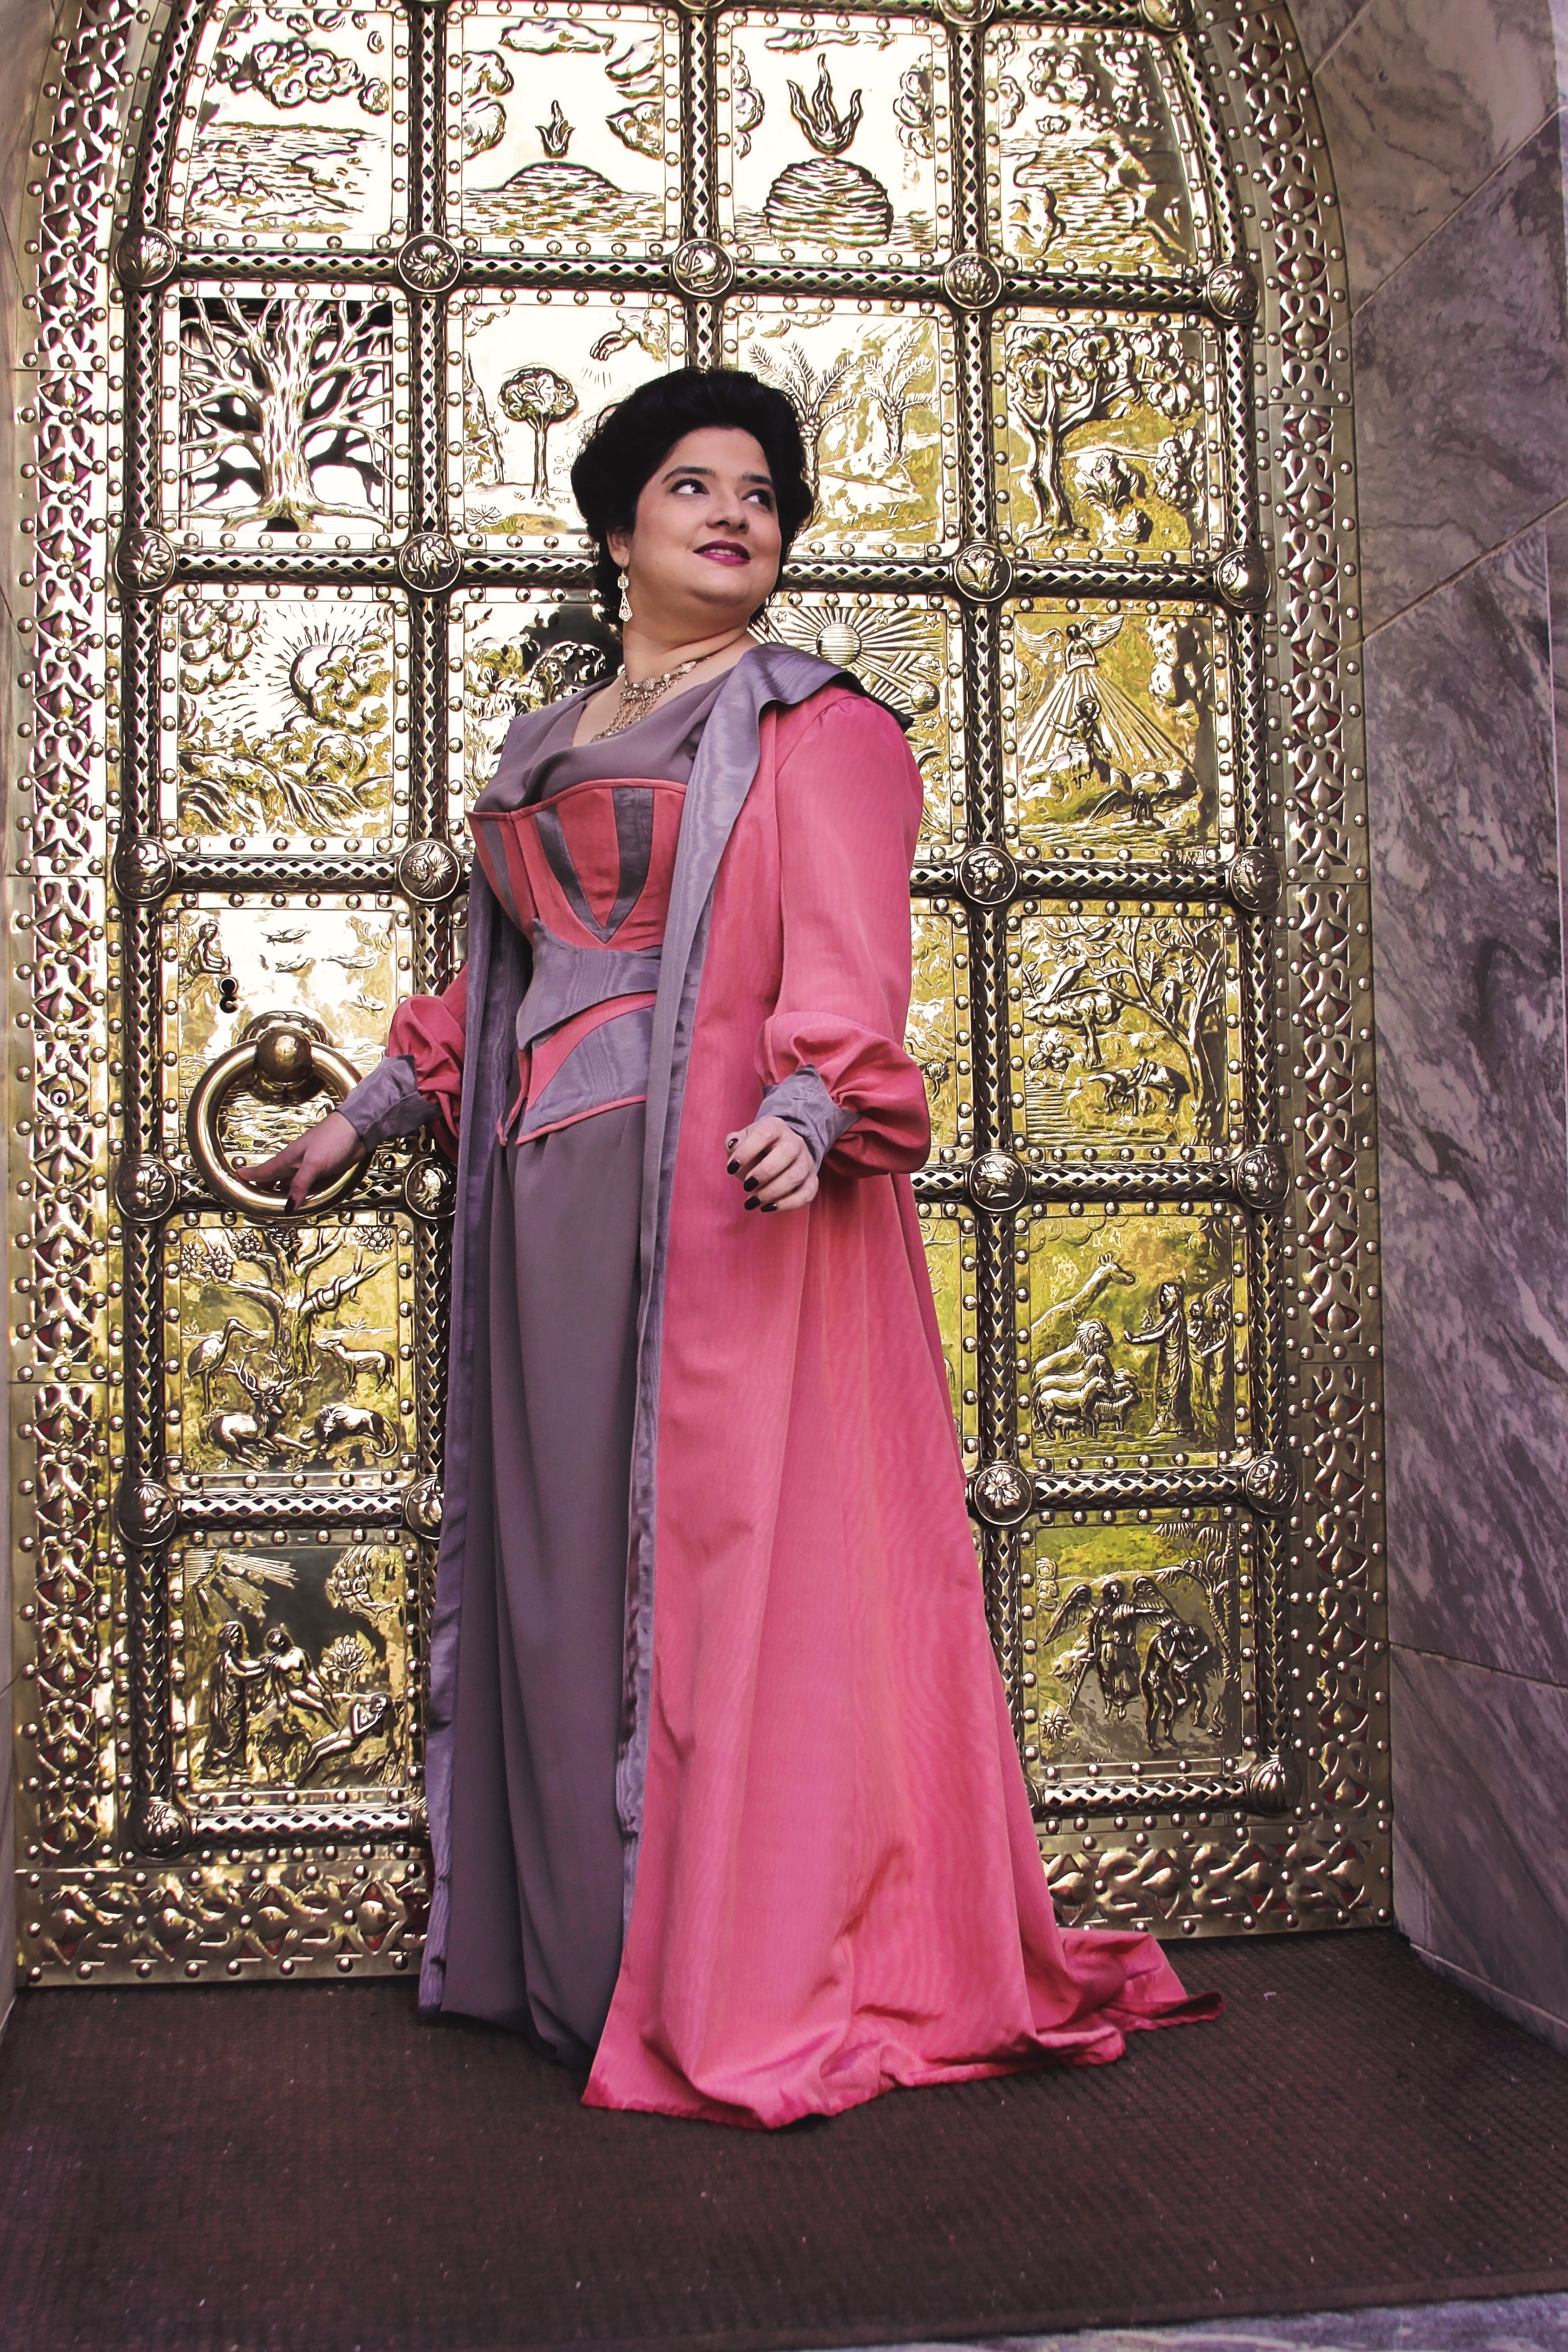
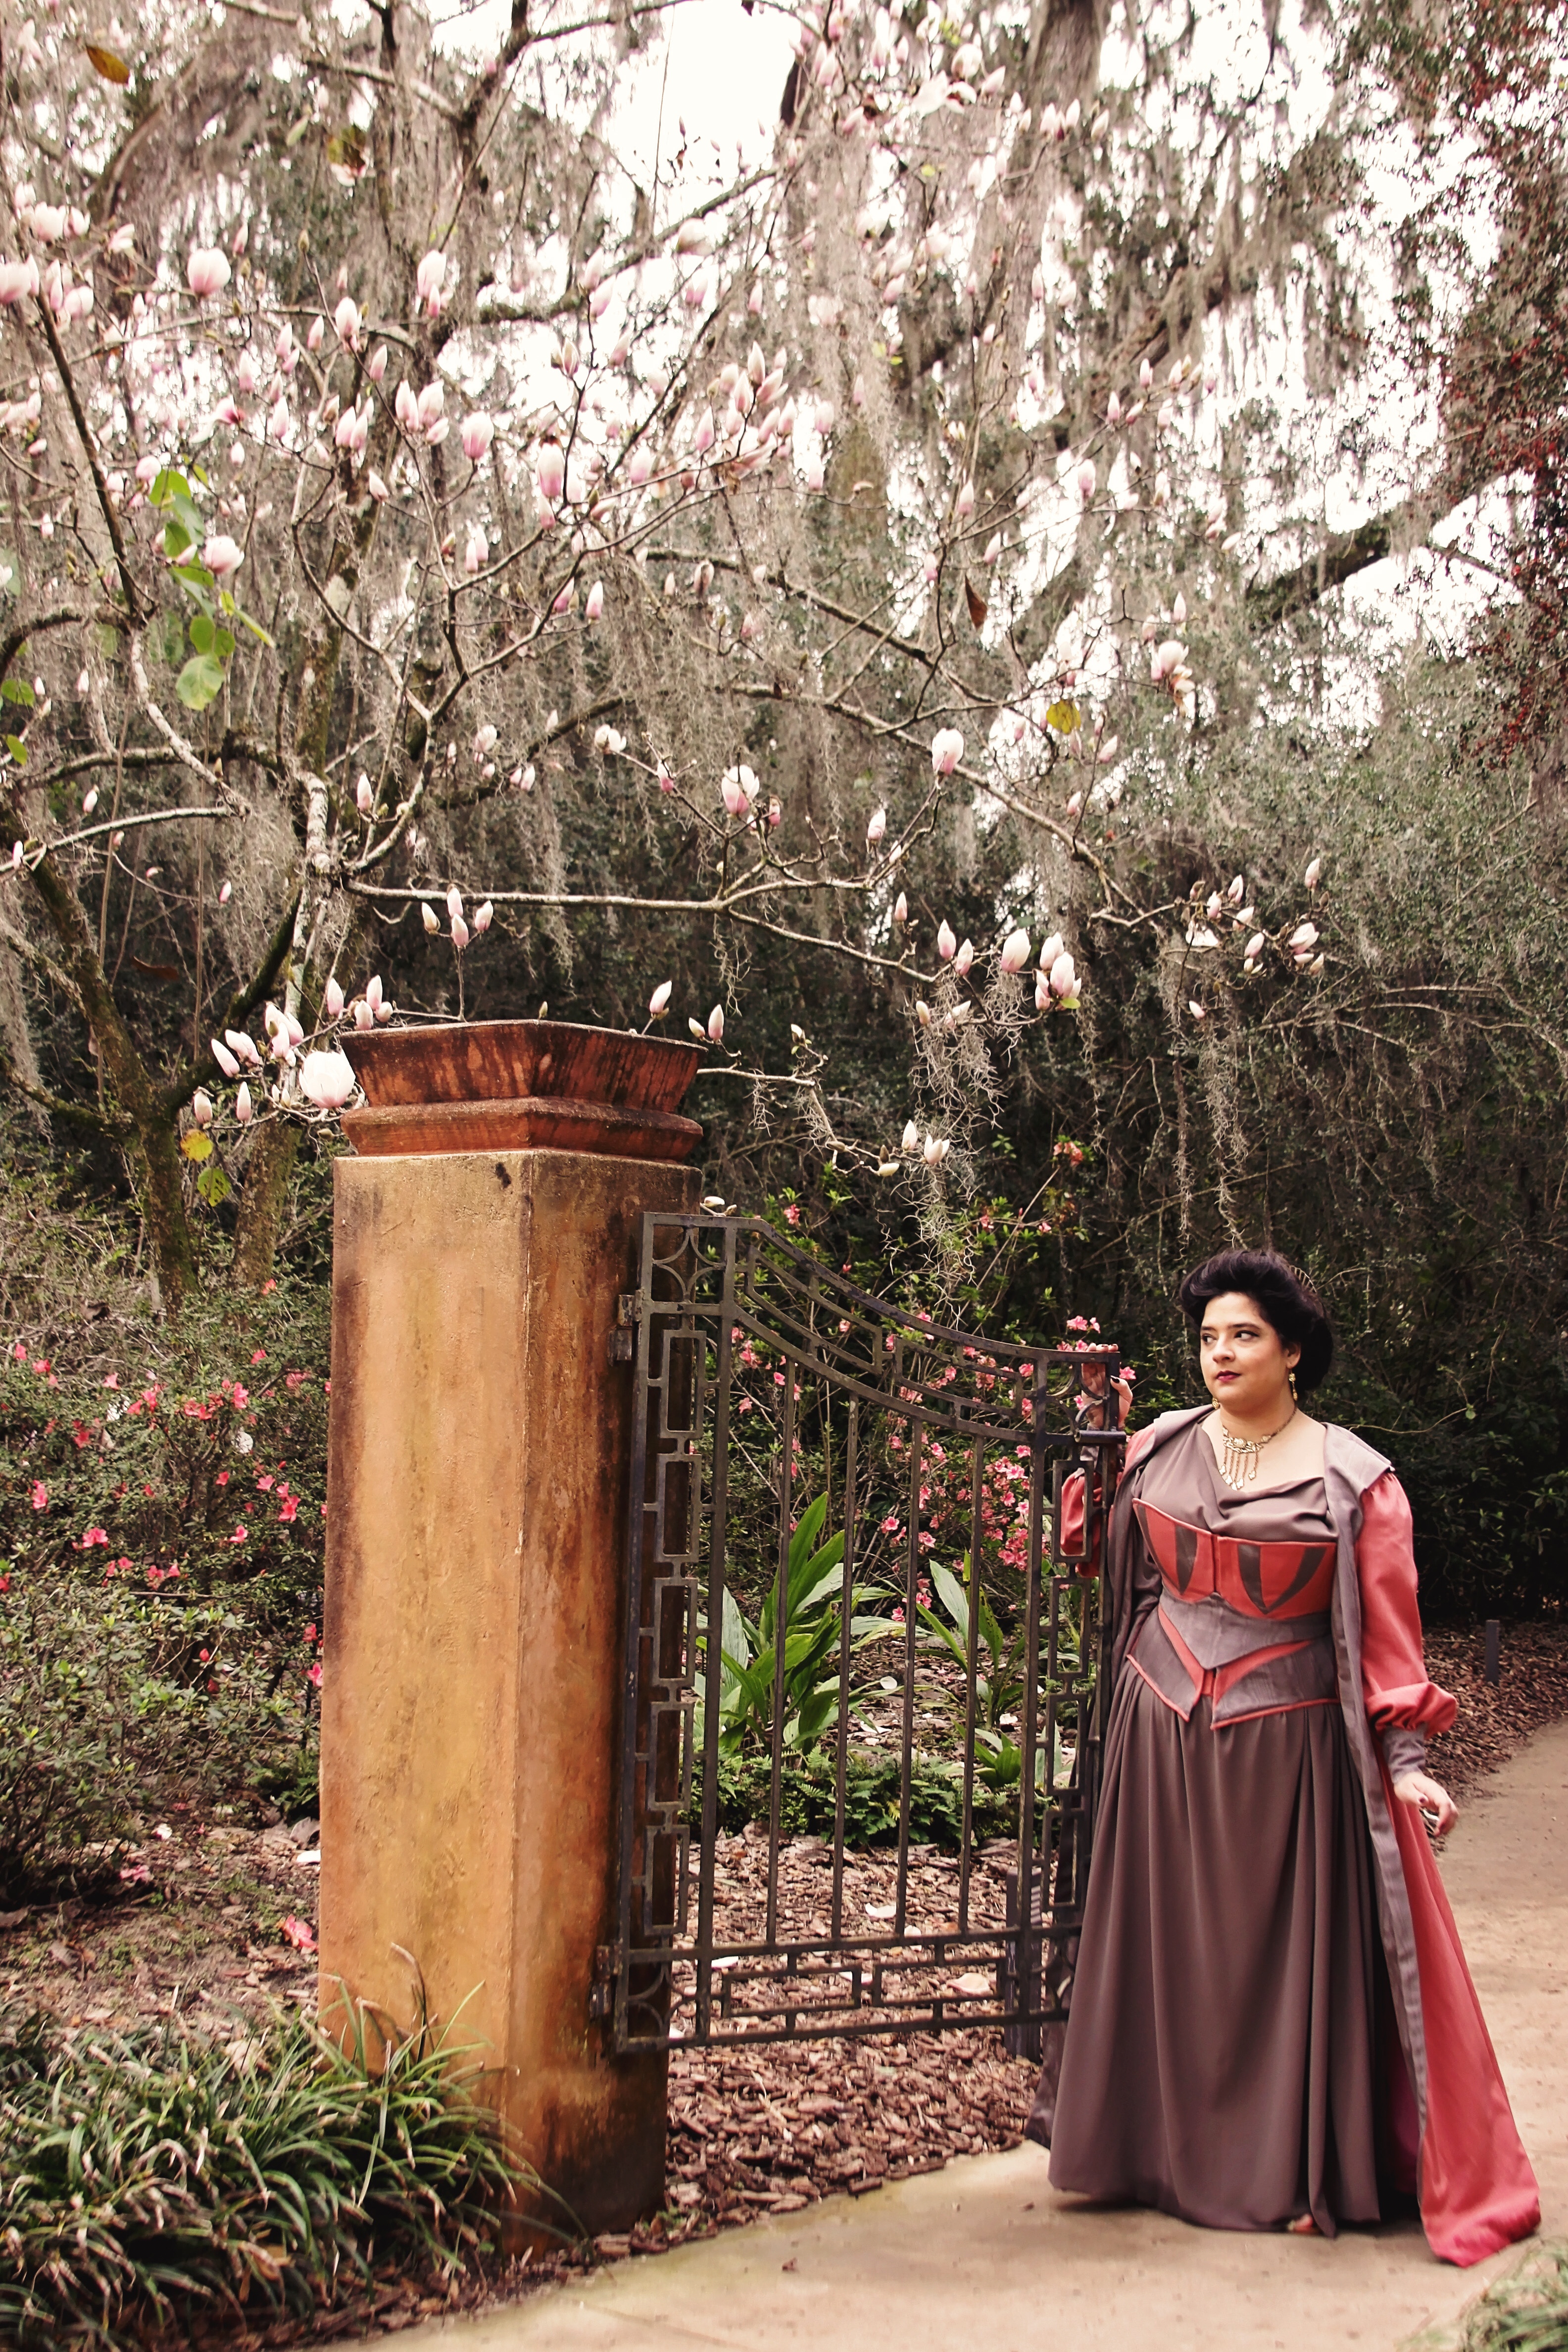
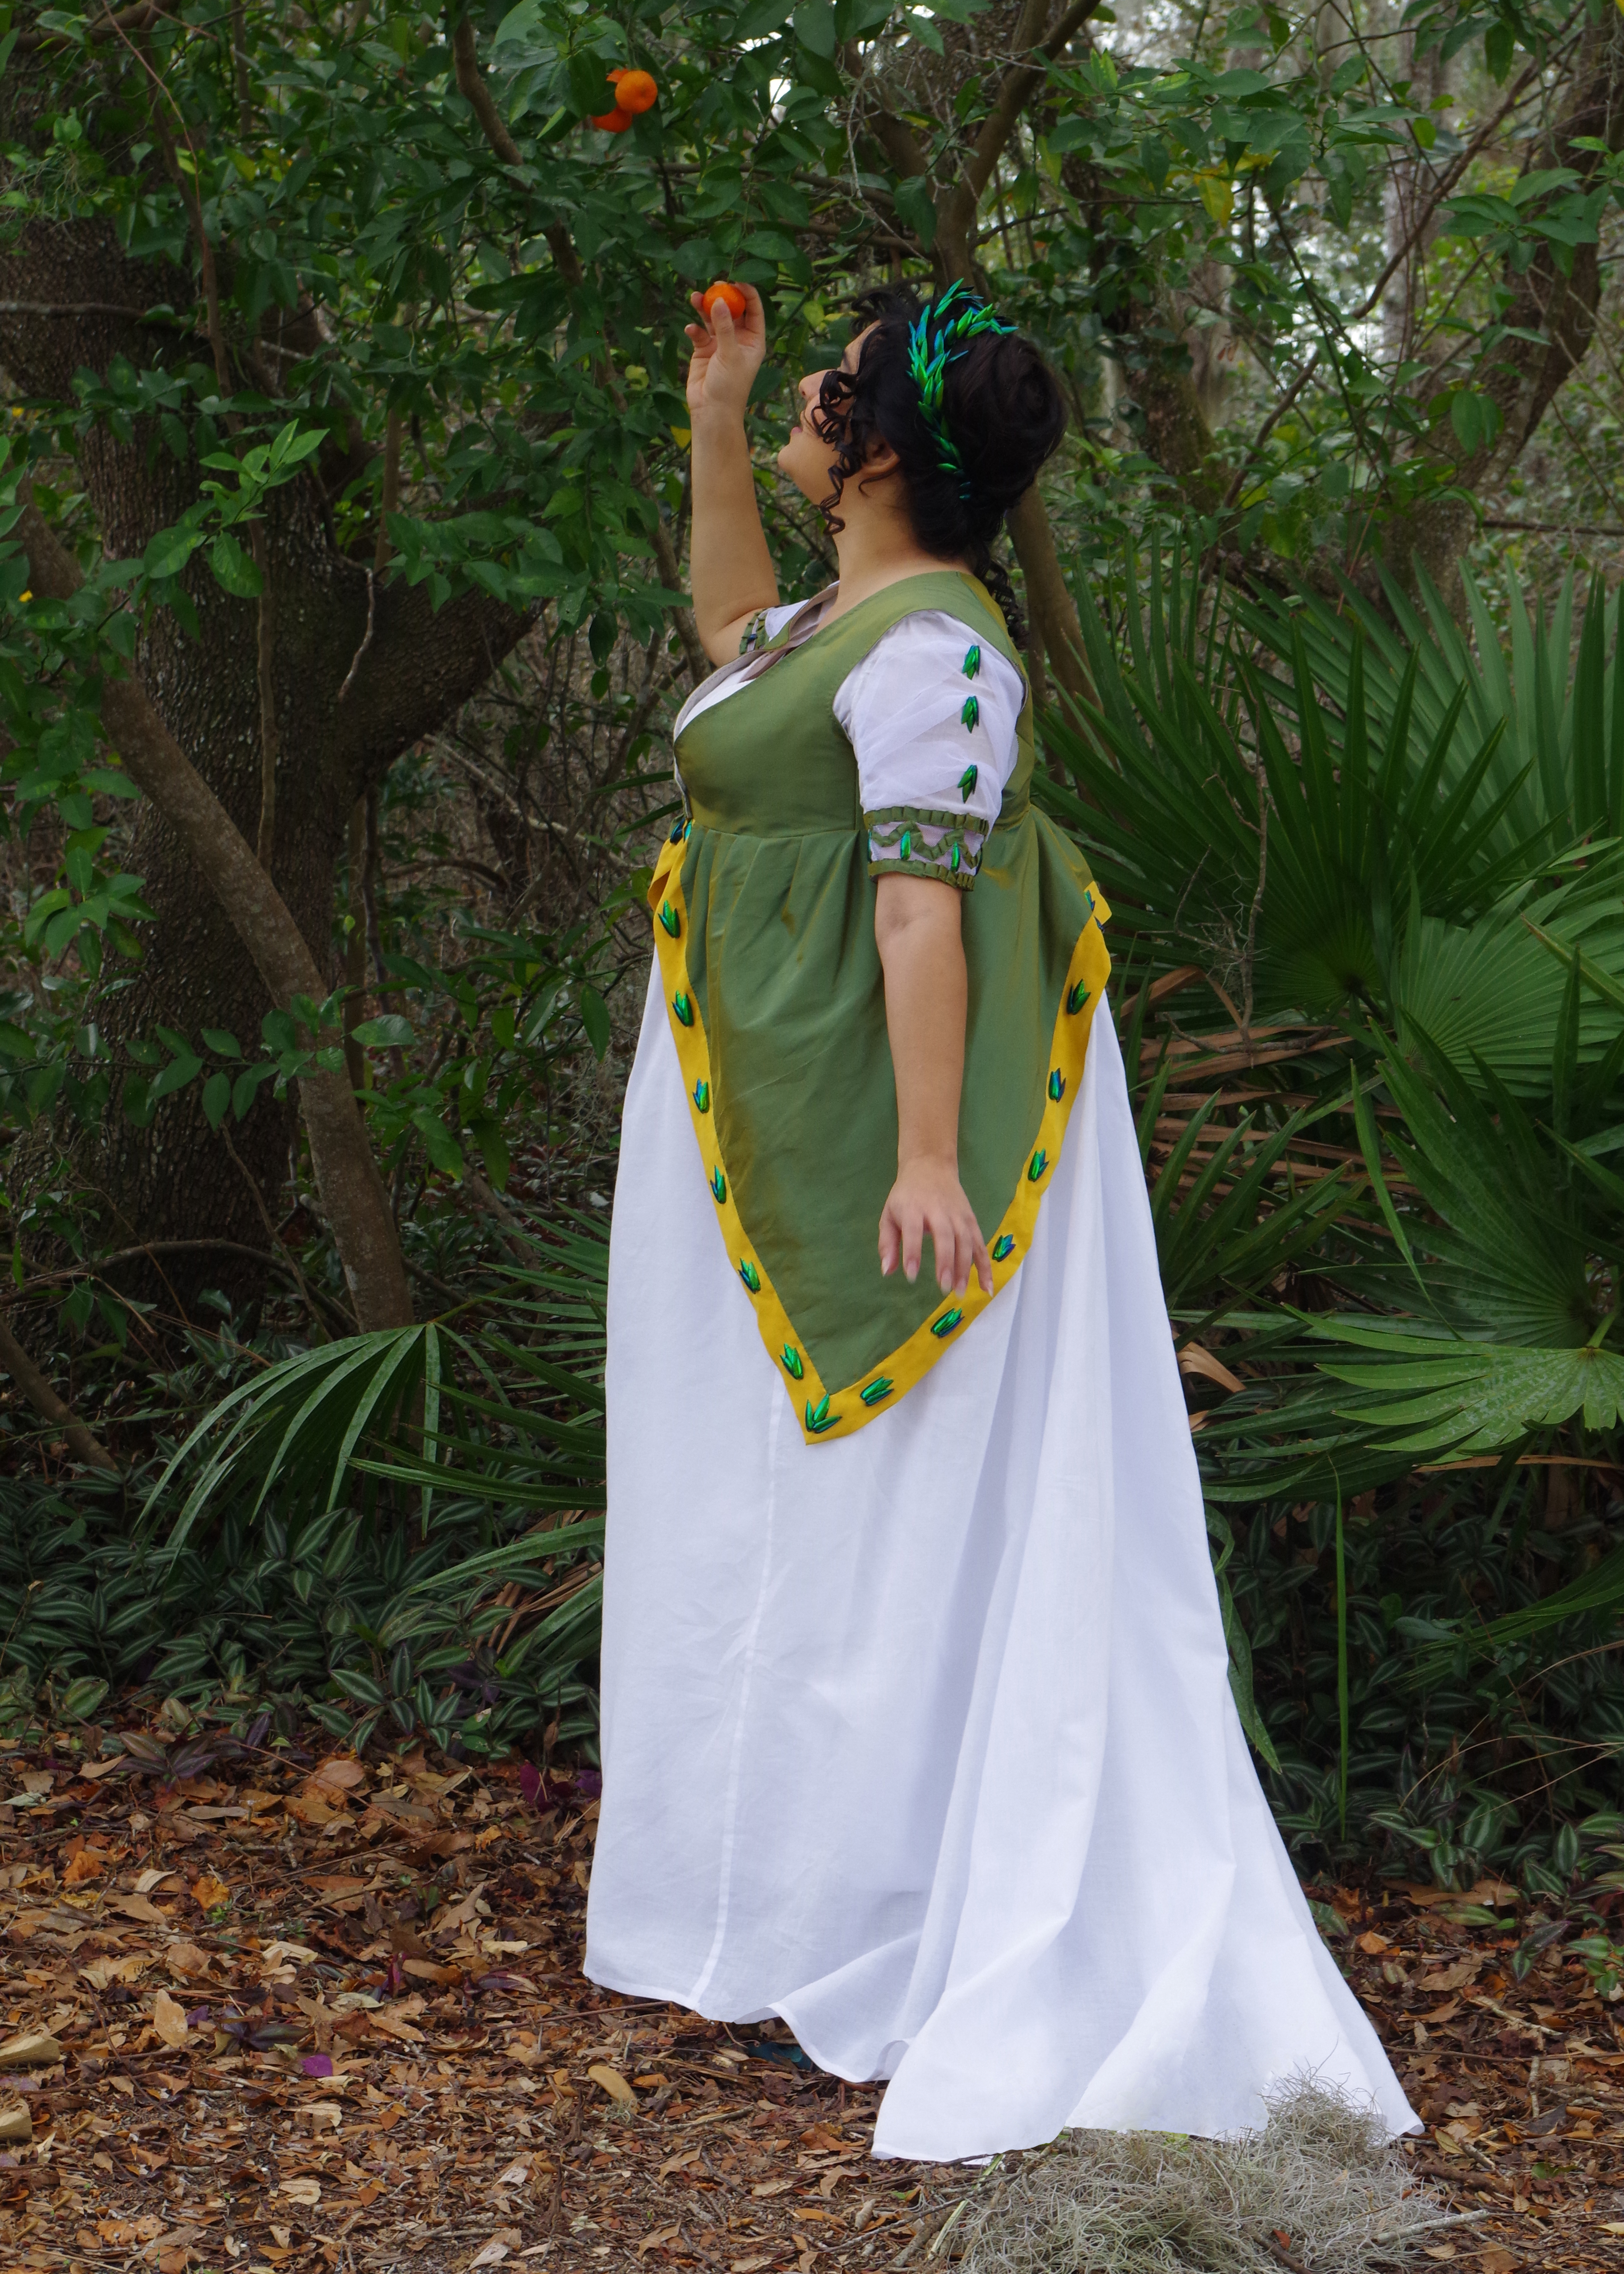
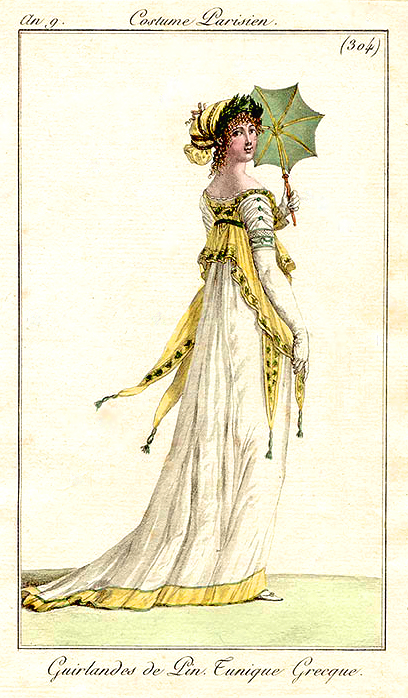
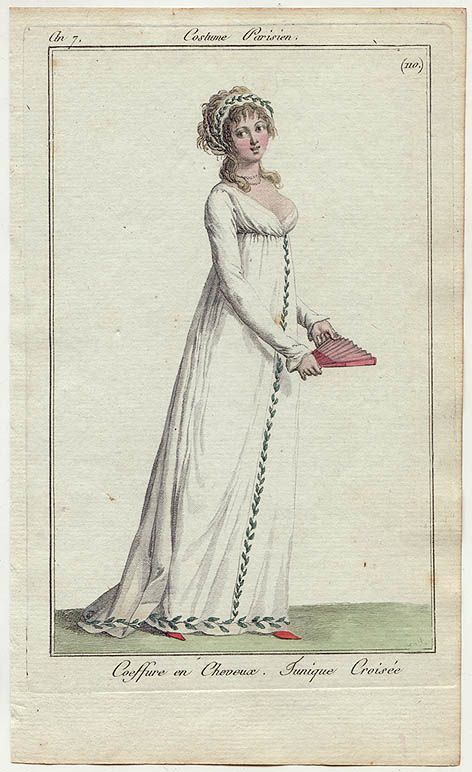
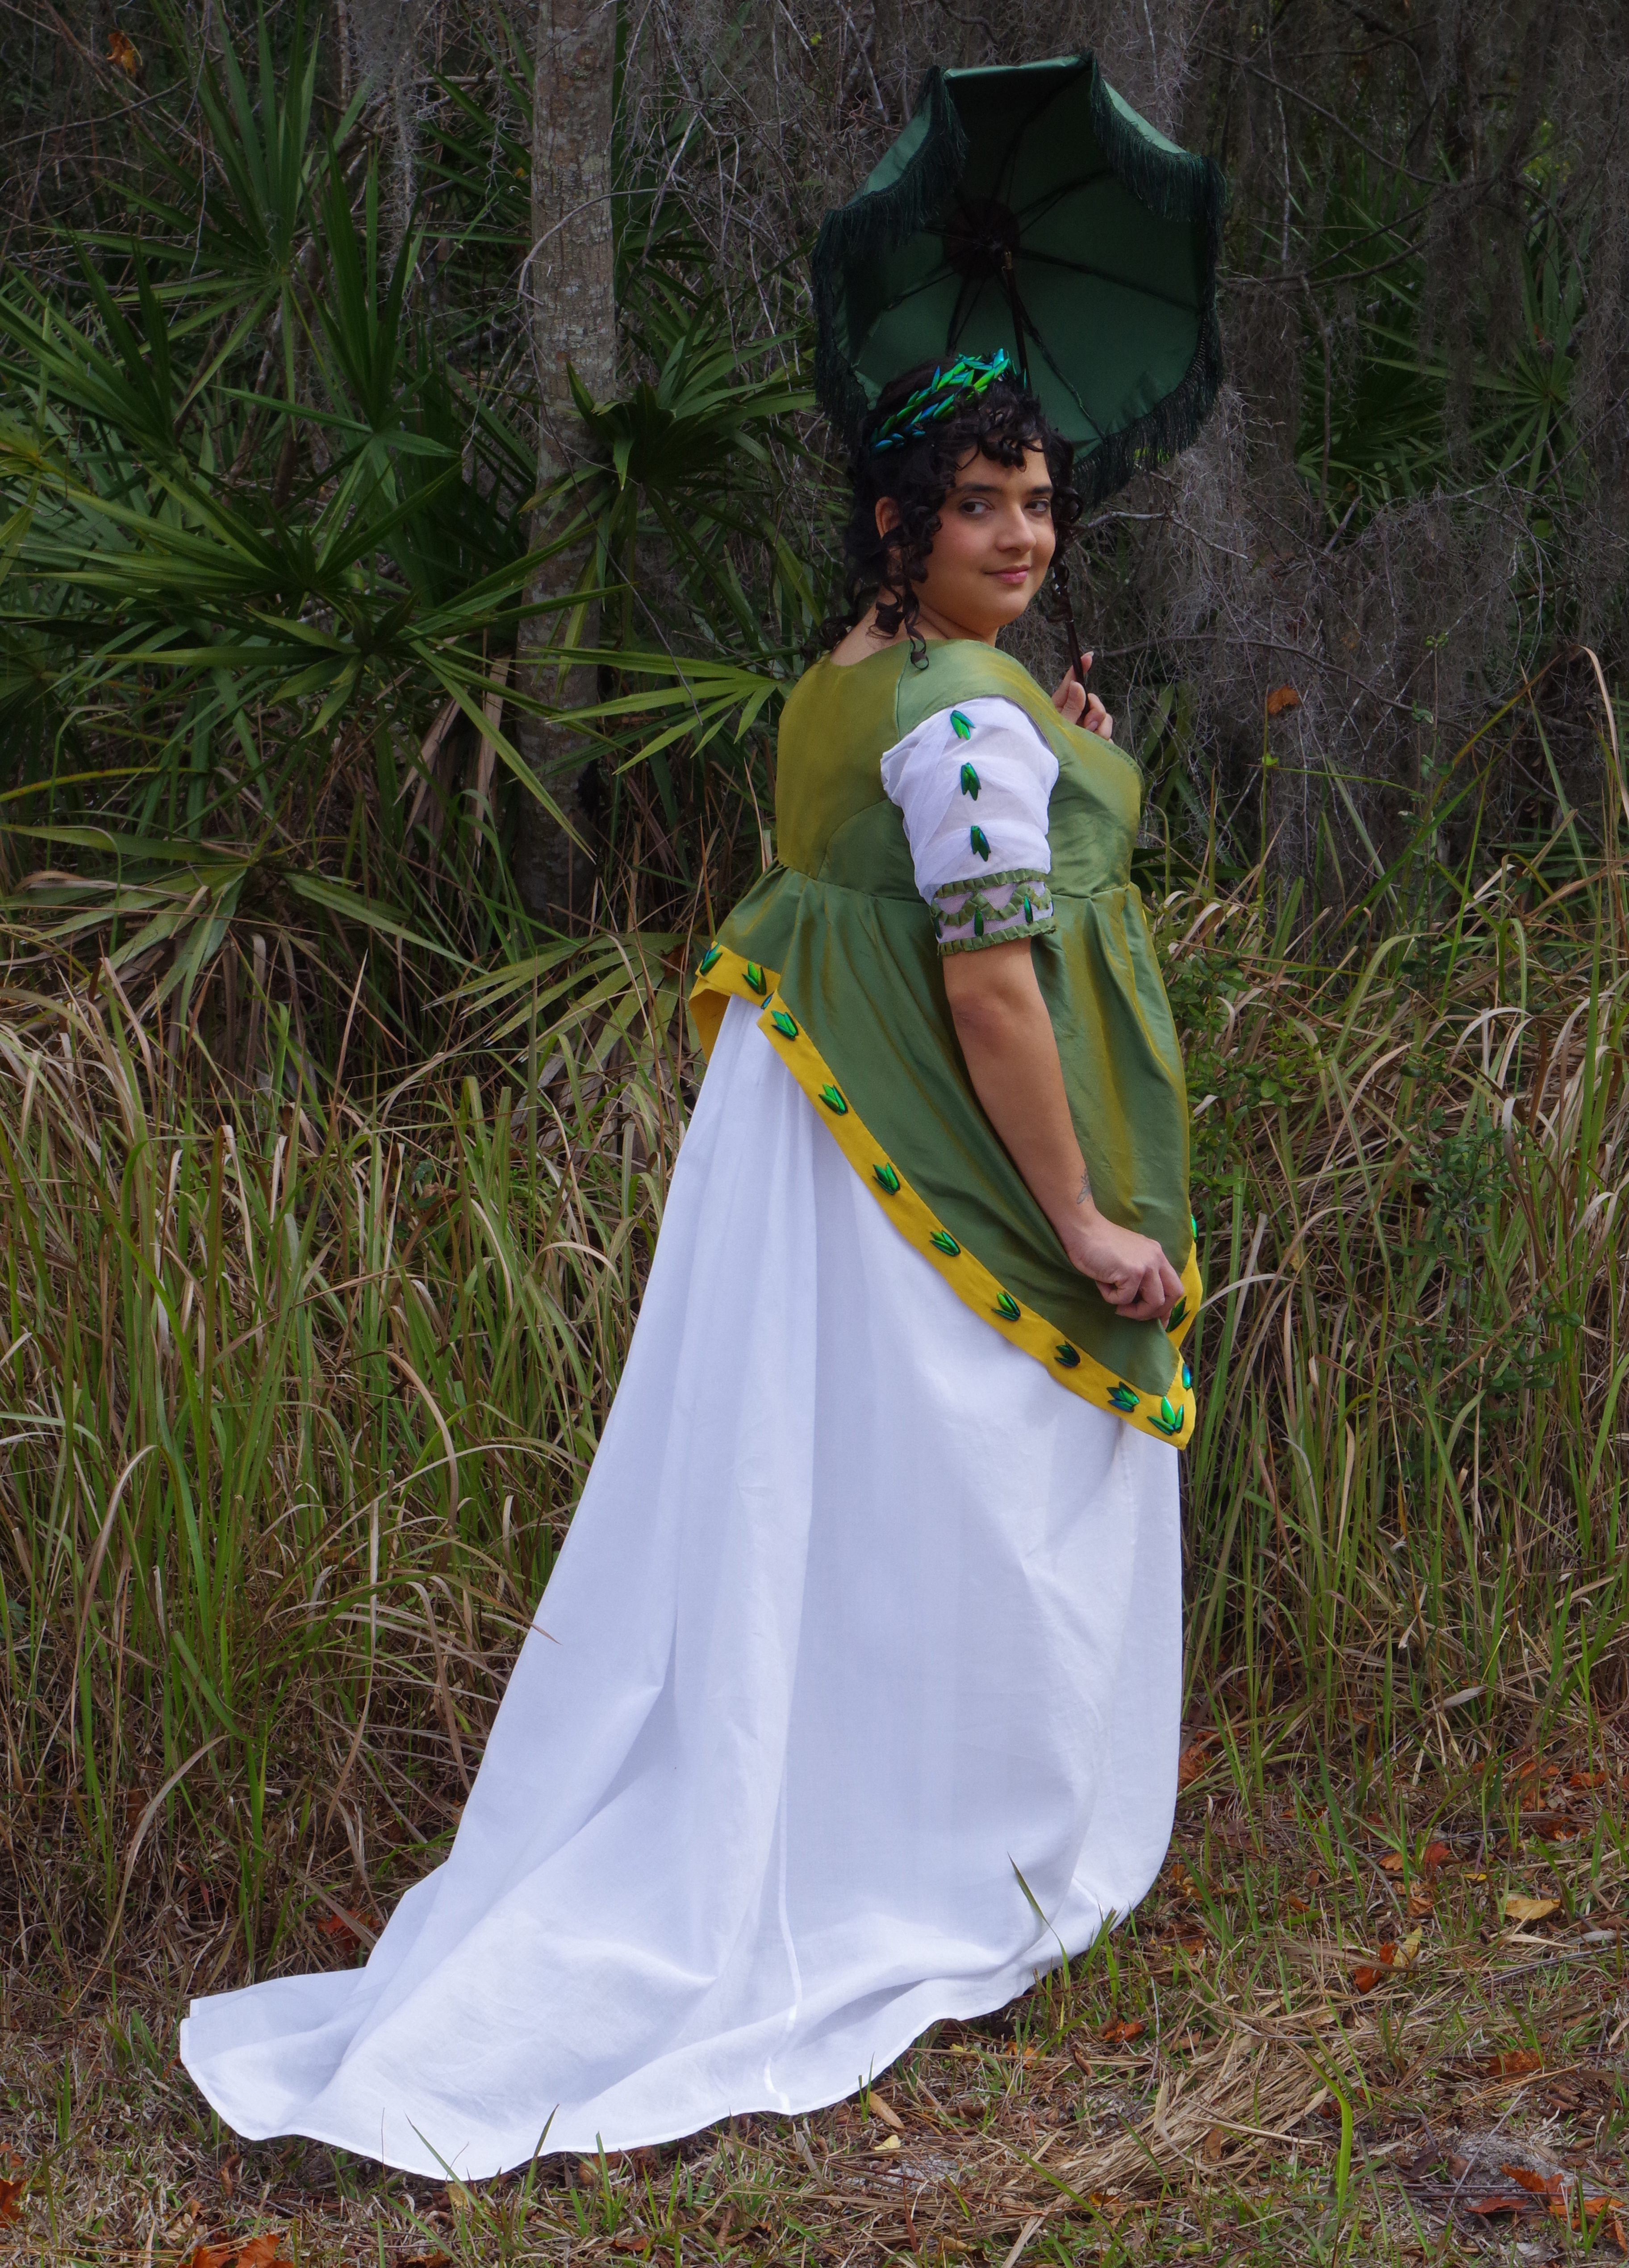
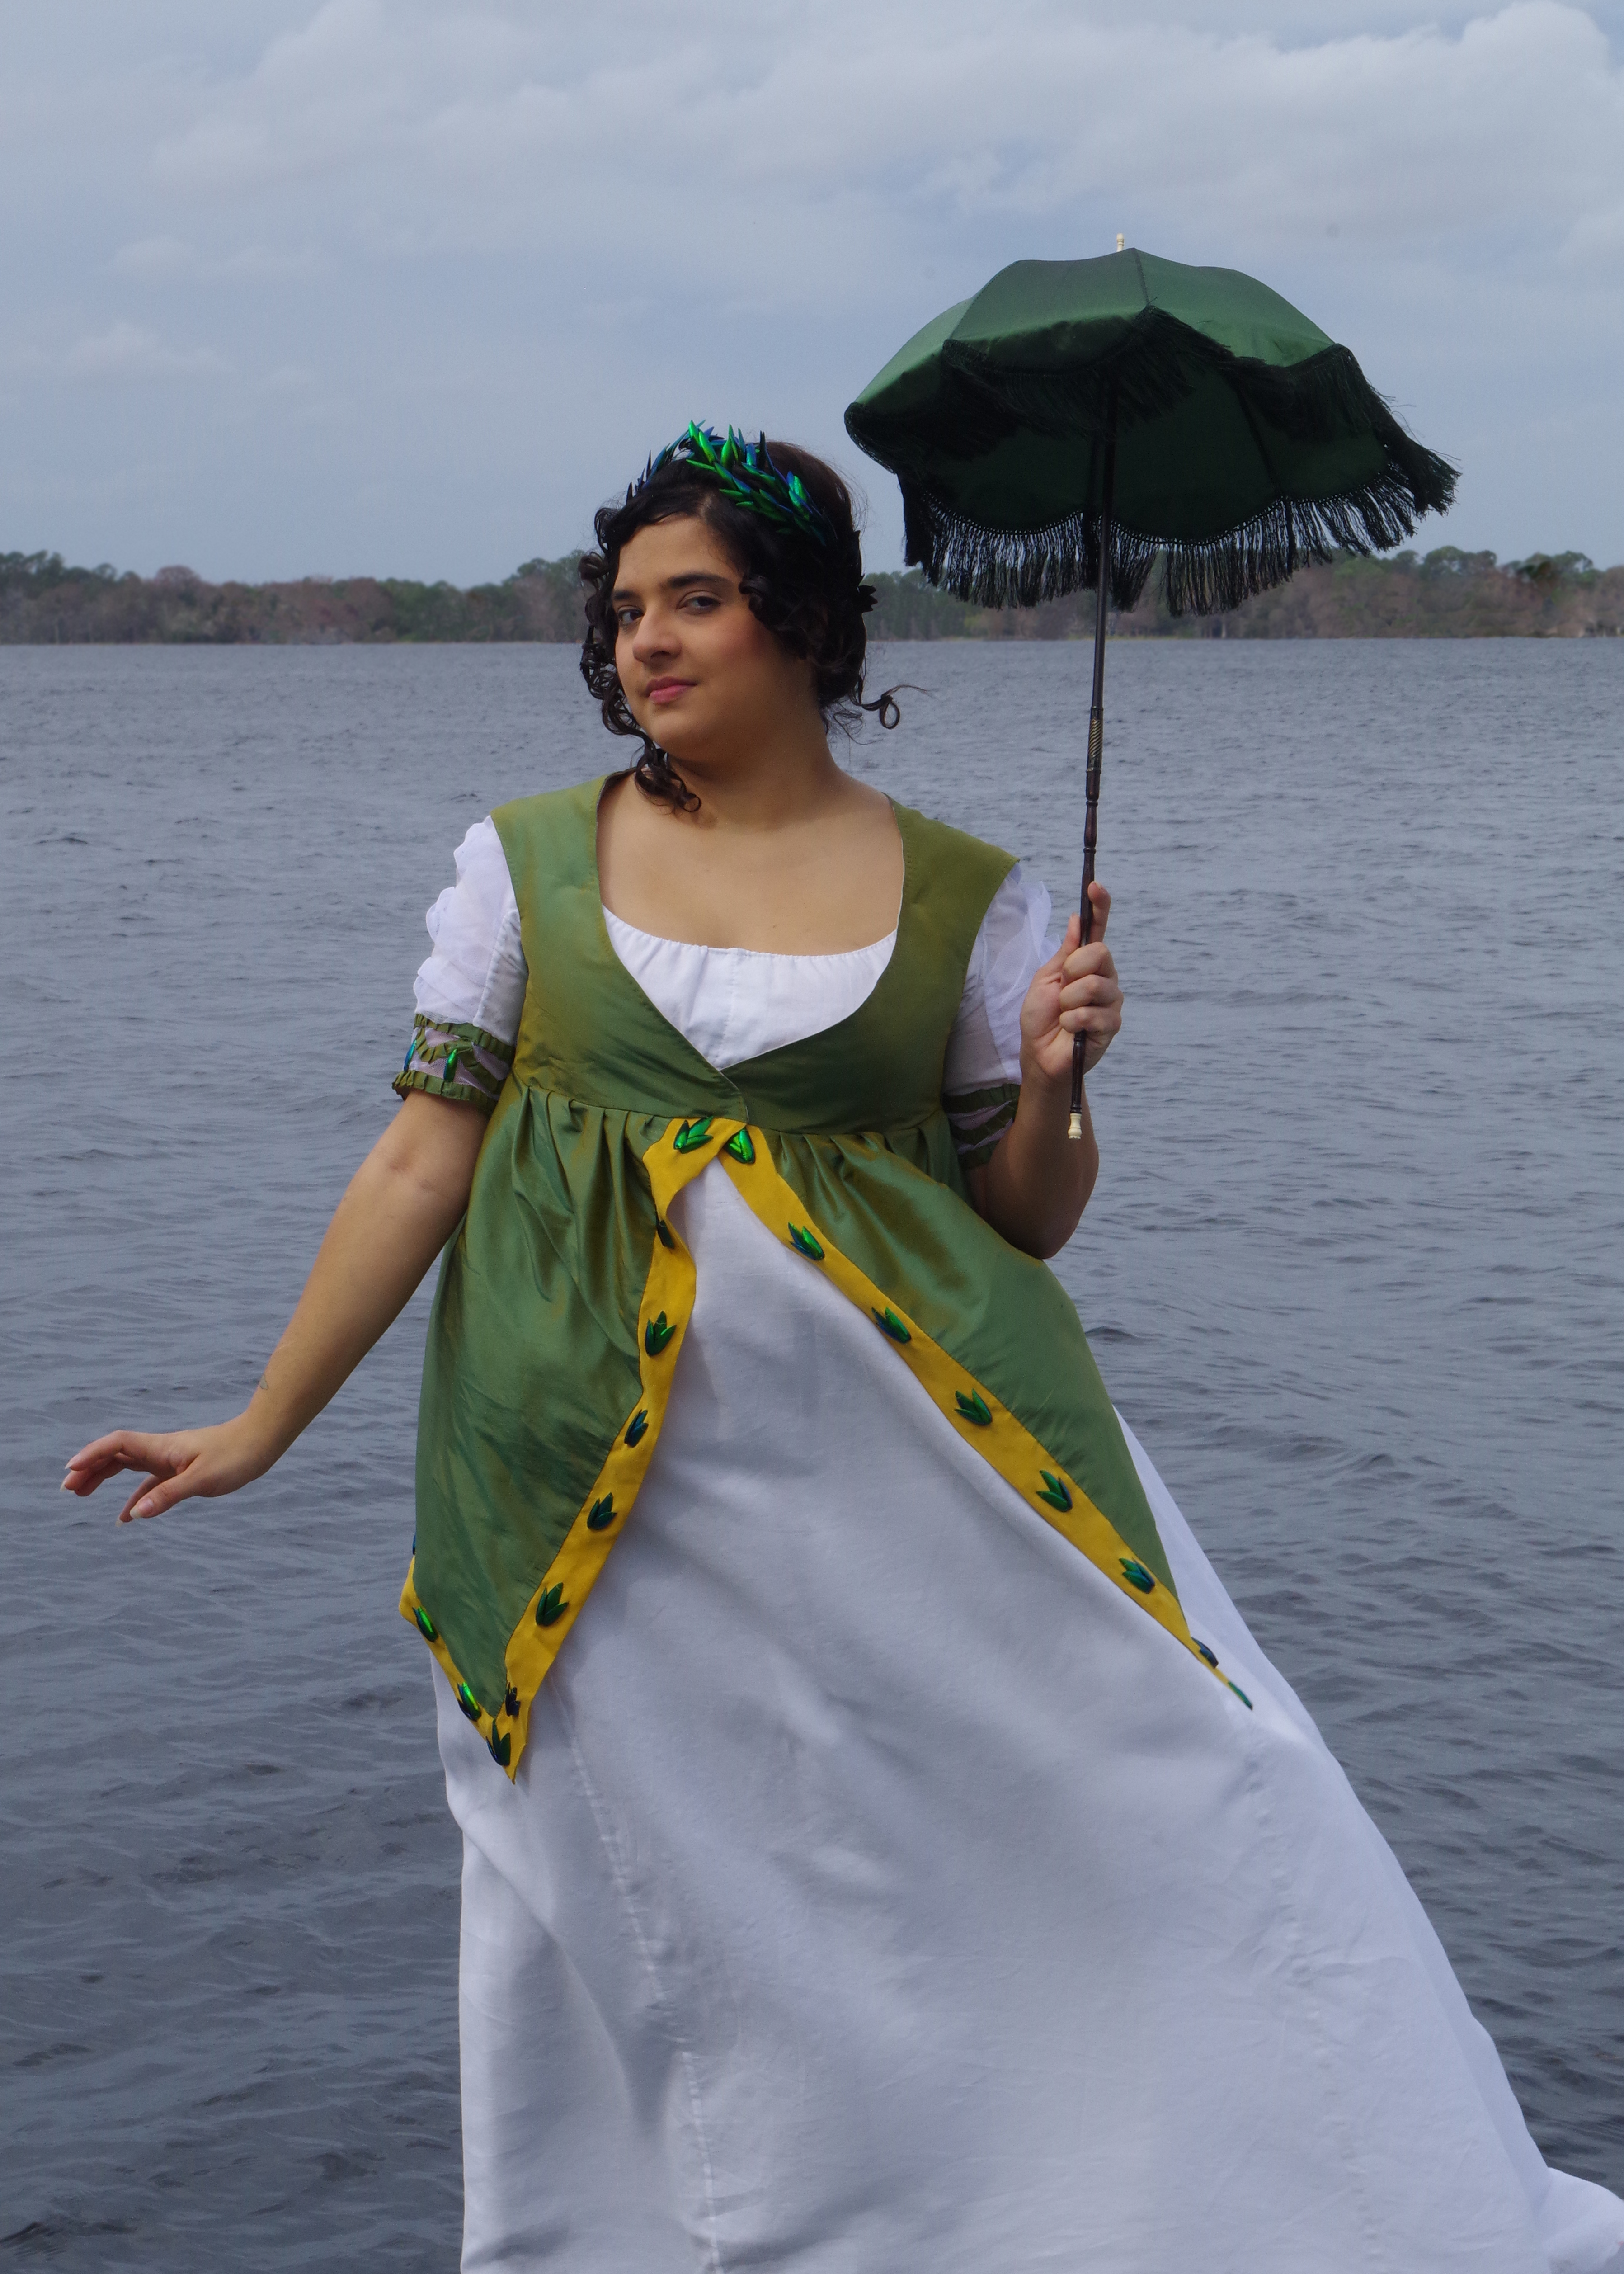
The Yellow Book of the 1890s was a periodical that published poetry and stories that was lavishly illustrated by Aubrey Beardsley. The Aesthetic movement was captured both in the writing and design of the publication. In researching I found Aesthetes and Decadents of the 1890s it is an anthology of poetry including many from The Yellow Book. Hérodiade by Stéphane Mallarmé was my character inspiration. The fictionalized version of Herodias the wife of Herod the Great. She was characterized as the goddess of witchcraft in the Medieval era. The ancient and medieval influence on the Aesthetic movement inspired my design.

Jane Morris (née Burden) by John Robert Parsons, July 1865, National Portrait Gallery
The families of William Morris and Edward Burne-Jones, photographed by Frederick Hollyer in the garden at The Grange, Platinotype photograph 1874

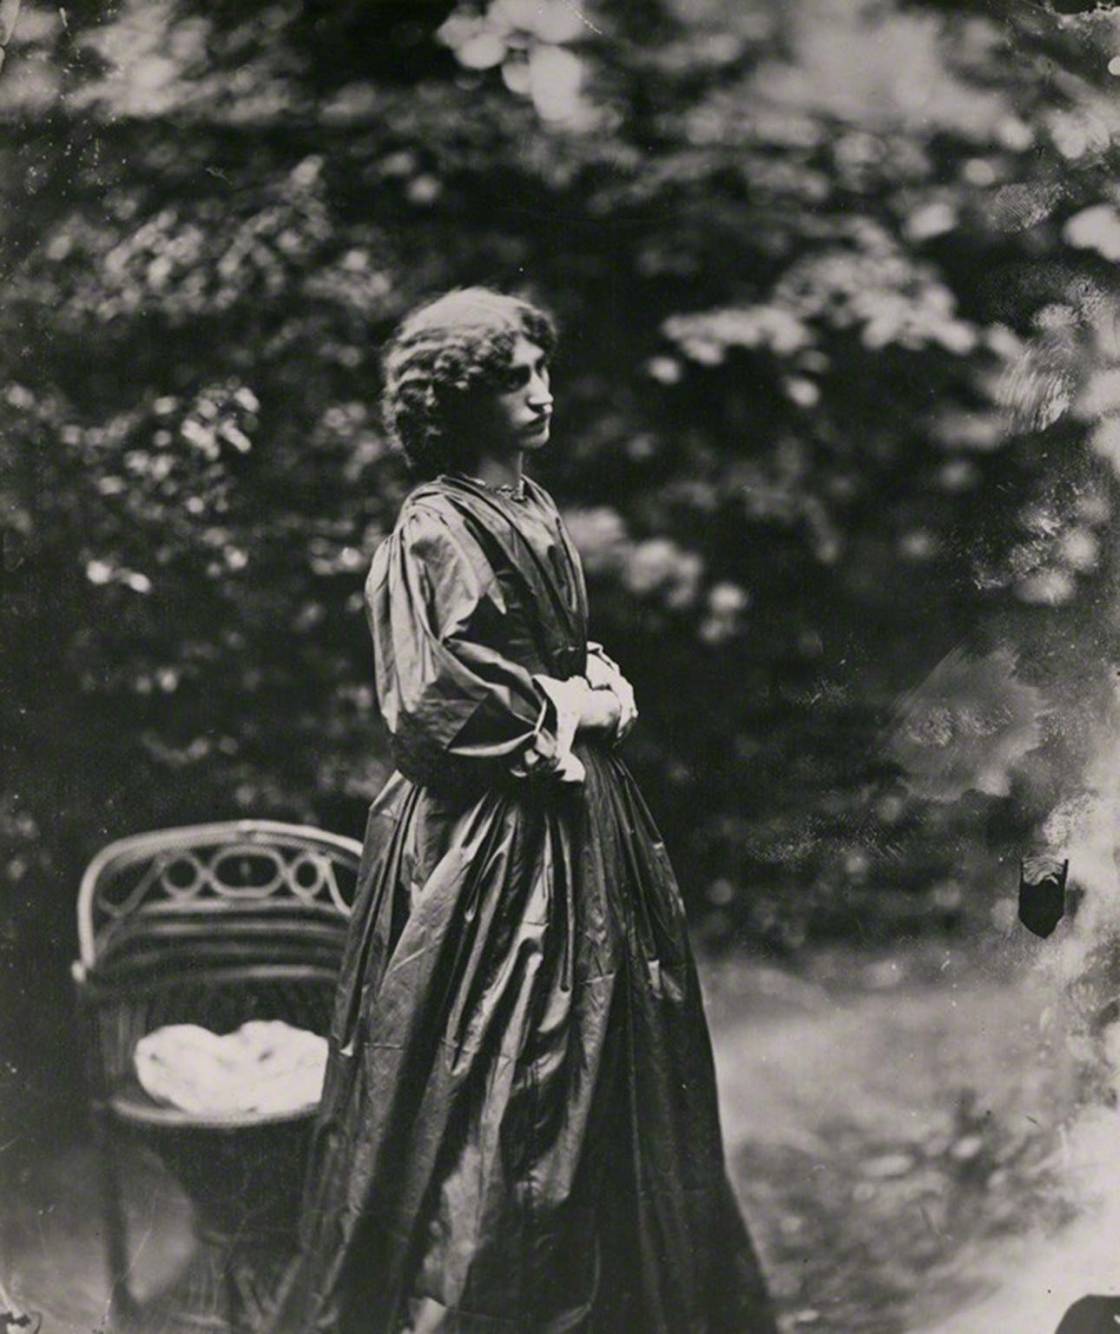
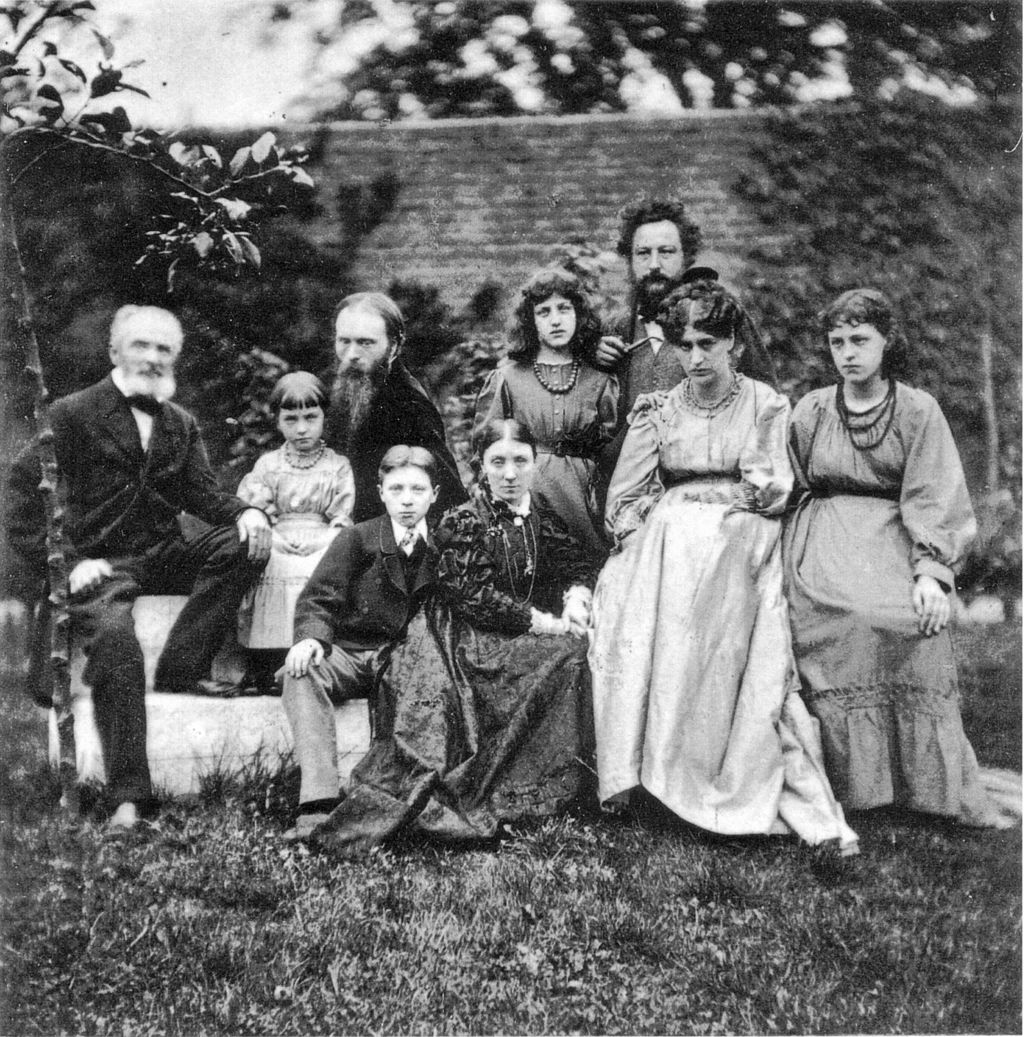
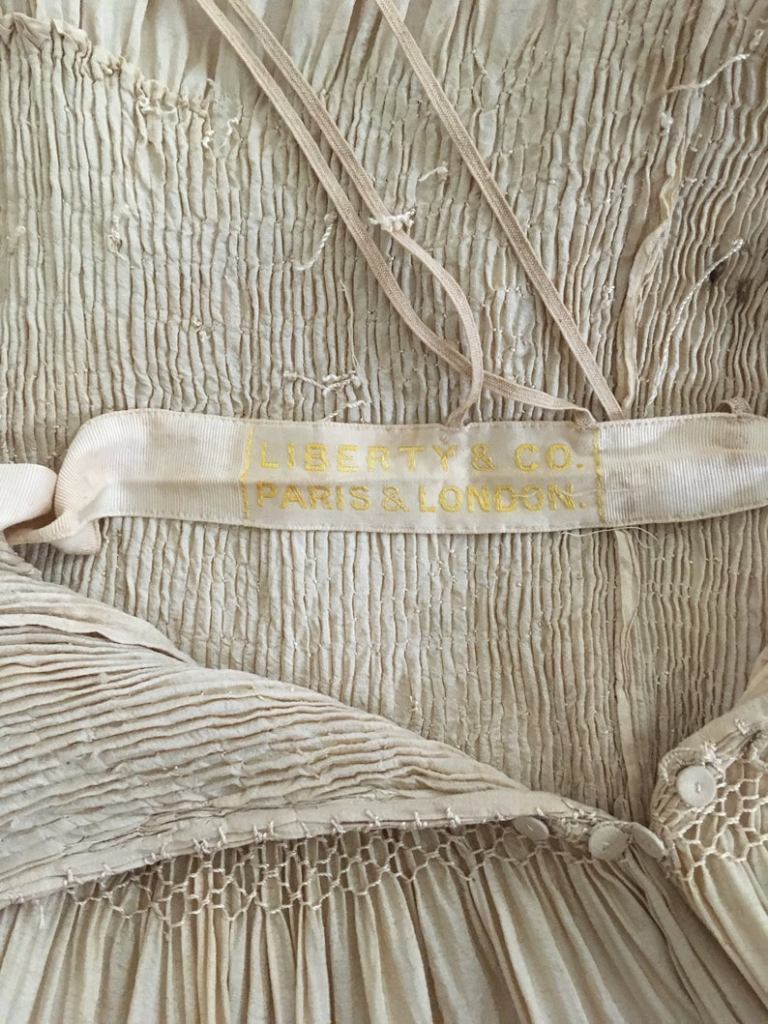
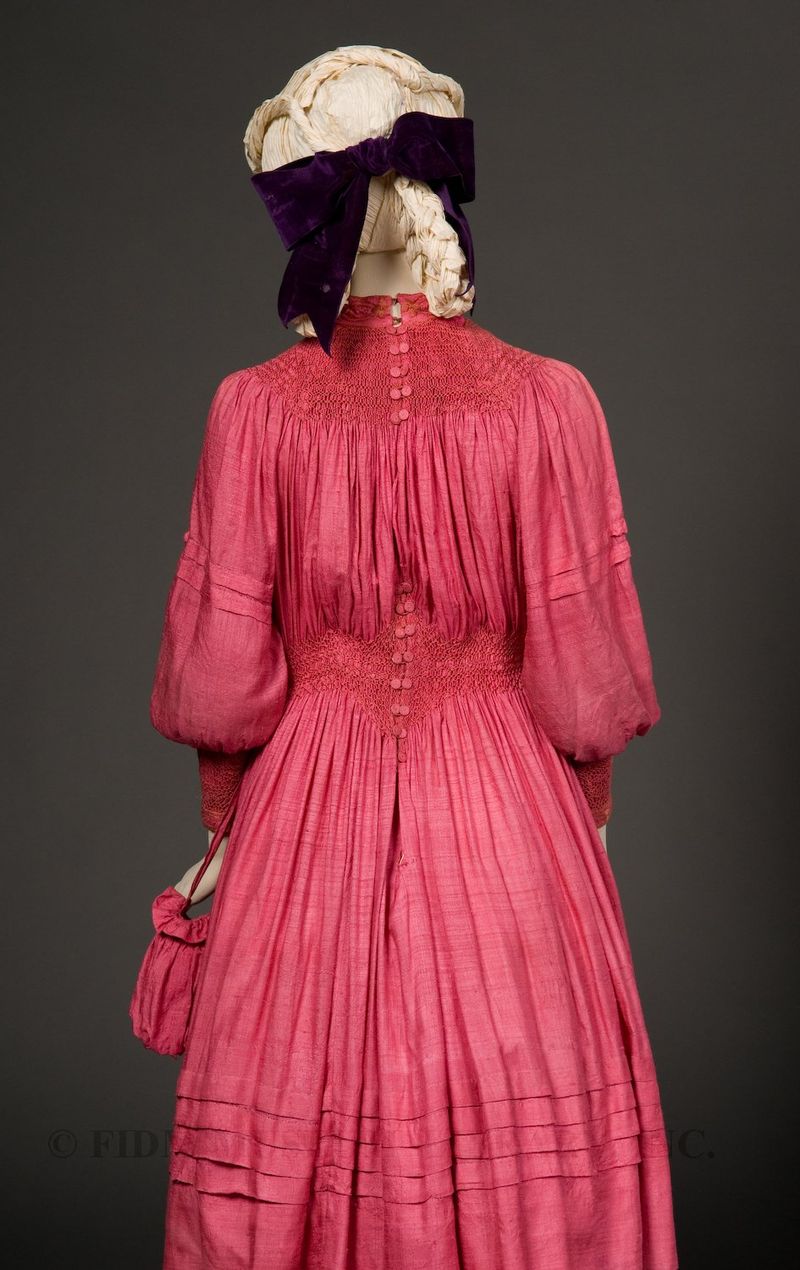
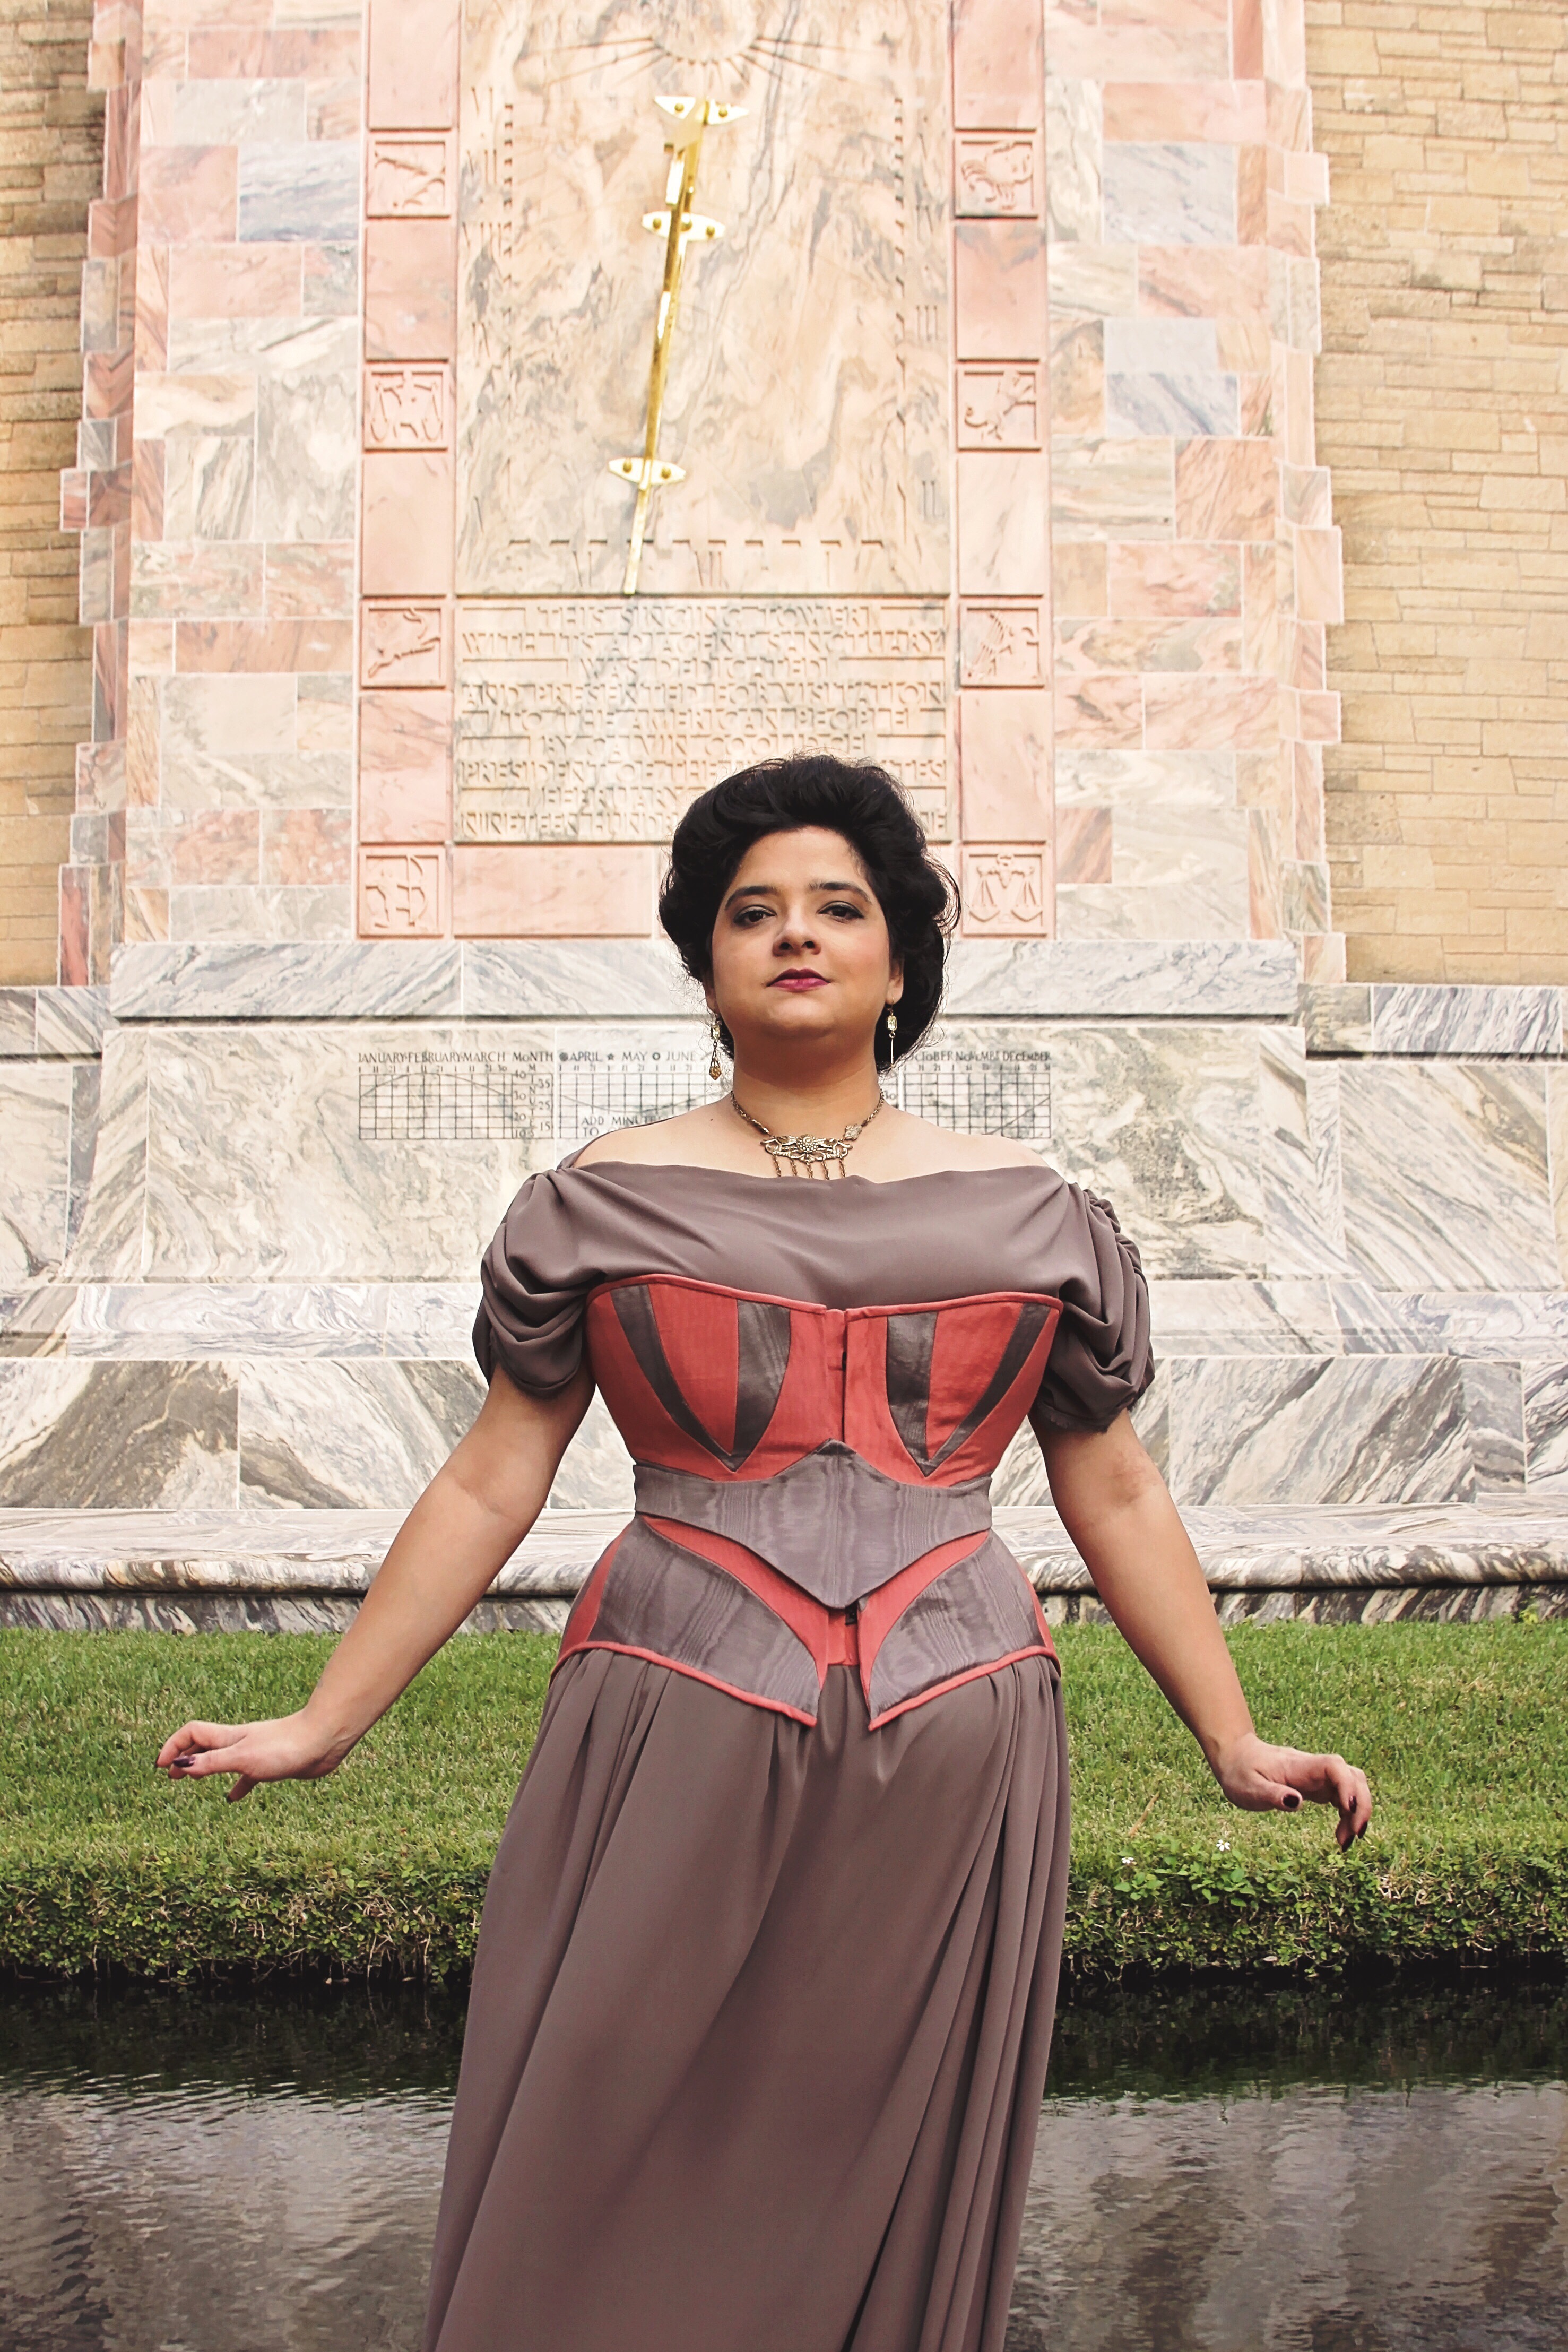
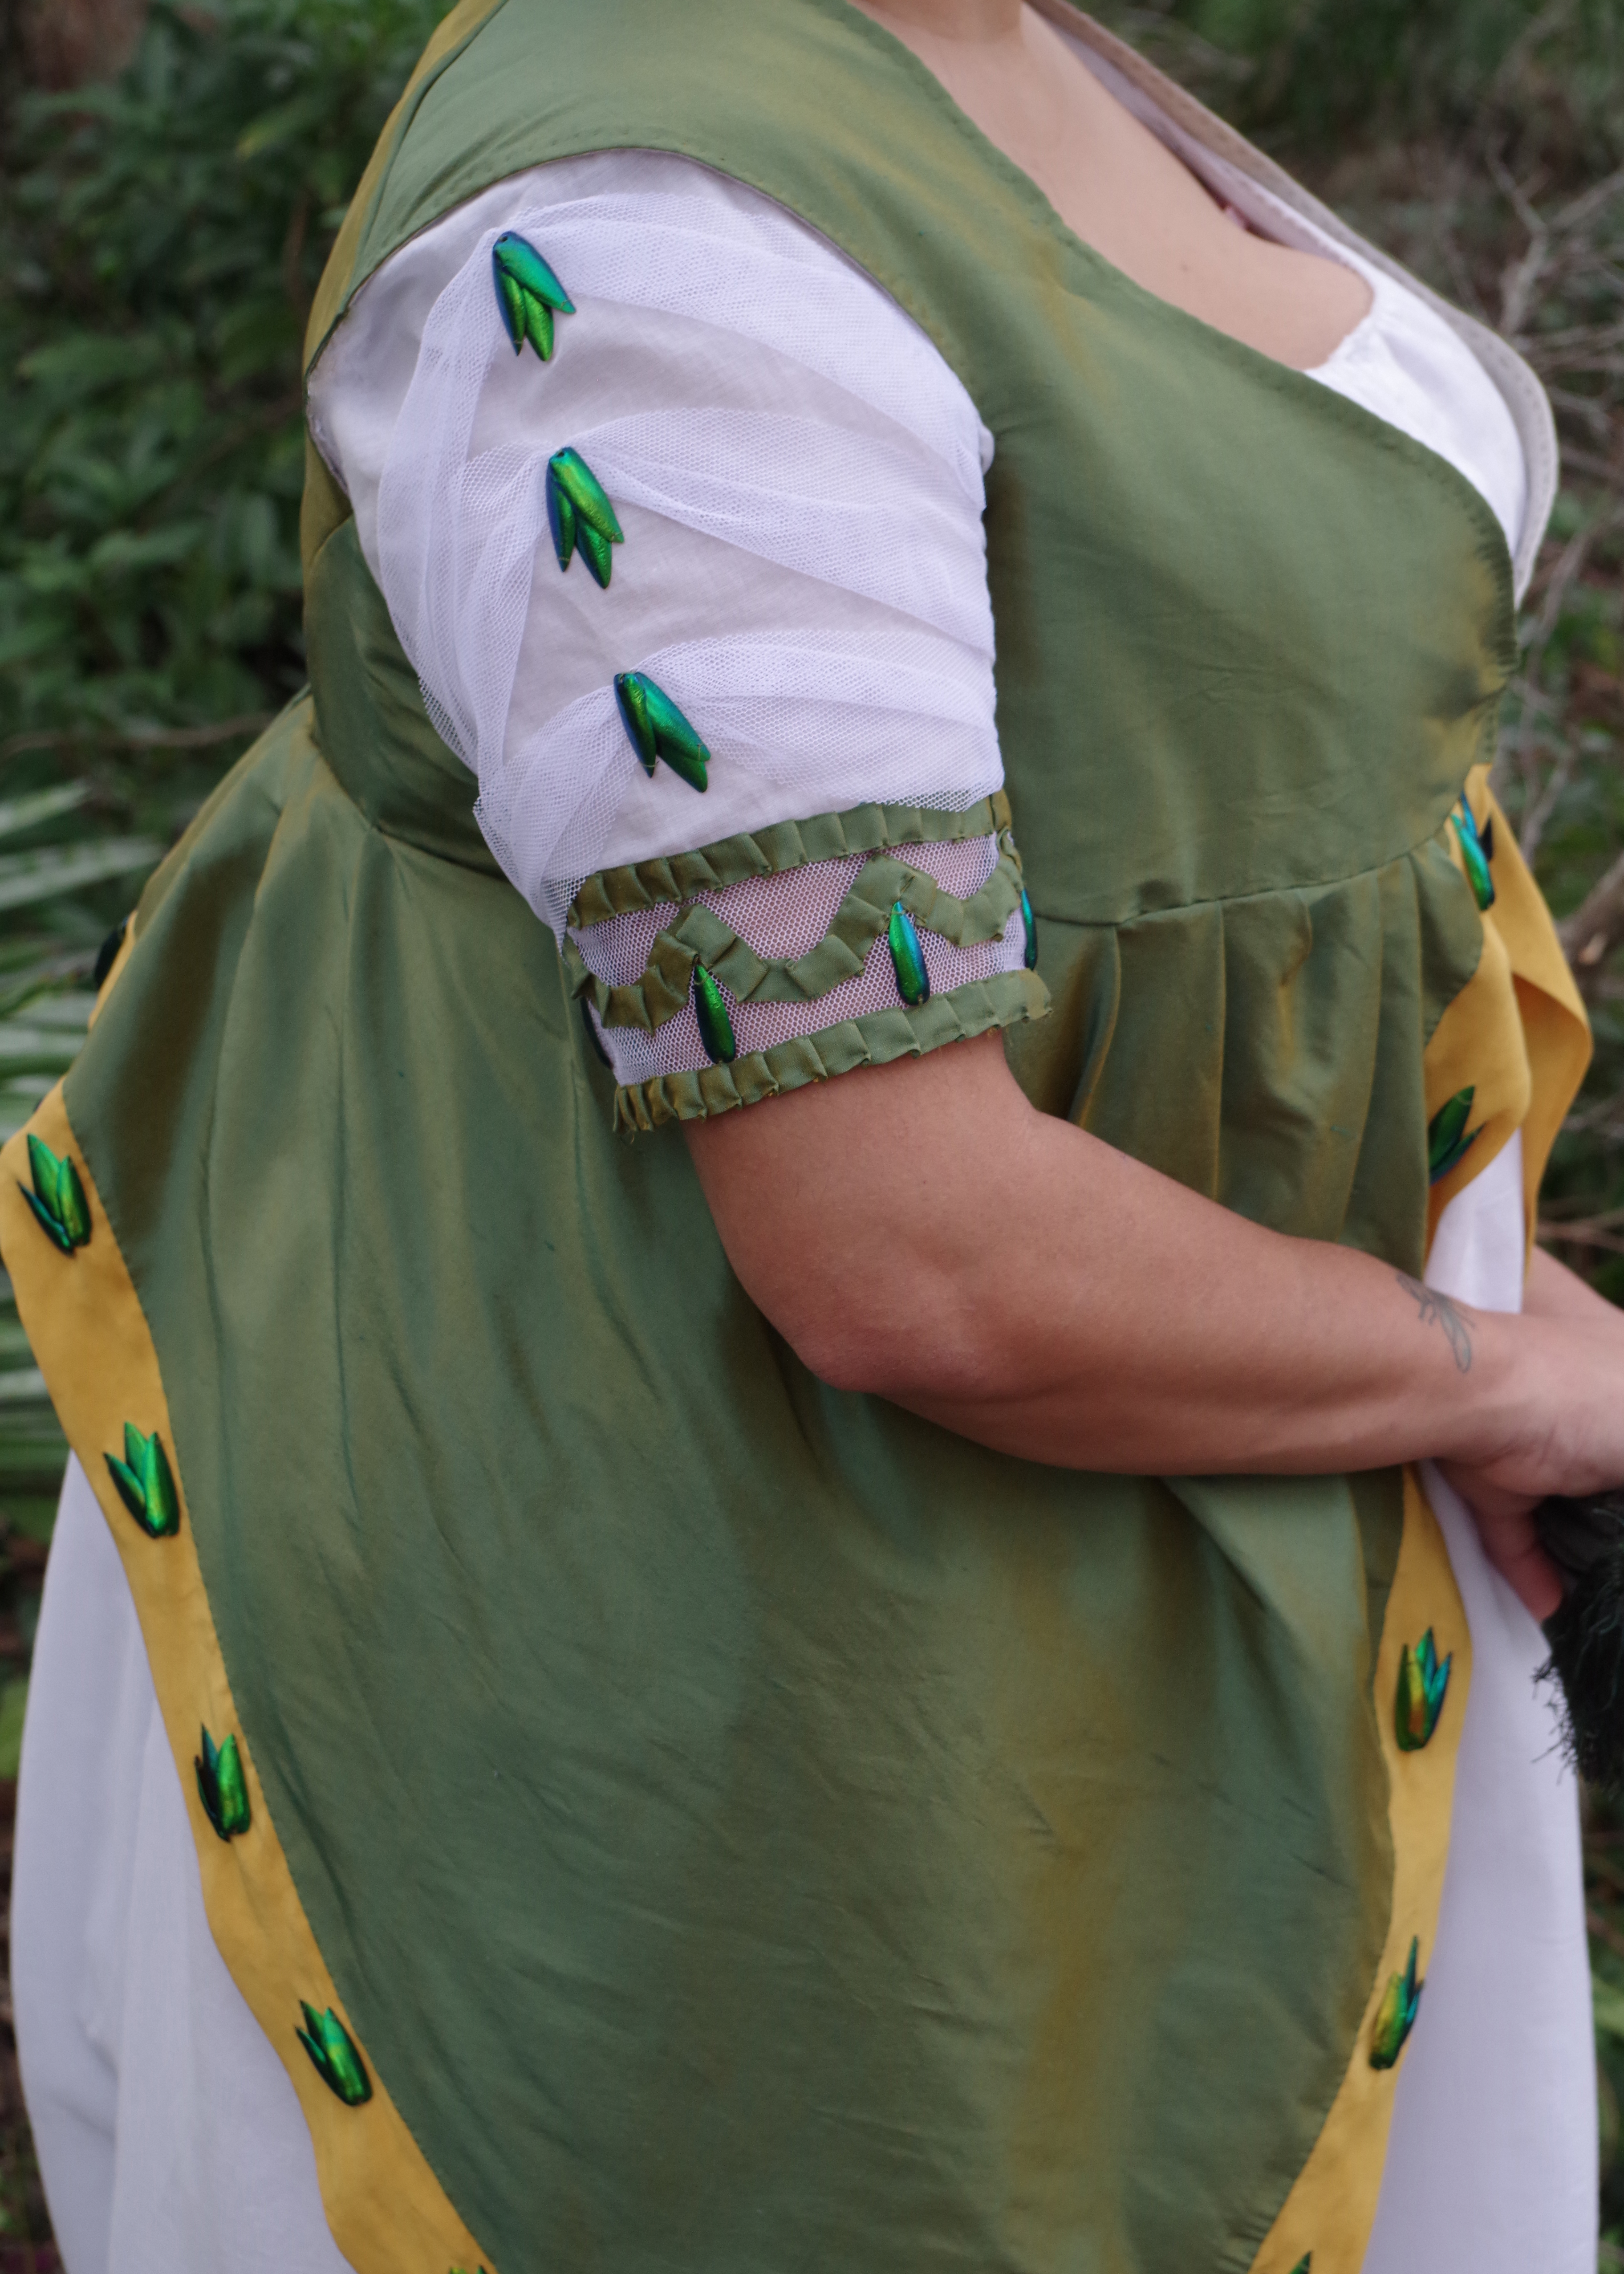
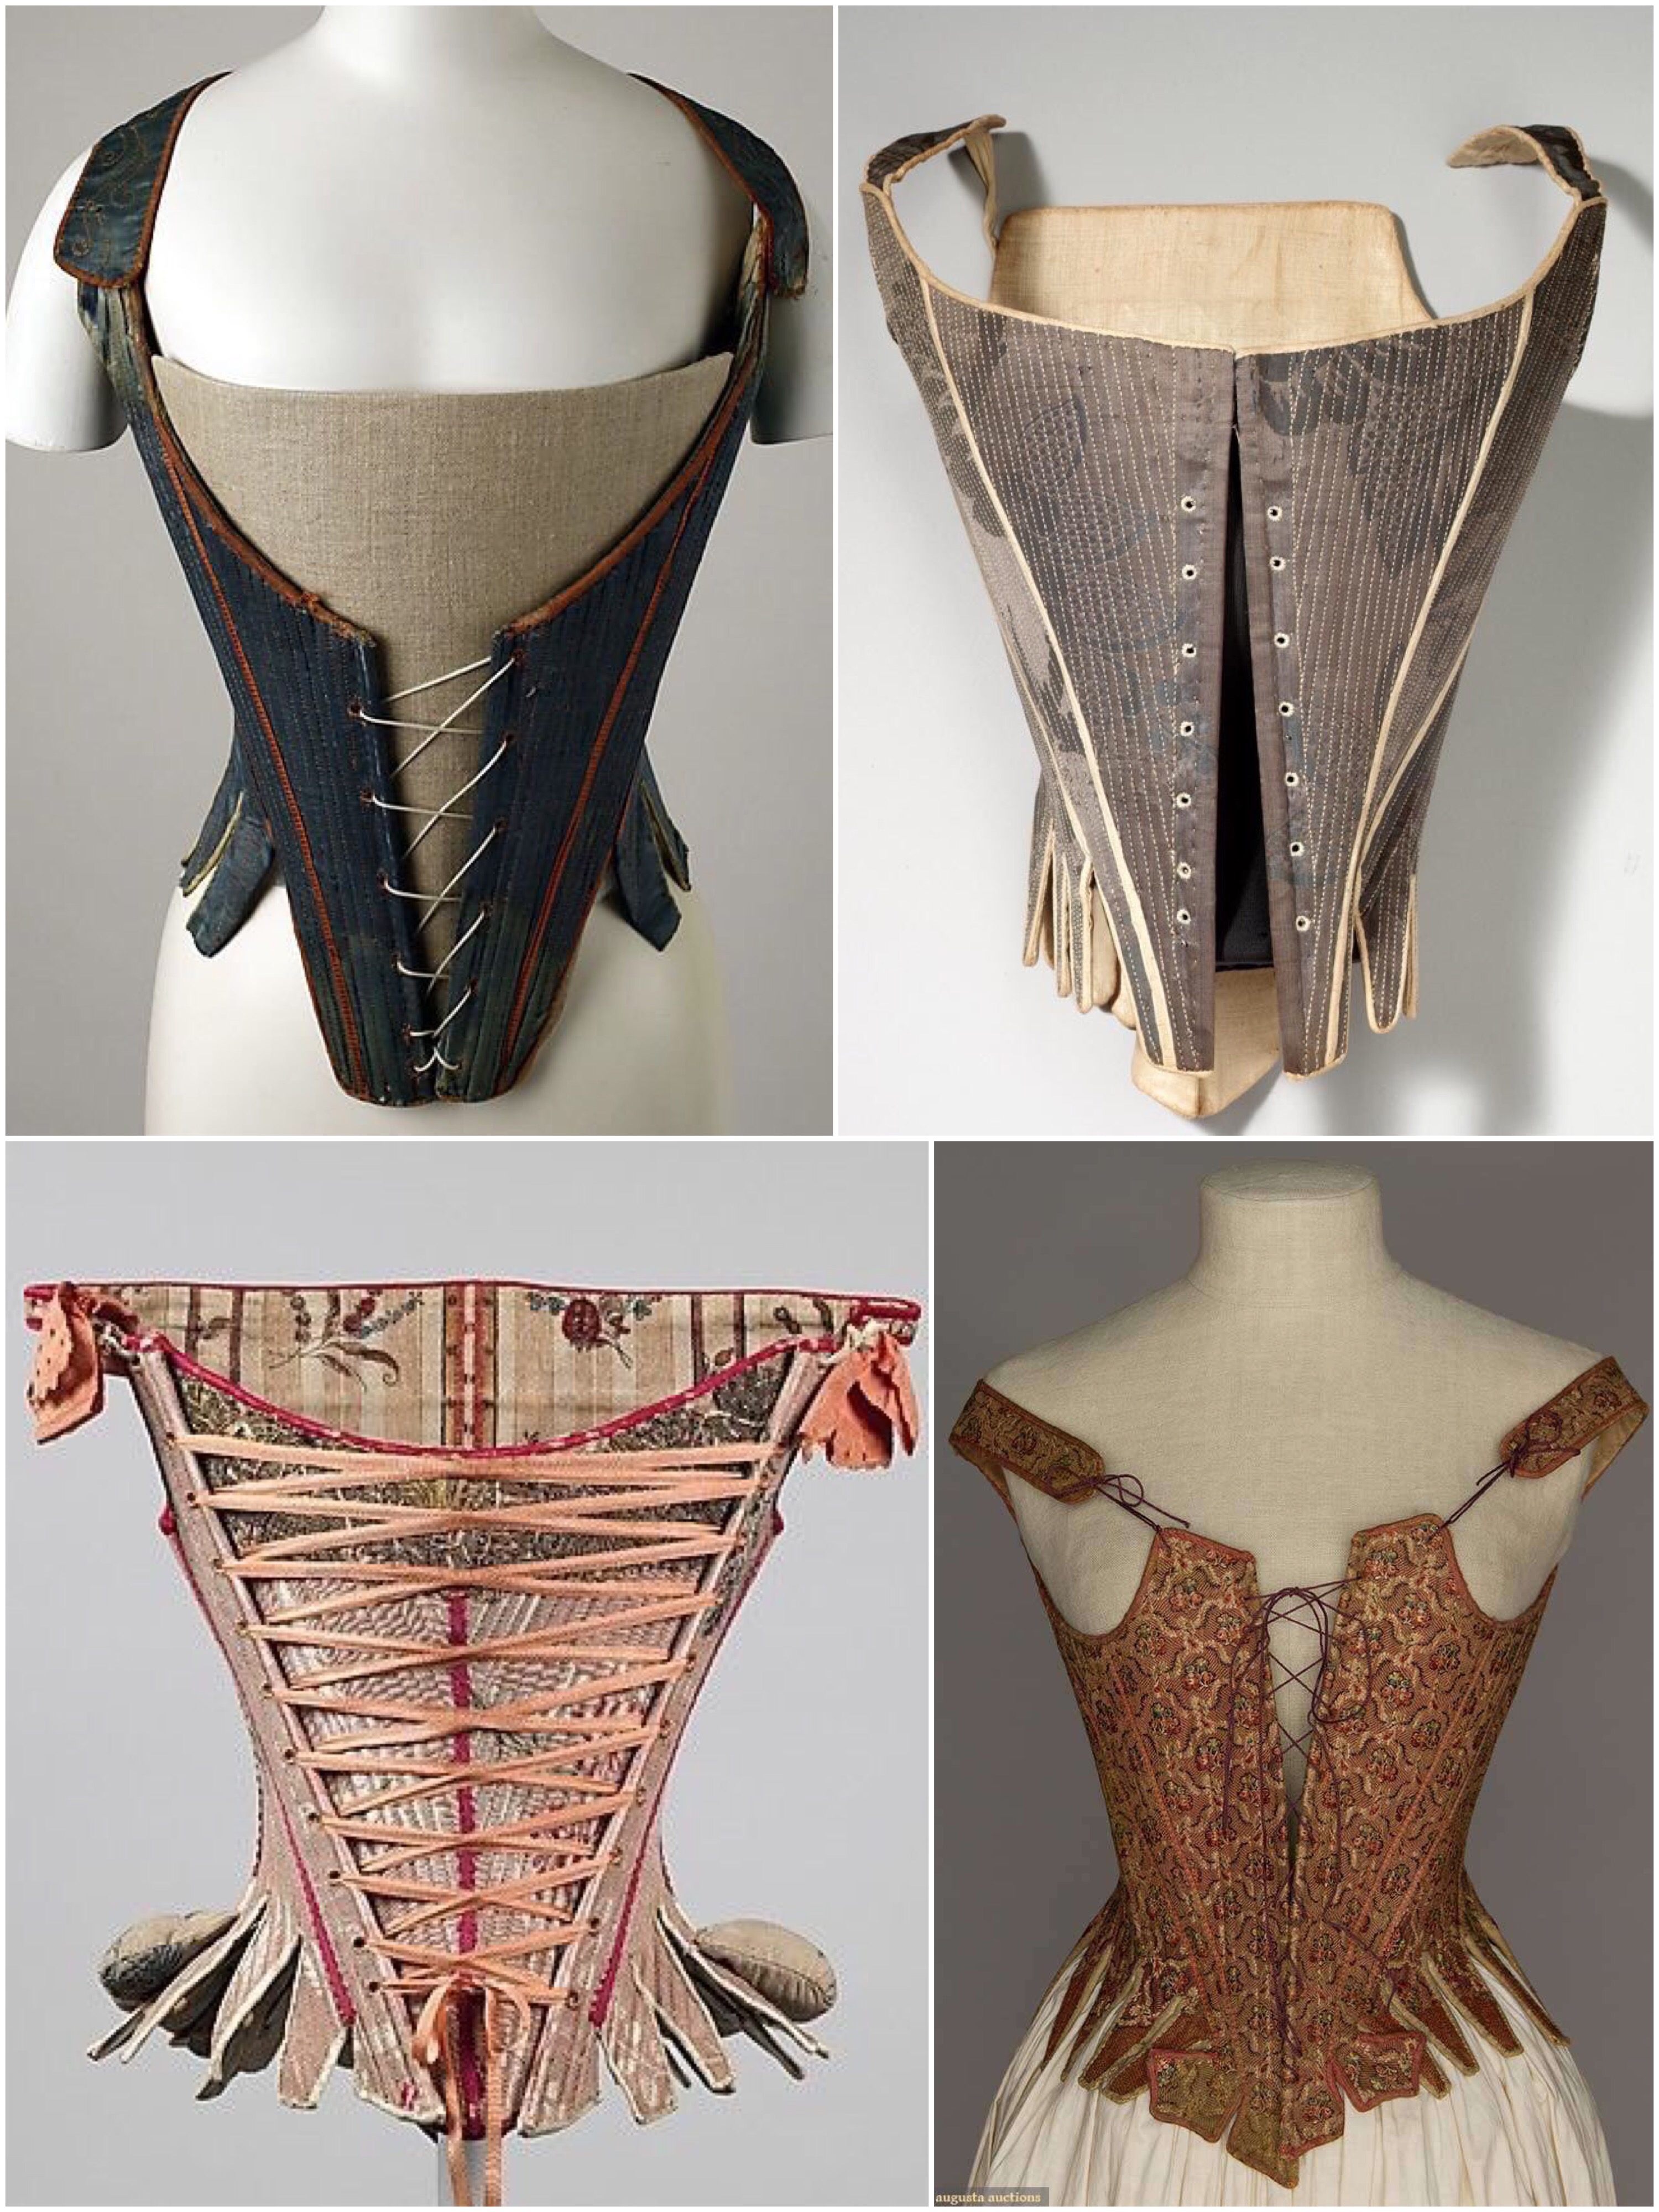
I researched the smocked dresses produced by Liberty & Co. I also researched the reform dresses worn by the Pre-Raphaelites and members of the Arts and Crafts movement during the 1860s and 1870s. The original clothing was of a slightly different silhouette than what was eventually commercially sold. I wanted both of these styles to influence my finished look instead of making a Liberty & Co. replica. I free form drew organic embroidery designs to give that Aubrey Beardsley feel that is both modern and Medieval feeling. I wanted to capture the feeling of reading poetry and becoming the character. 

Purity’, 1913. Autochrome by Alfonse van Besten
The interior waist tape on a Liberty & Co. Smocked dress. Click through to purchases from Madelon Vintage.

Child’s Dress, Liberty & Company, 1893-97
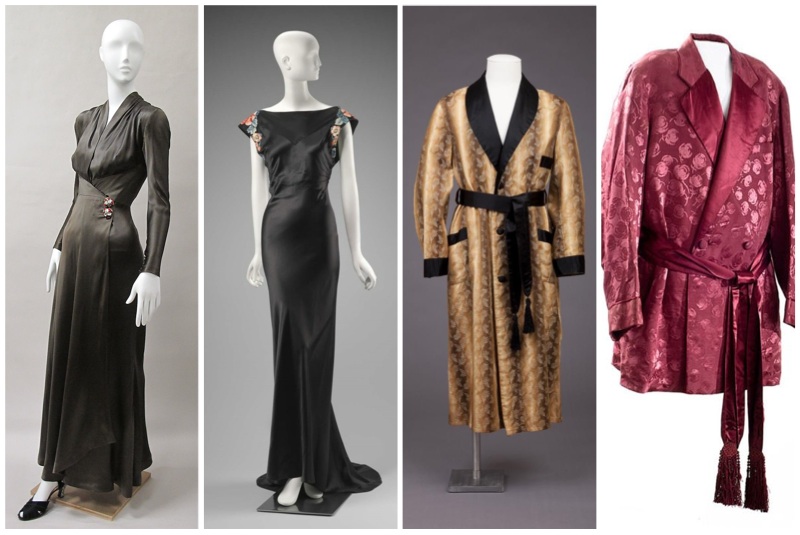
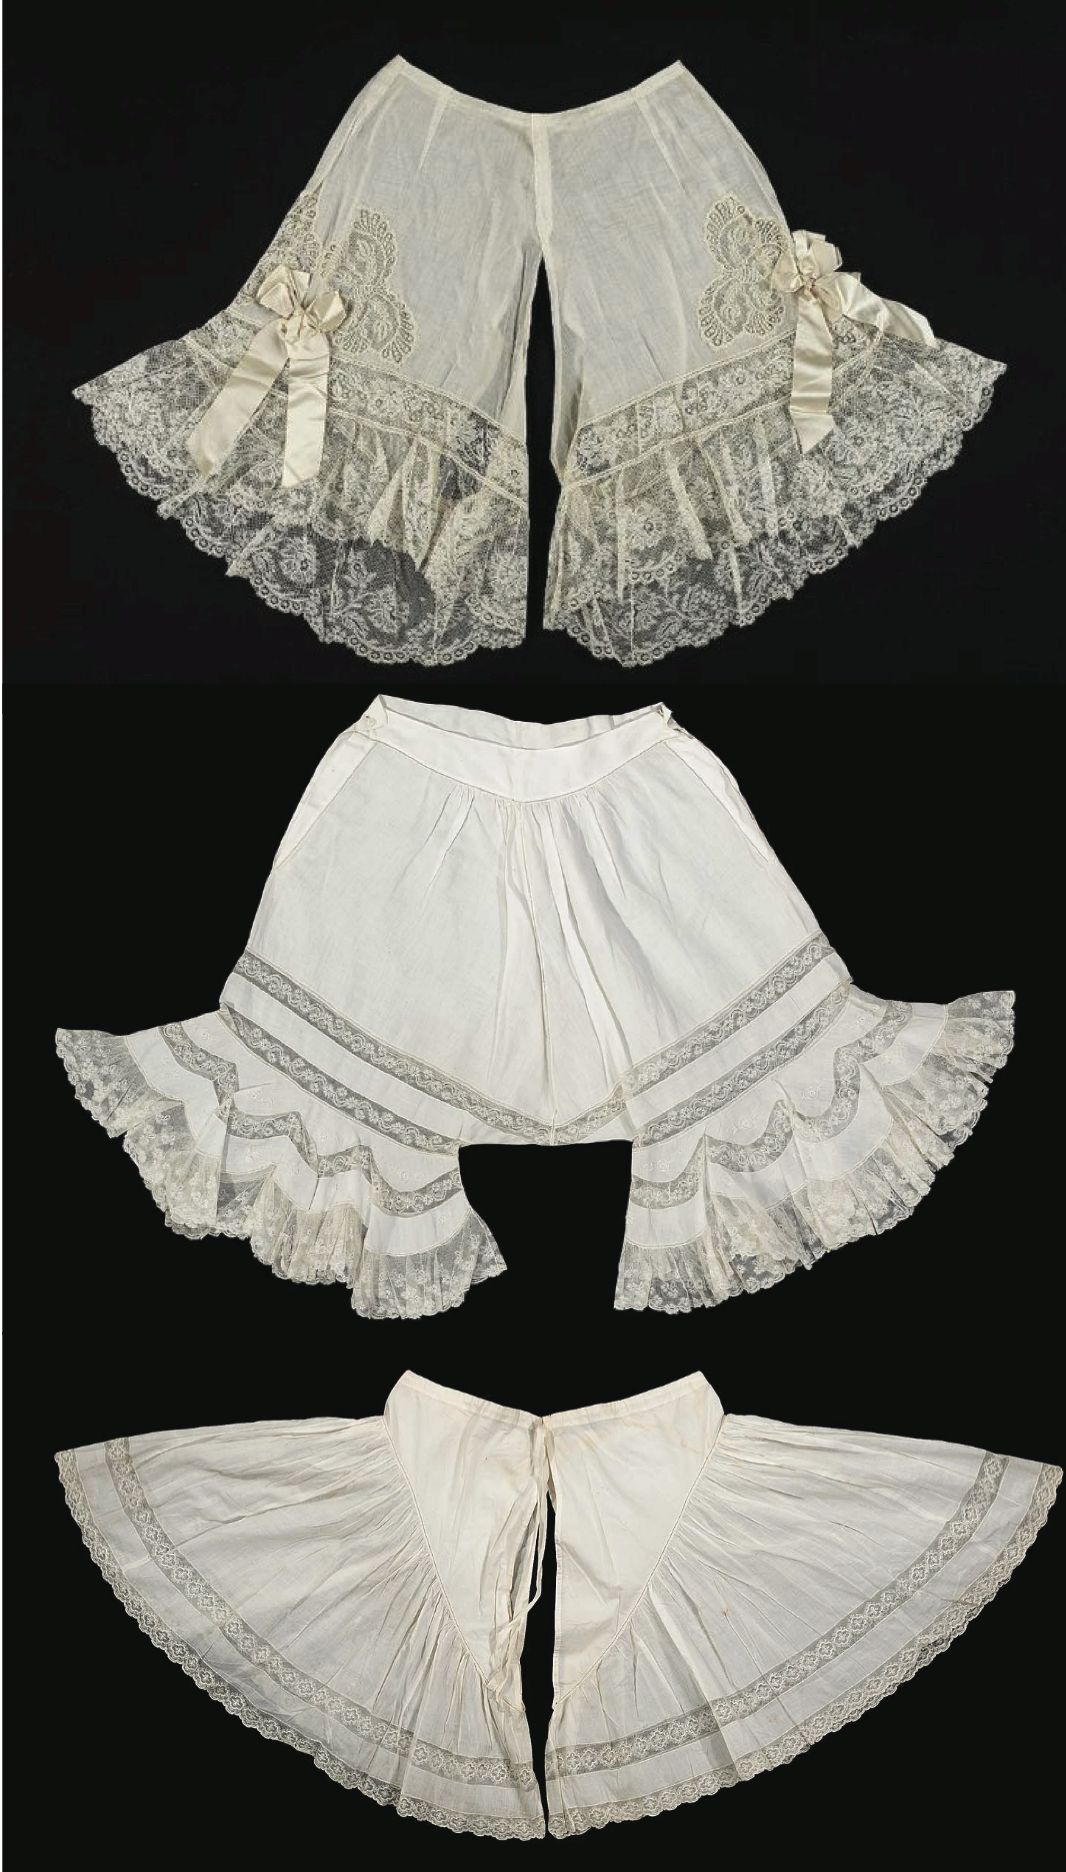
FIDM Museum 2008.25.3

Dress, Liberty & Co. Ltd., 1893-1894
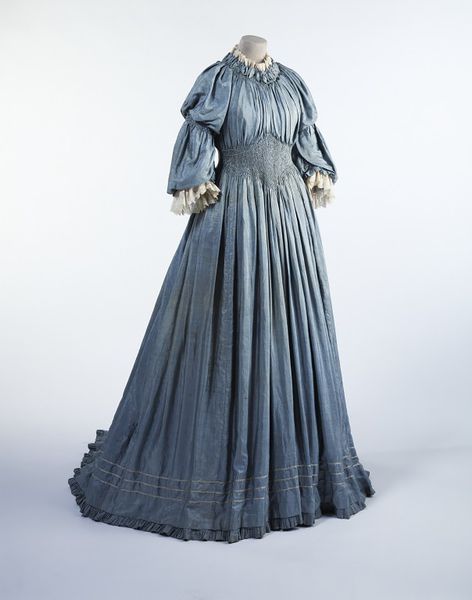
V&A Museum T.17-1985
Dress, Liberty and Company, 1900
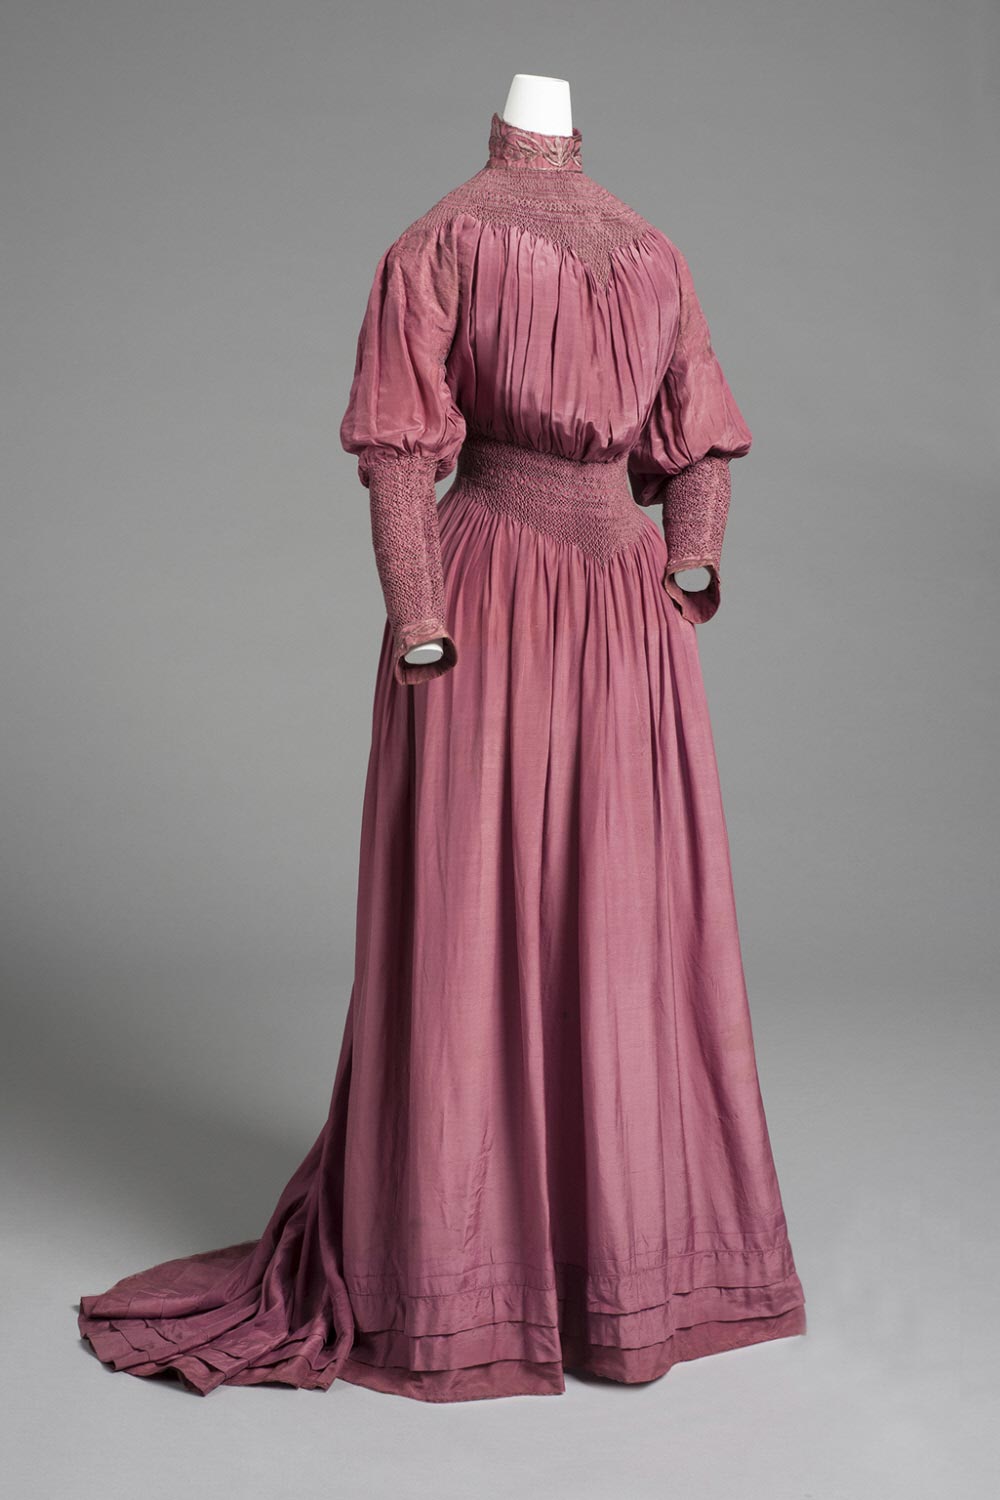
Philadelphia Museum of Art 1995-82-1
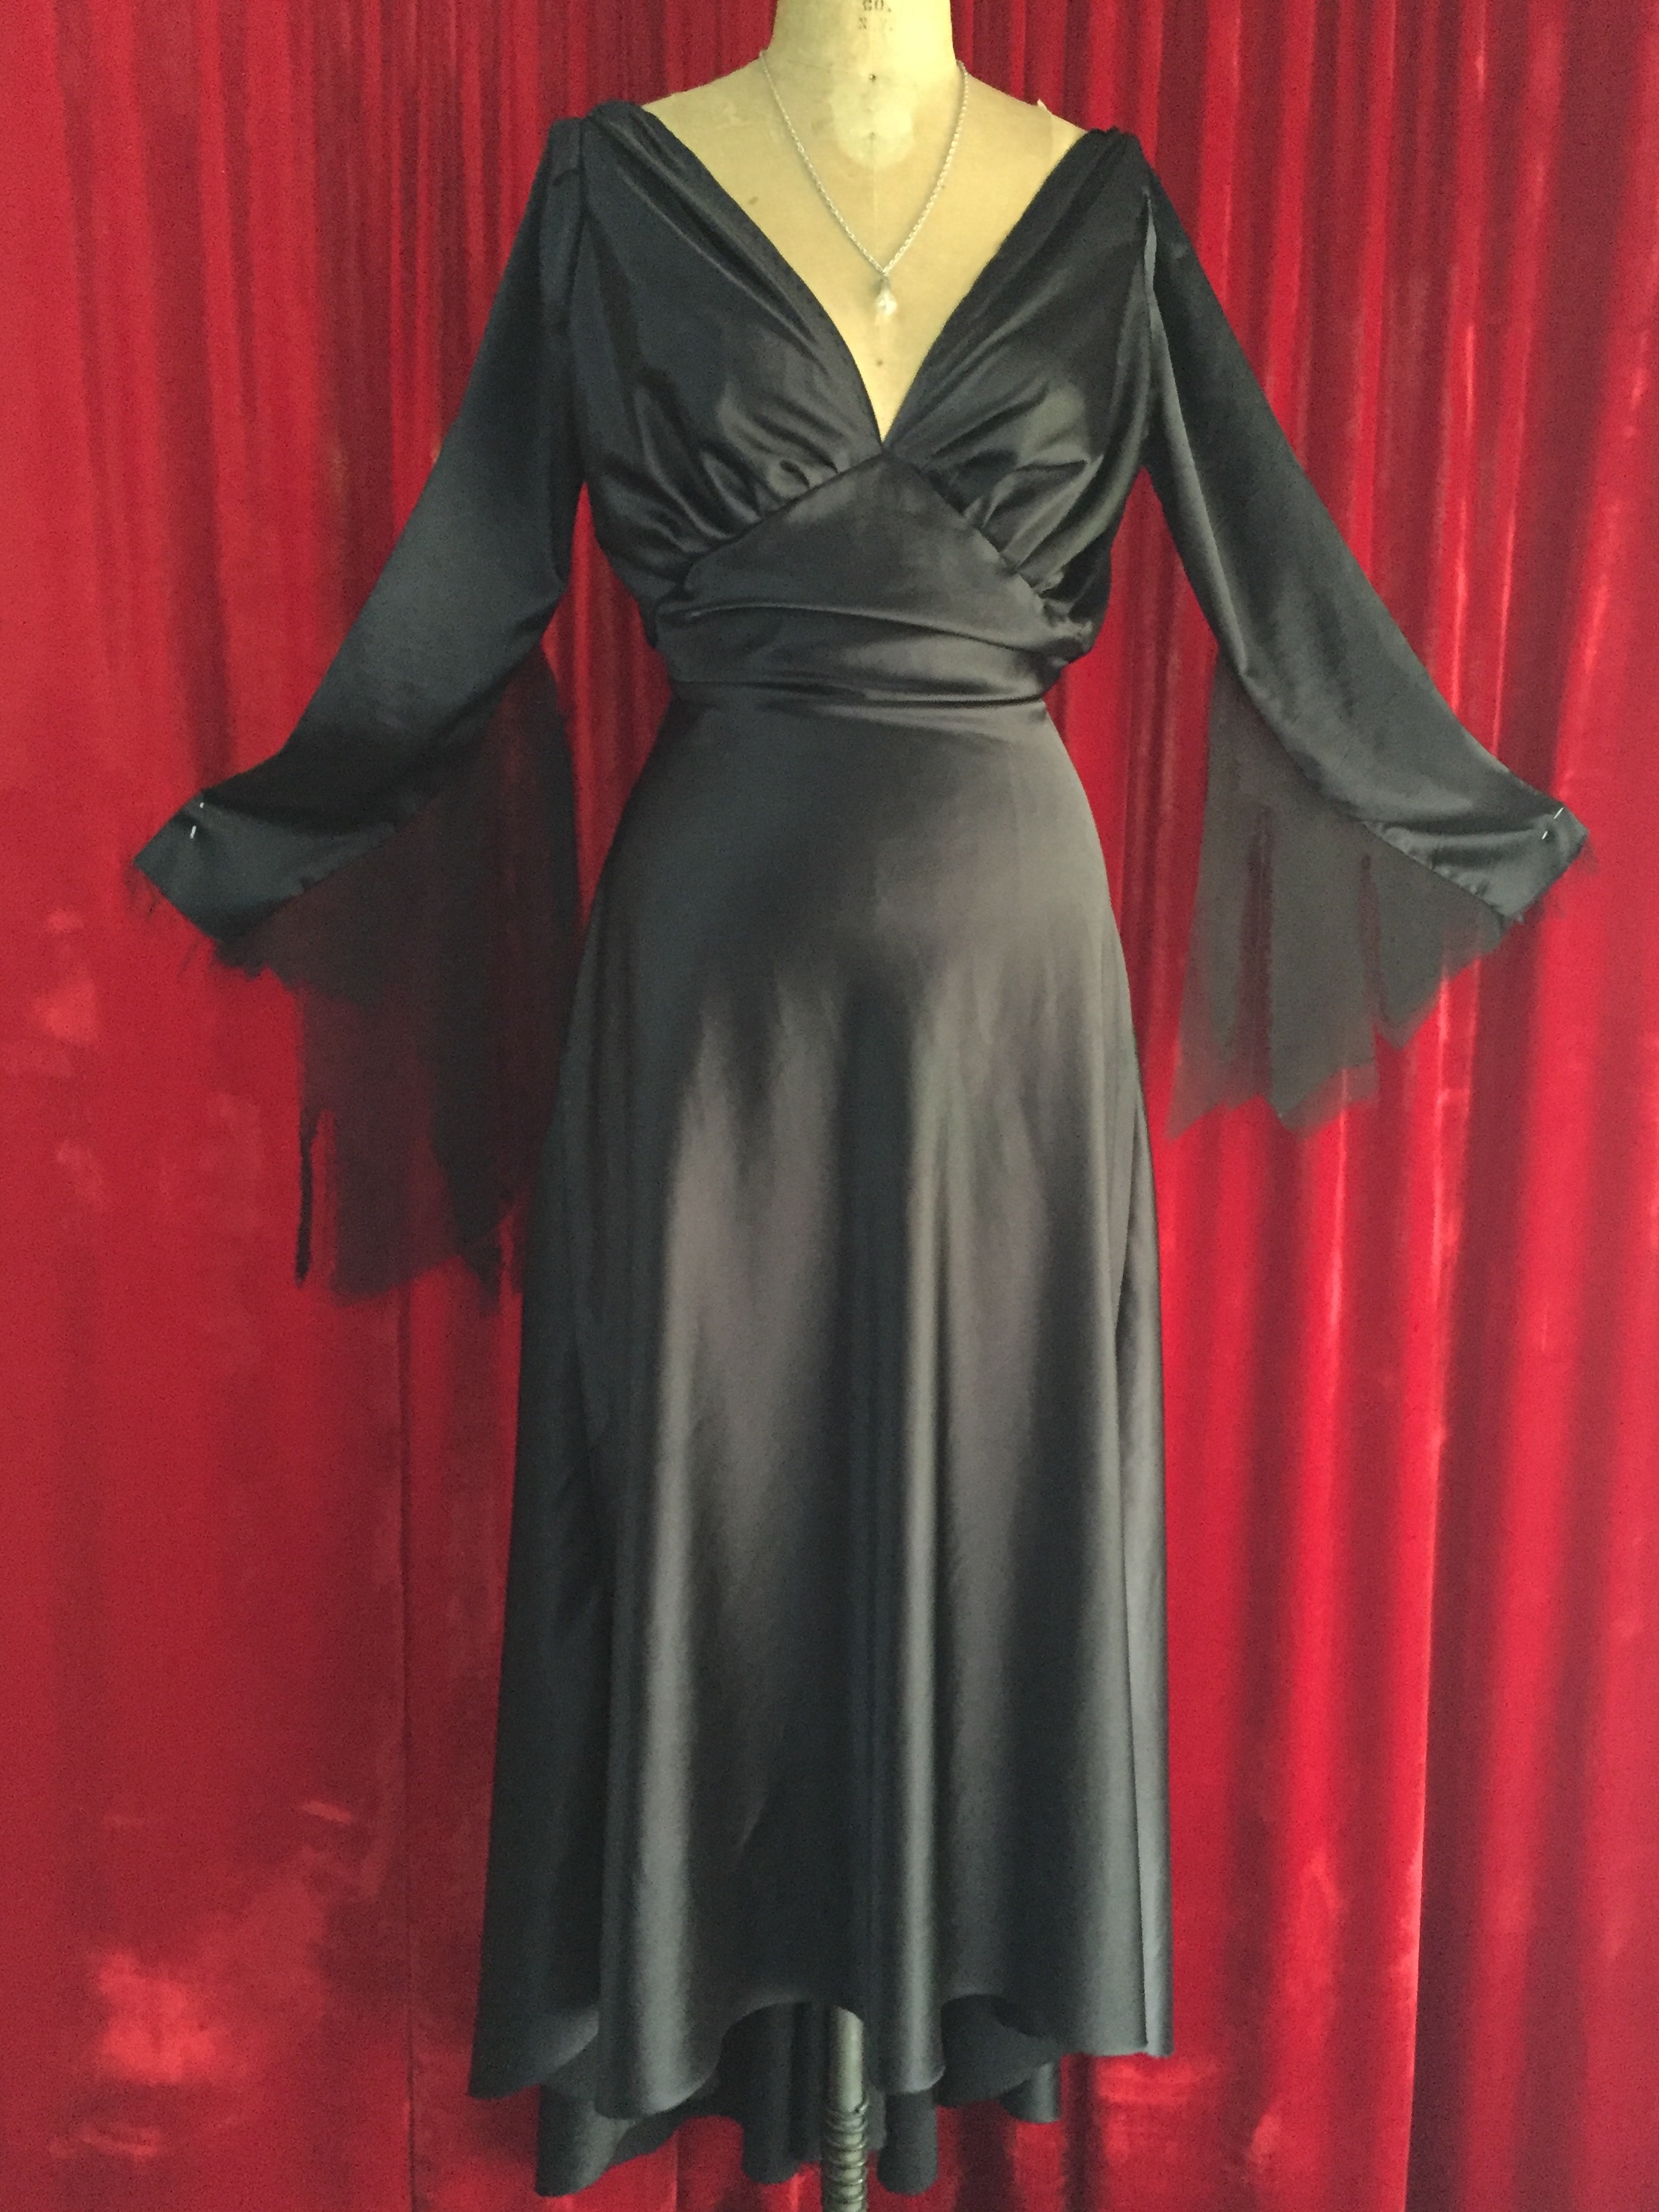
Construction:

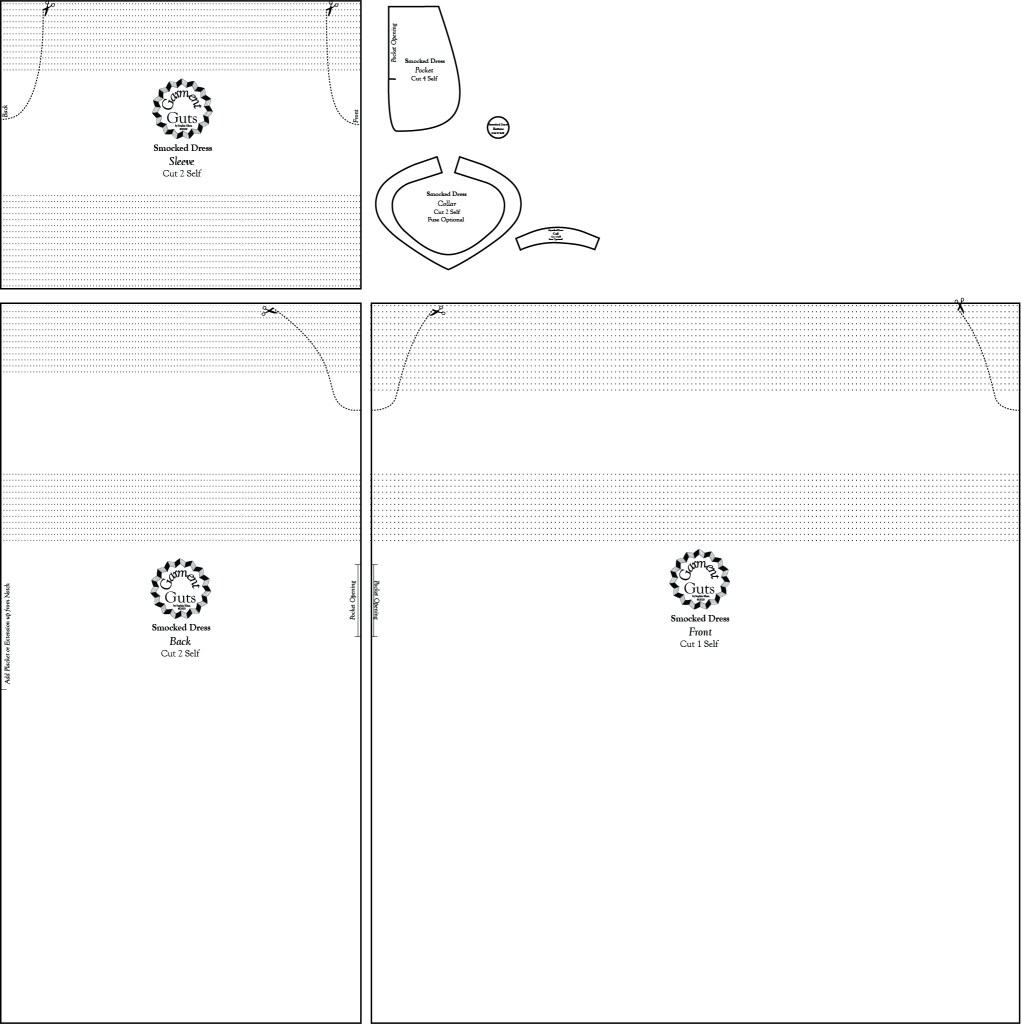
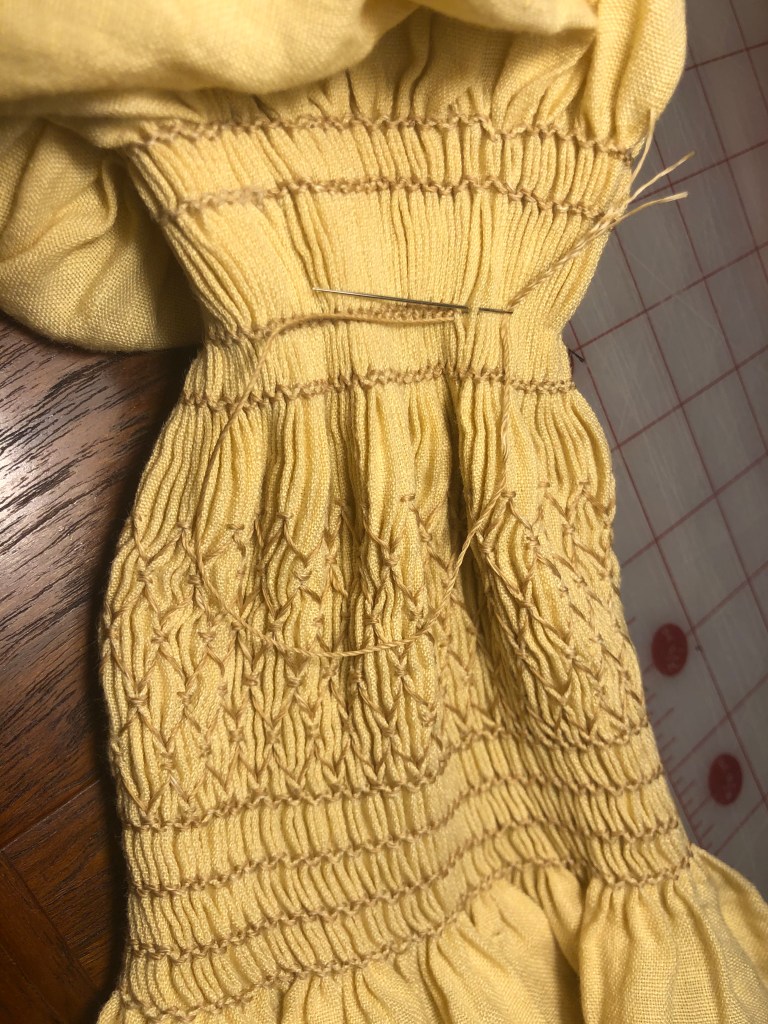
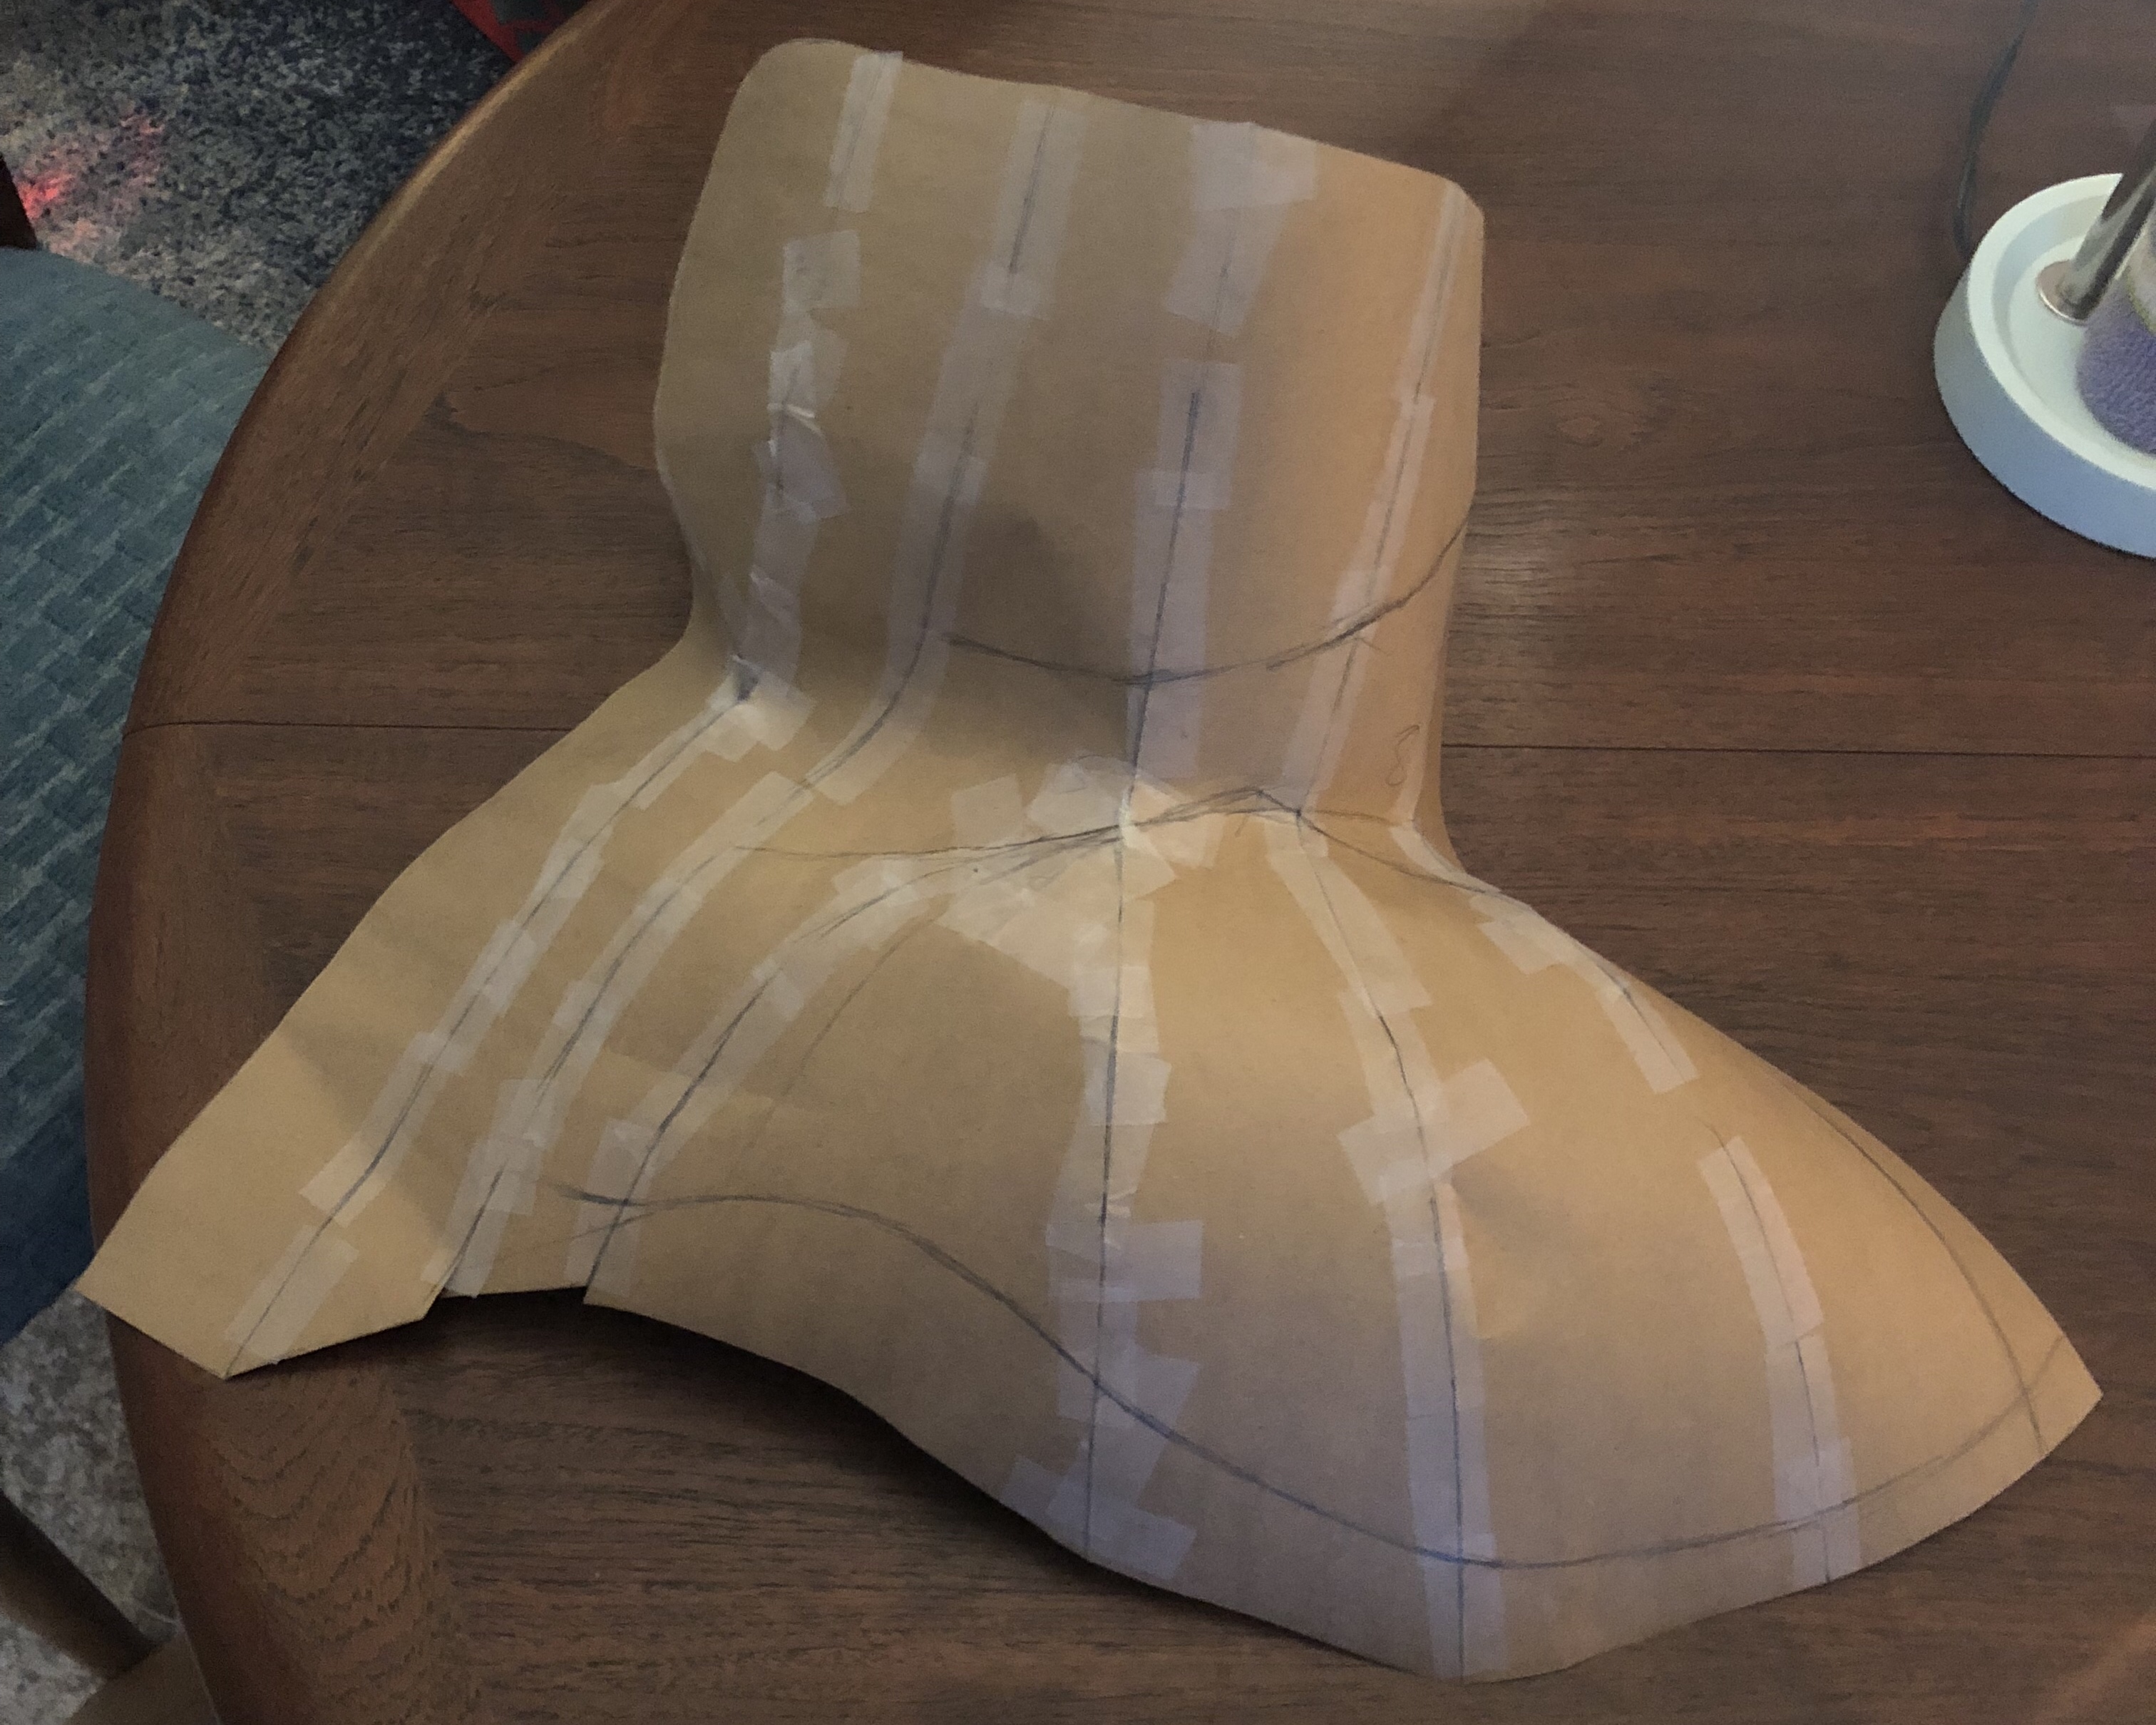
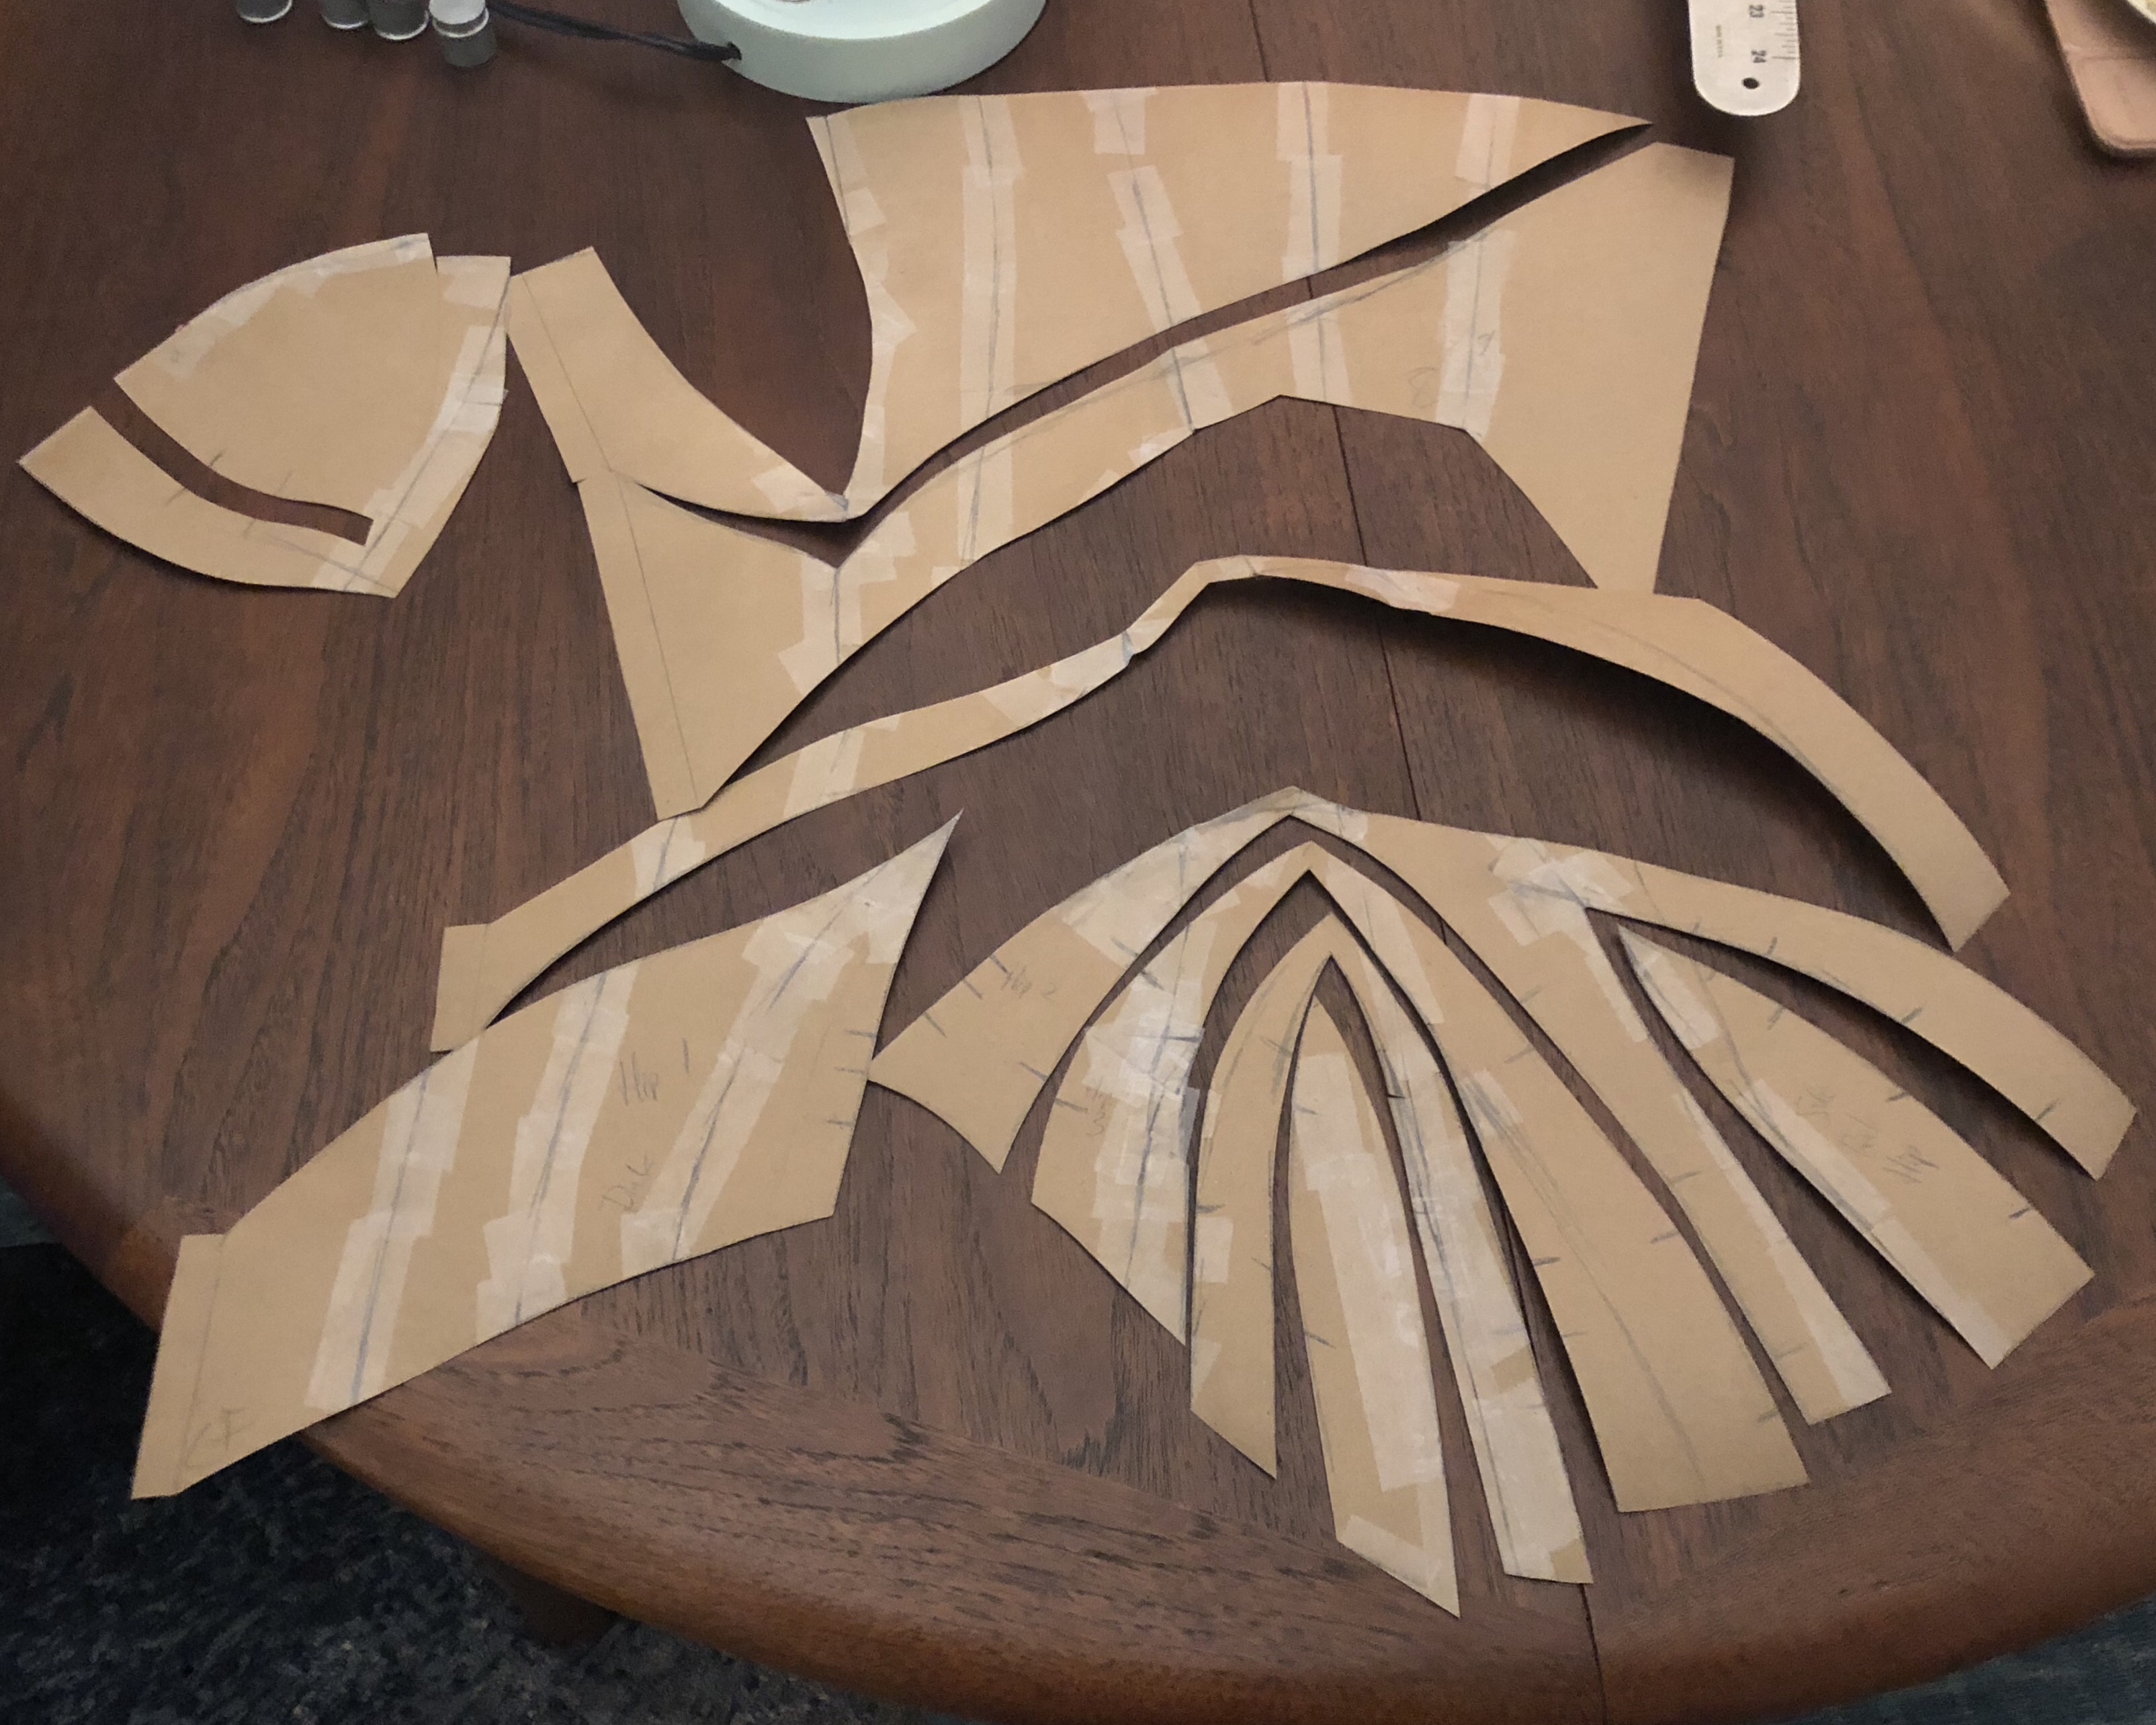
The pattern is created using simple rectangles. I made a smocking sample to deduce how the fabric was needed.  The fabric needed 4.25 times the finished smocked section to reduce correctly. Because 12” was needed across the front neck that meant 51” of fabric was need. My fabric was 54” wide so I just used the full width on the front panel. I needed some extra width across my back so I used two 30” wide panels across the back. 60” of length was needed for both the front and the back panels. I actually needed more length and ended up adding a hem band to compensate. I would recommend adding at least 8” extra length to trim as needed after the dress is completed.  For the waist you don’t need to worry as much because the smocking is rather stretchy. In fact, I decided mine was too stretchy so I added a waist tape to control all my fullness correctly. The sleeves also happened to need 30” of width to reduce to a 7” wrist. To come up with the armscye and sleeve cap shape I used a raglan sleeve dress pattern I previously created to make of all things a mod 1960s swing dress. I traced these onto my pre cut linen rectangles. Use any raglan sleeve pattern that fits to create your personal pattern Do not cut these out you will after you add in your pleating stitches.  I cut out pockets for both sides. My collar was draped to get to get the desired shape over the smocking and the cuffs were drafted to match. I cut 8 matching button covers out of the scraps.

The pattern diagram below does not have any seam allowance or extensions. This is meant to be a guide for recreating your own smocked dress with whatever design details you desire. Add and subtract width to fit your frame. The collar and cuffs also do not have all the design details but can be used as general guidelines. I recommend patterning cuffs and collar to your own measurements. Click download below to get full size PDF.

This image has an empty alt attribute; its file name is smocked-dress-pattern.jpg

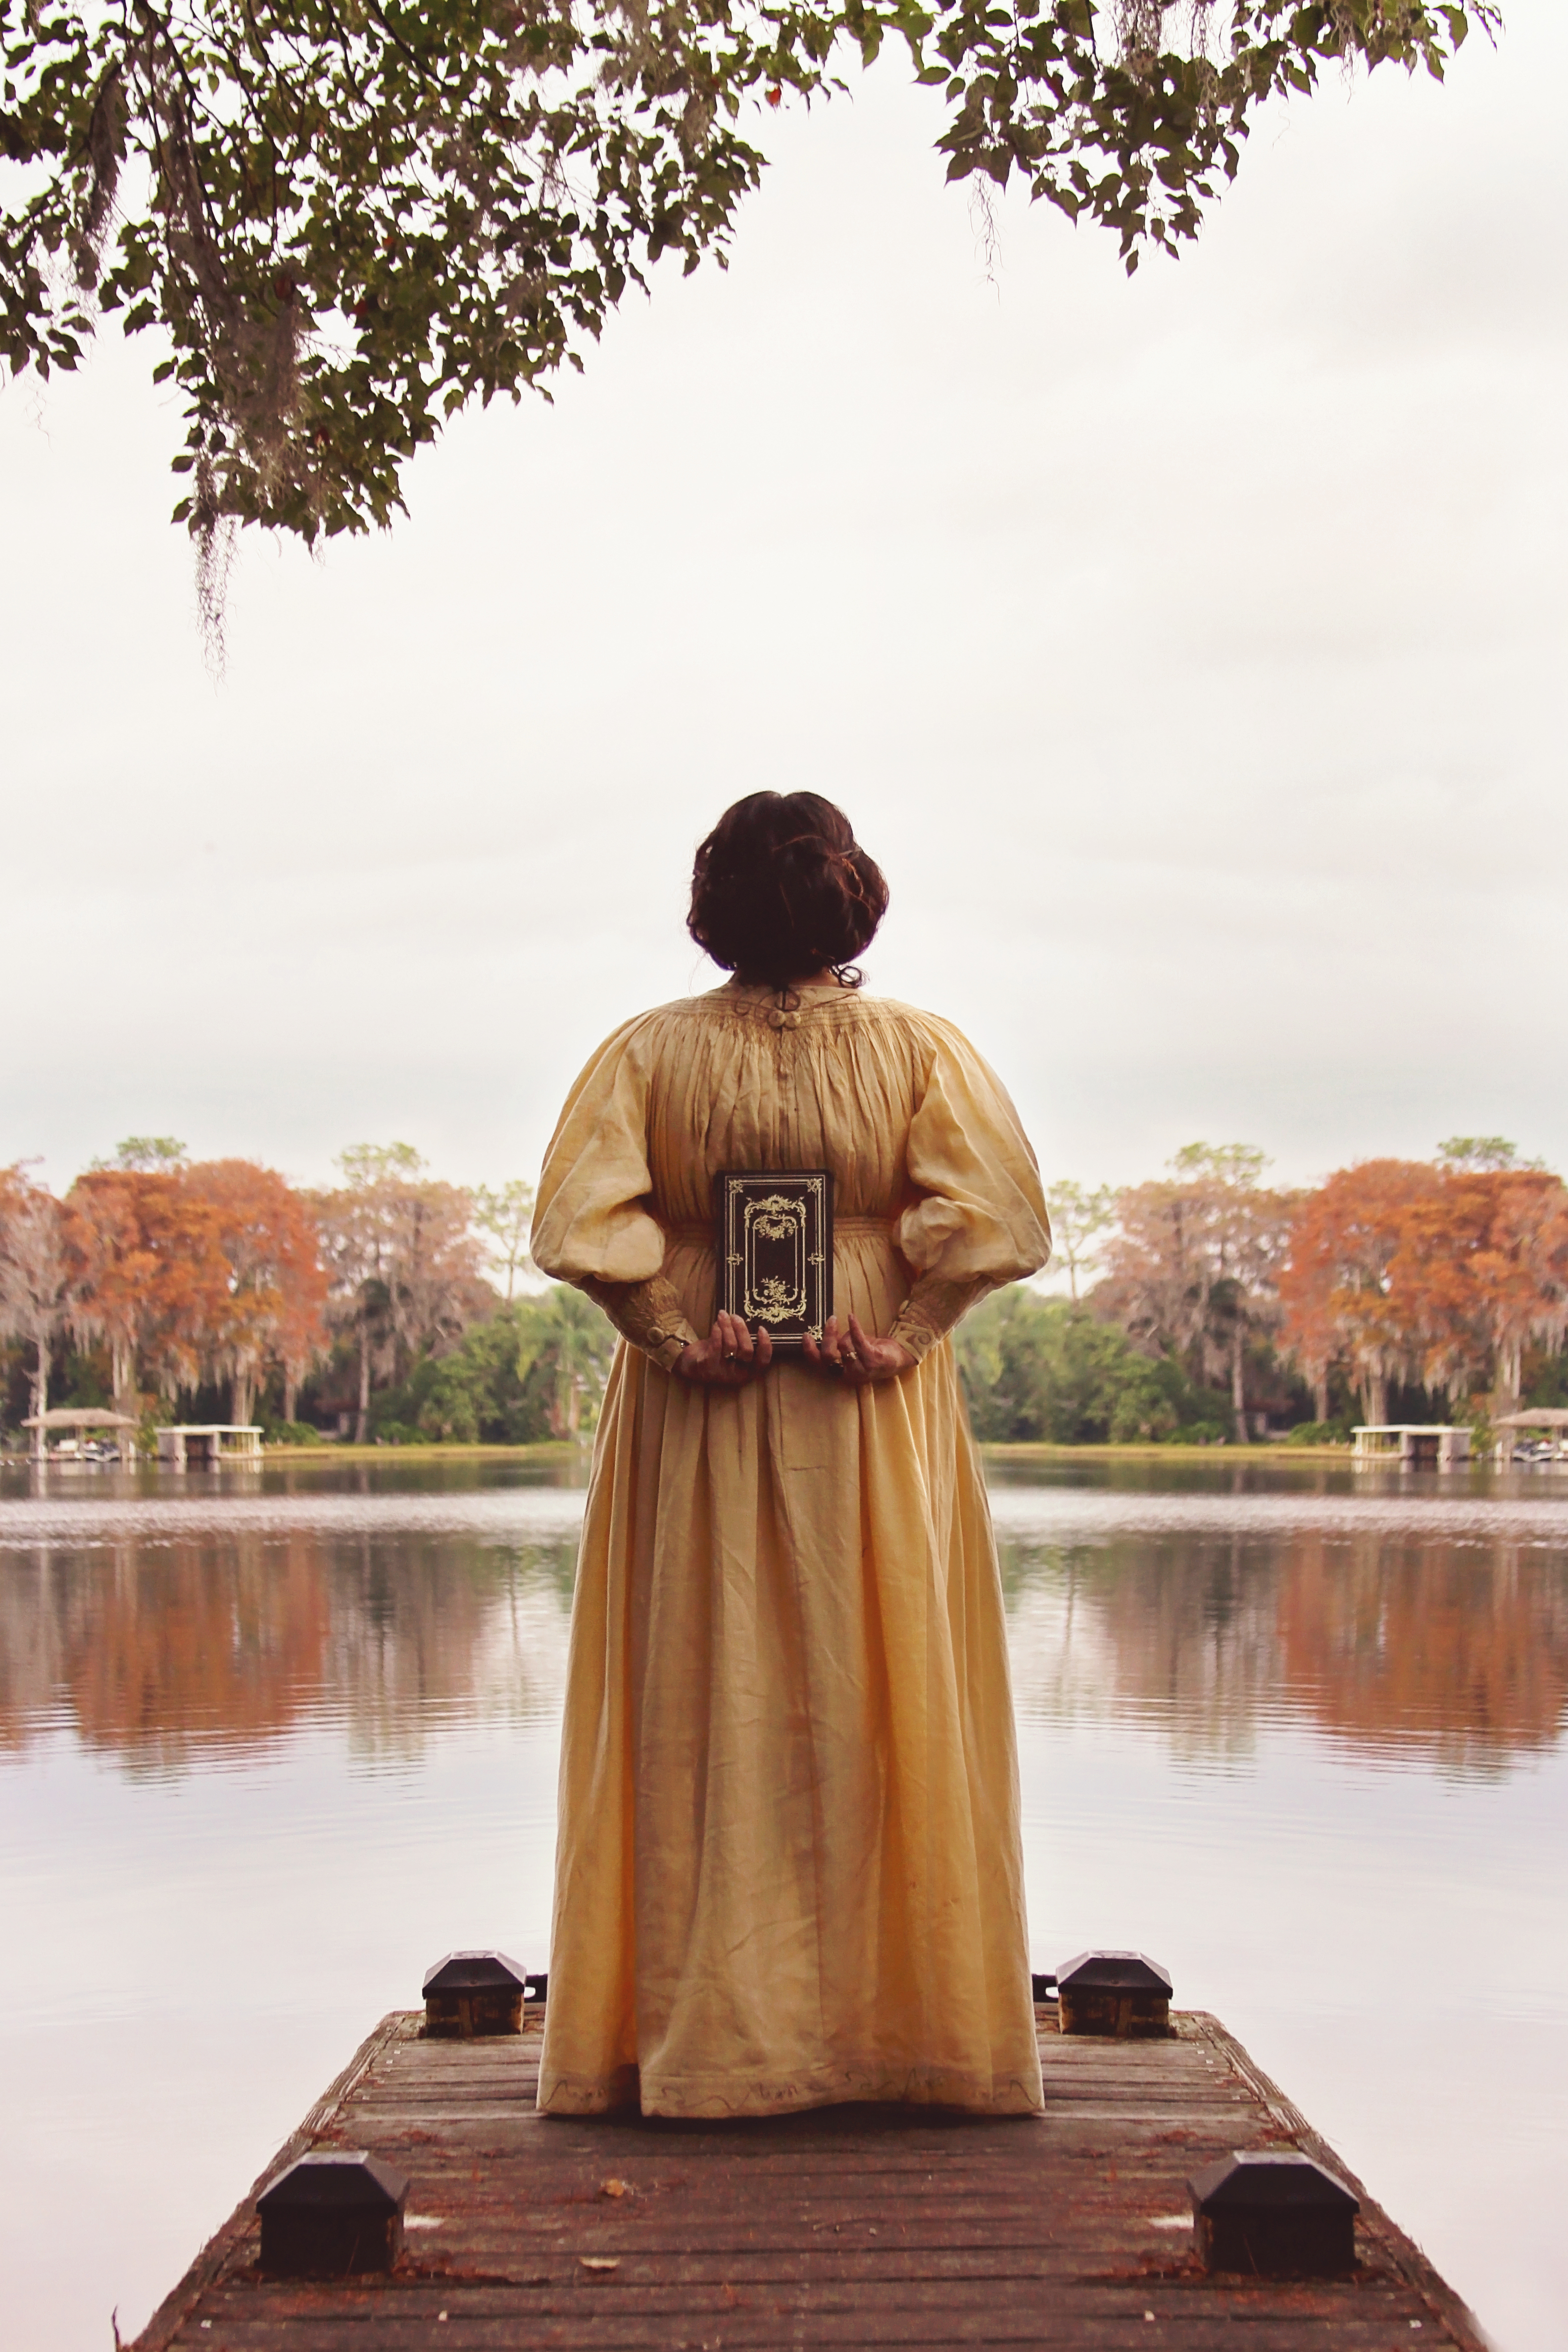
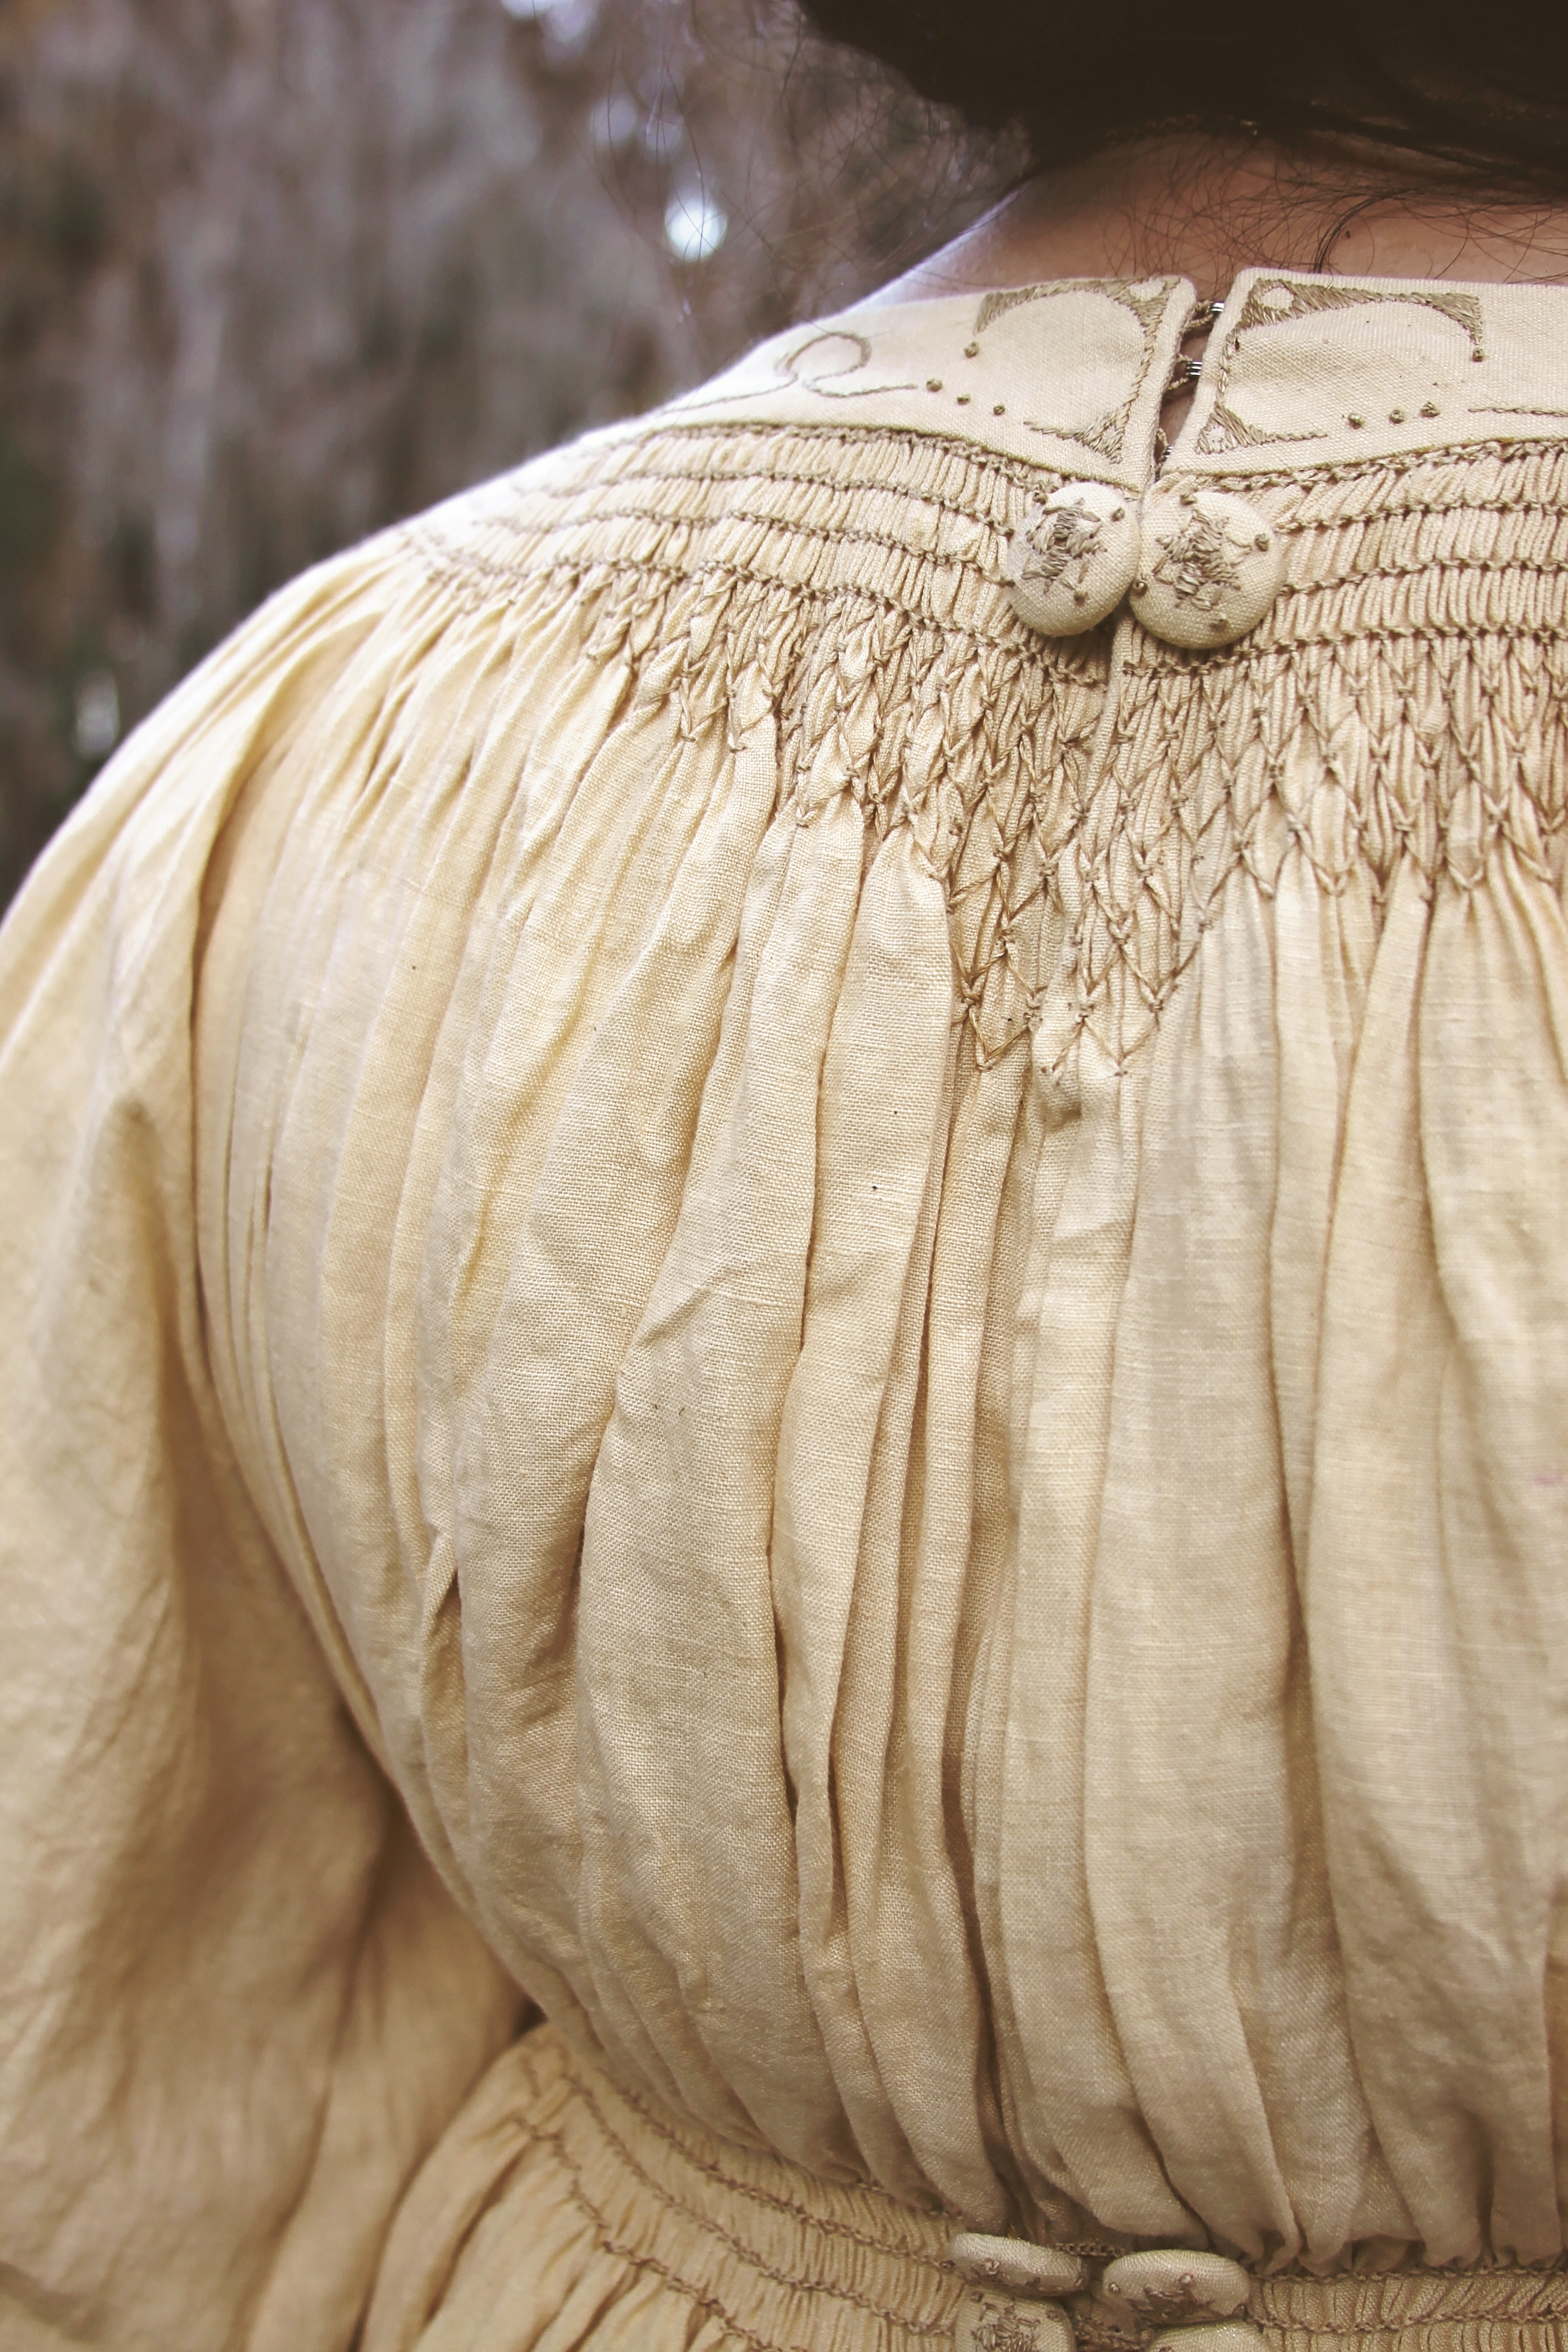
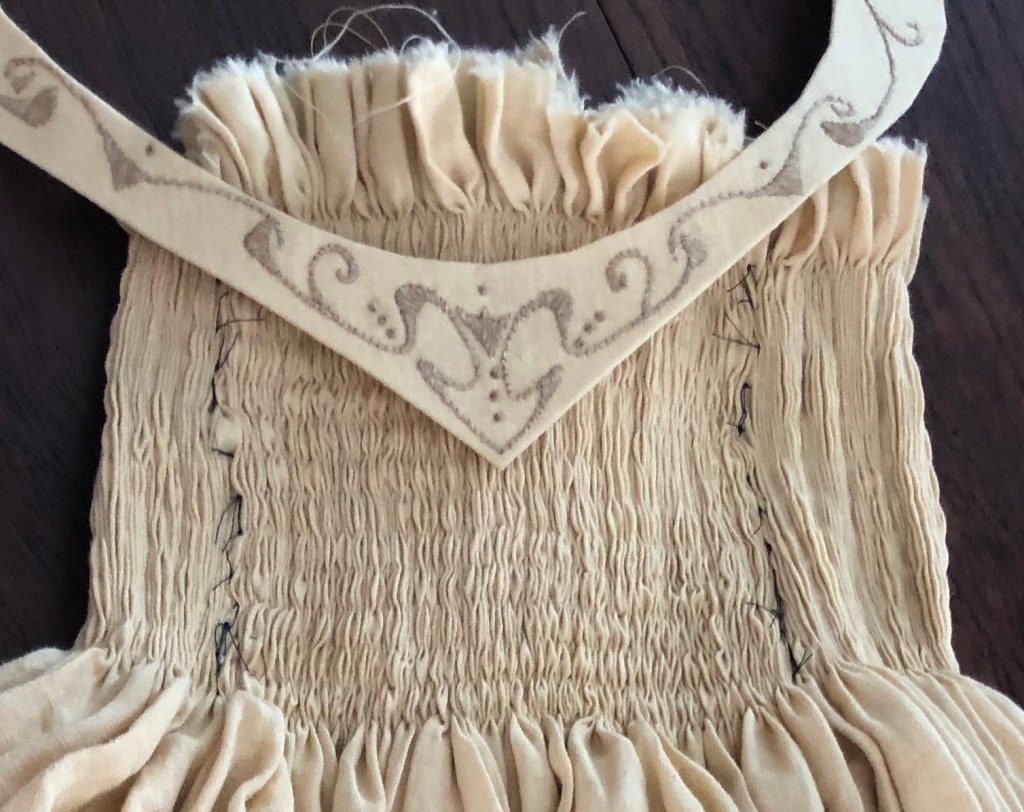
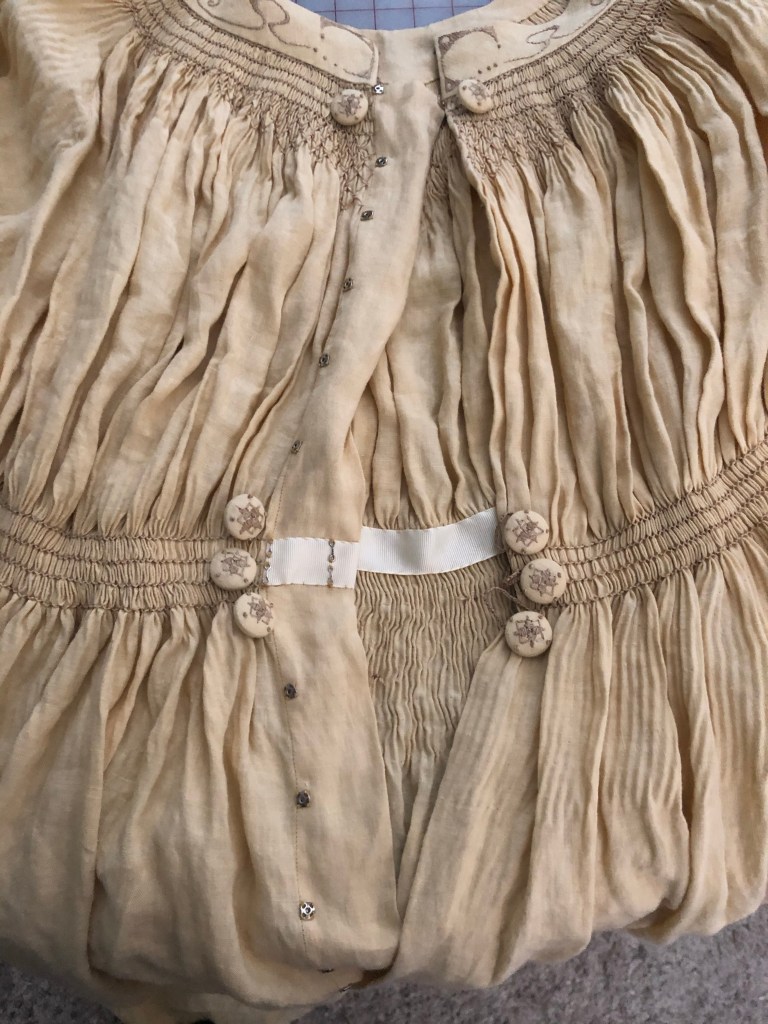
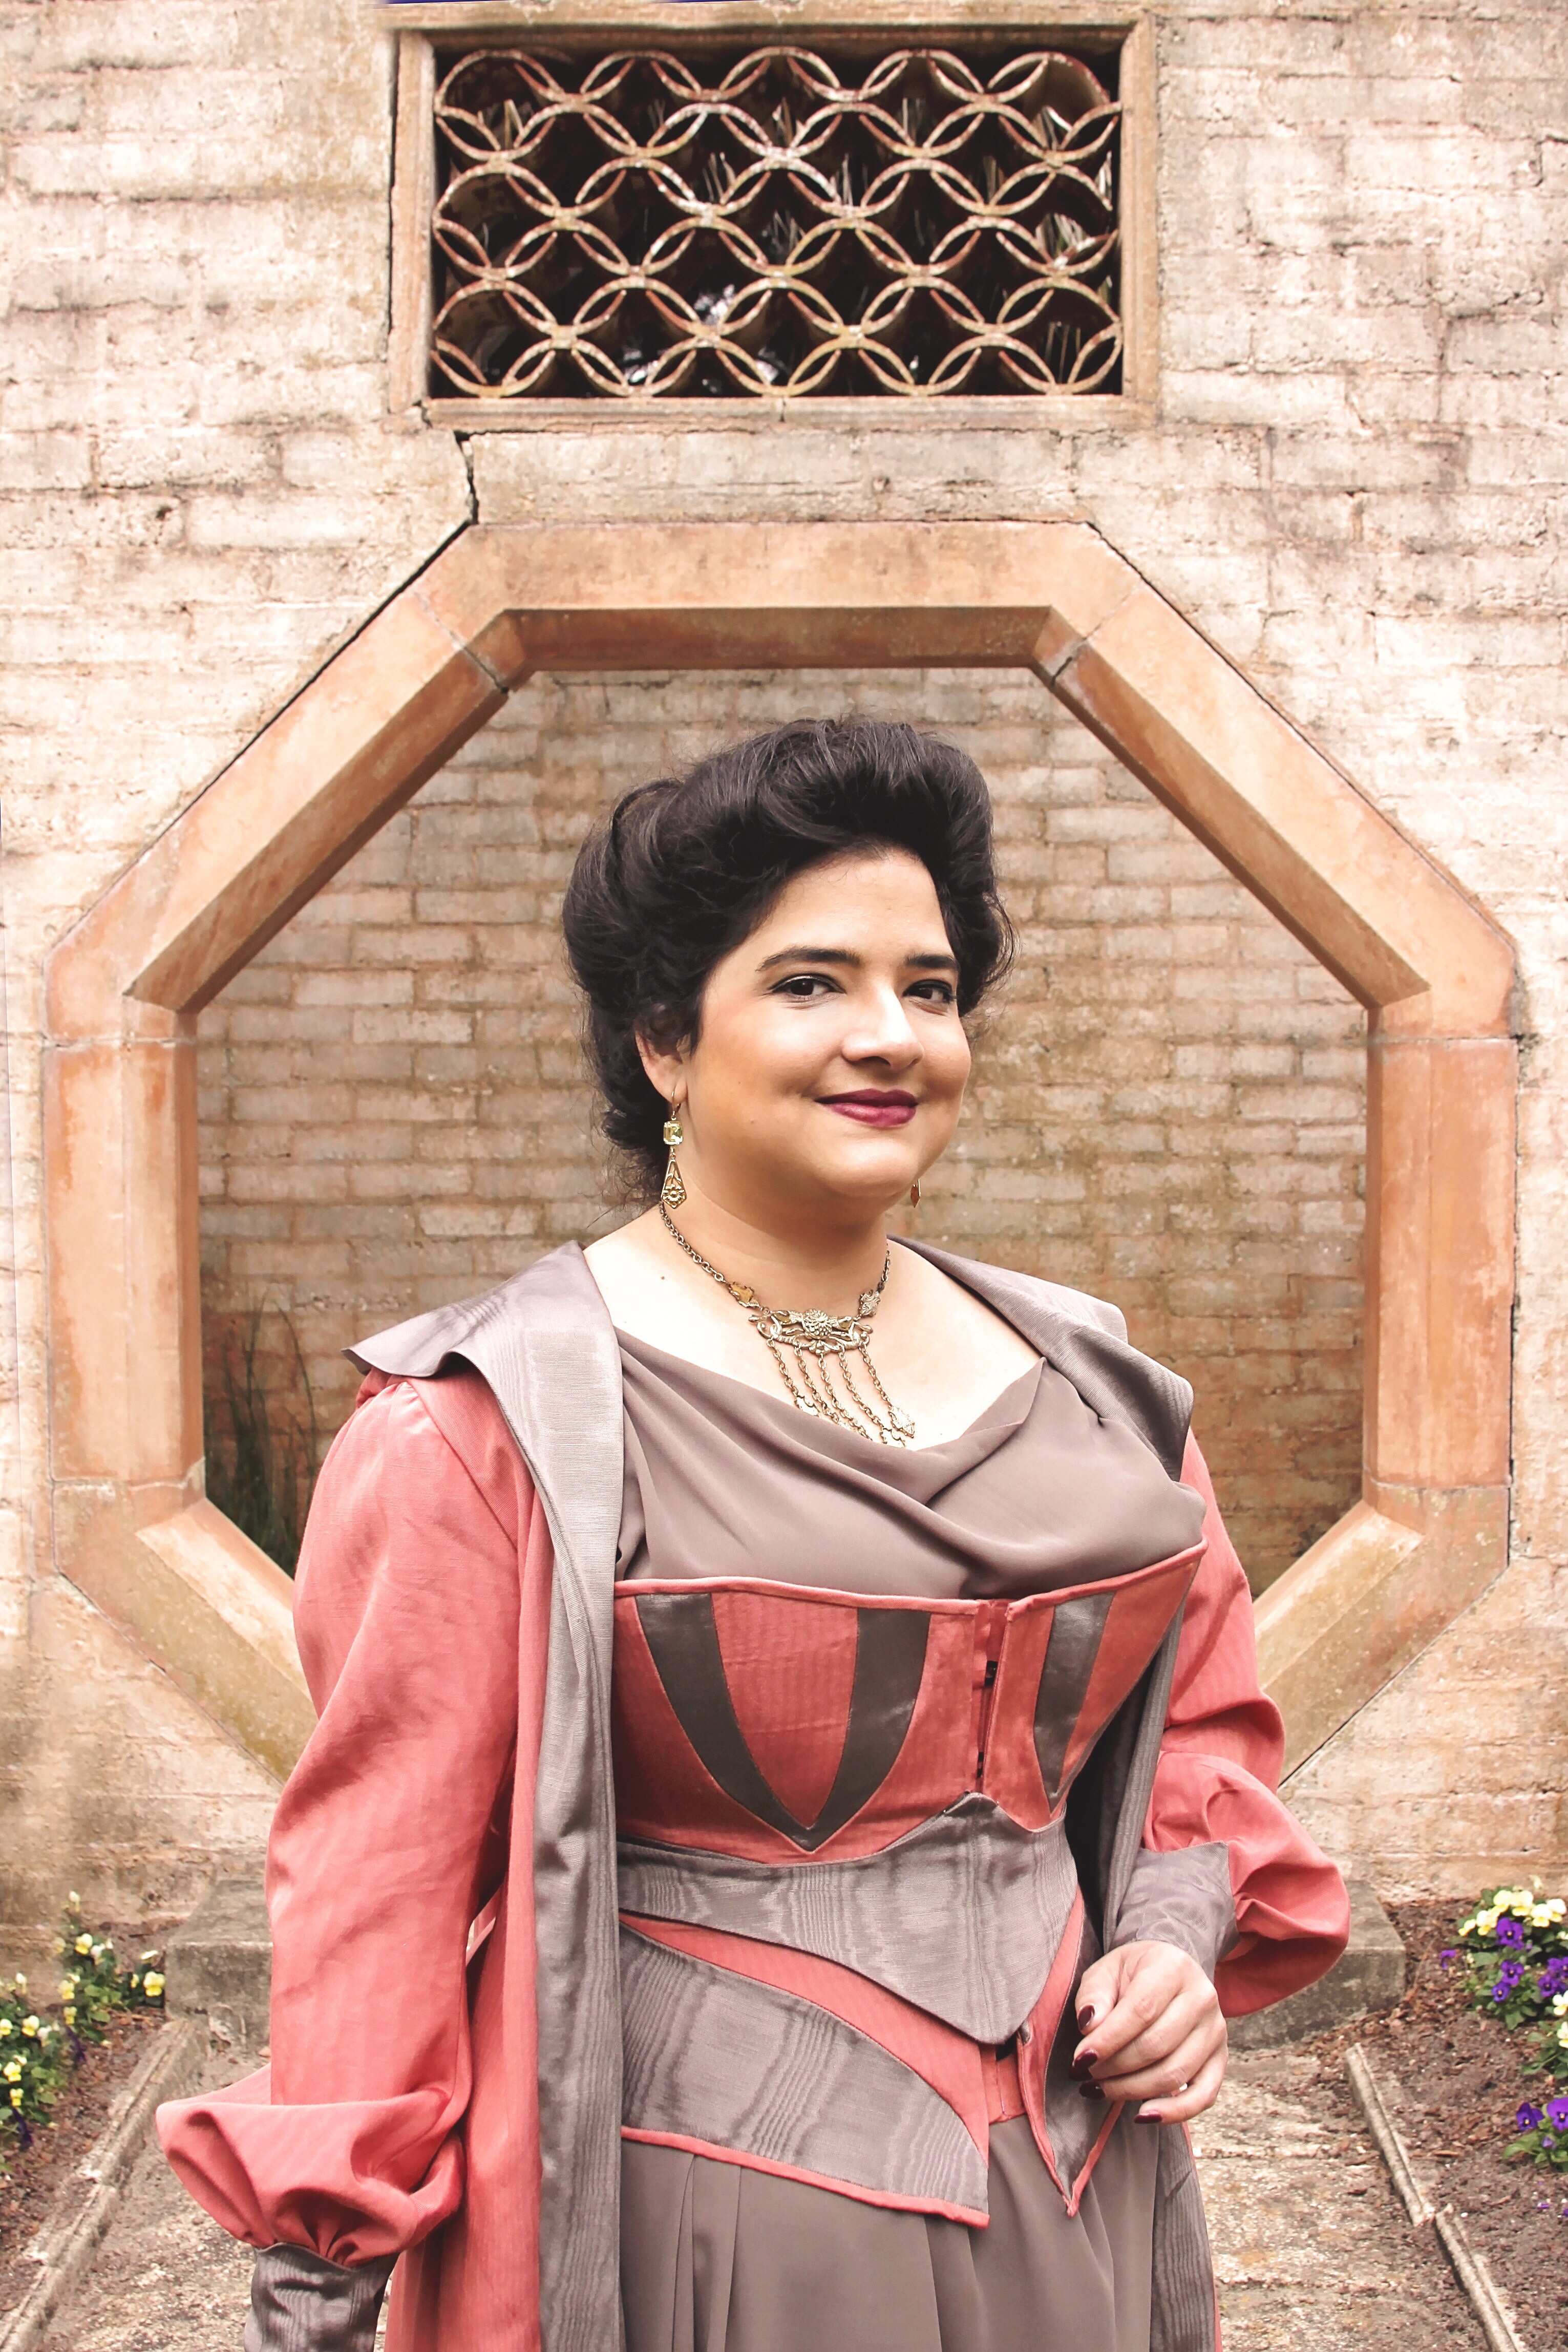
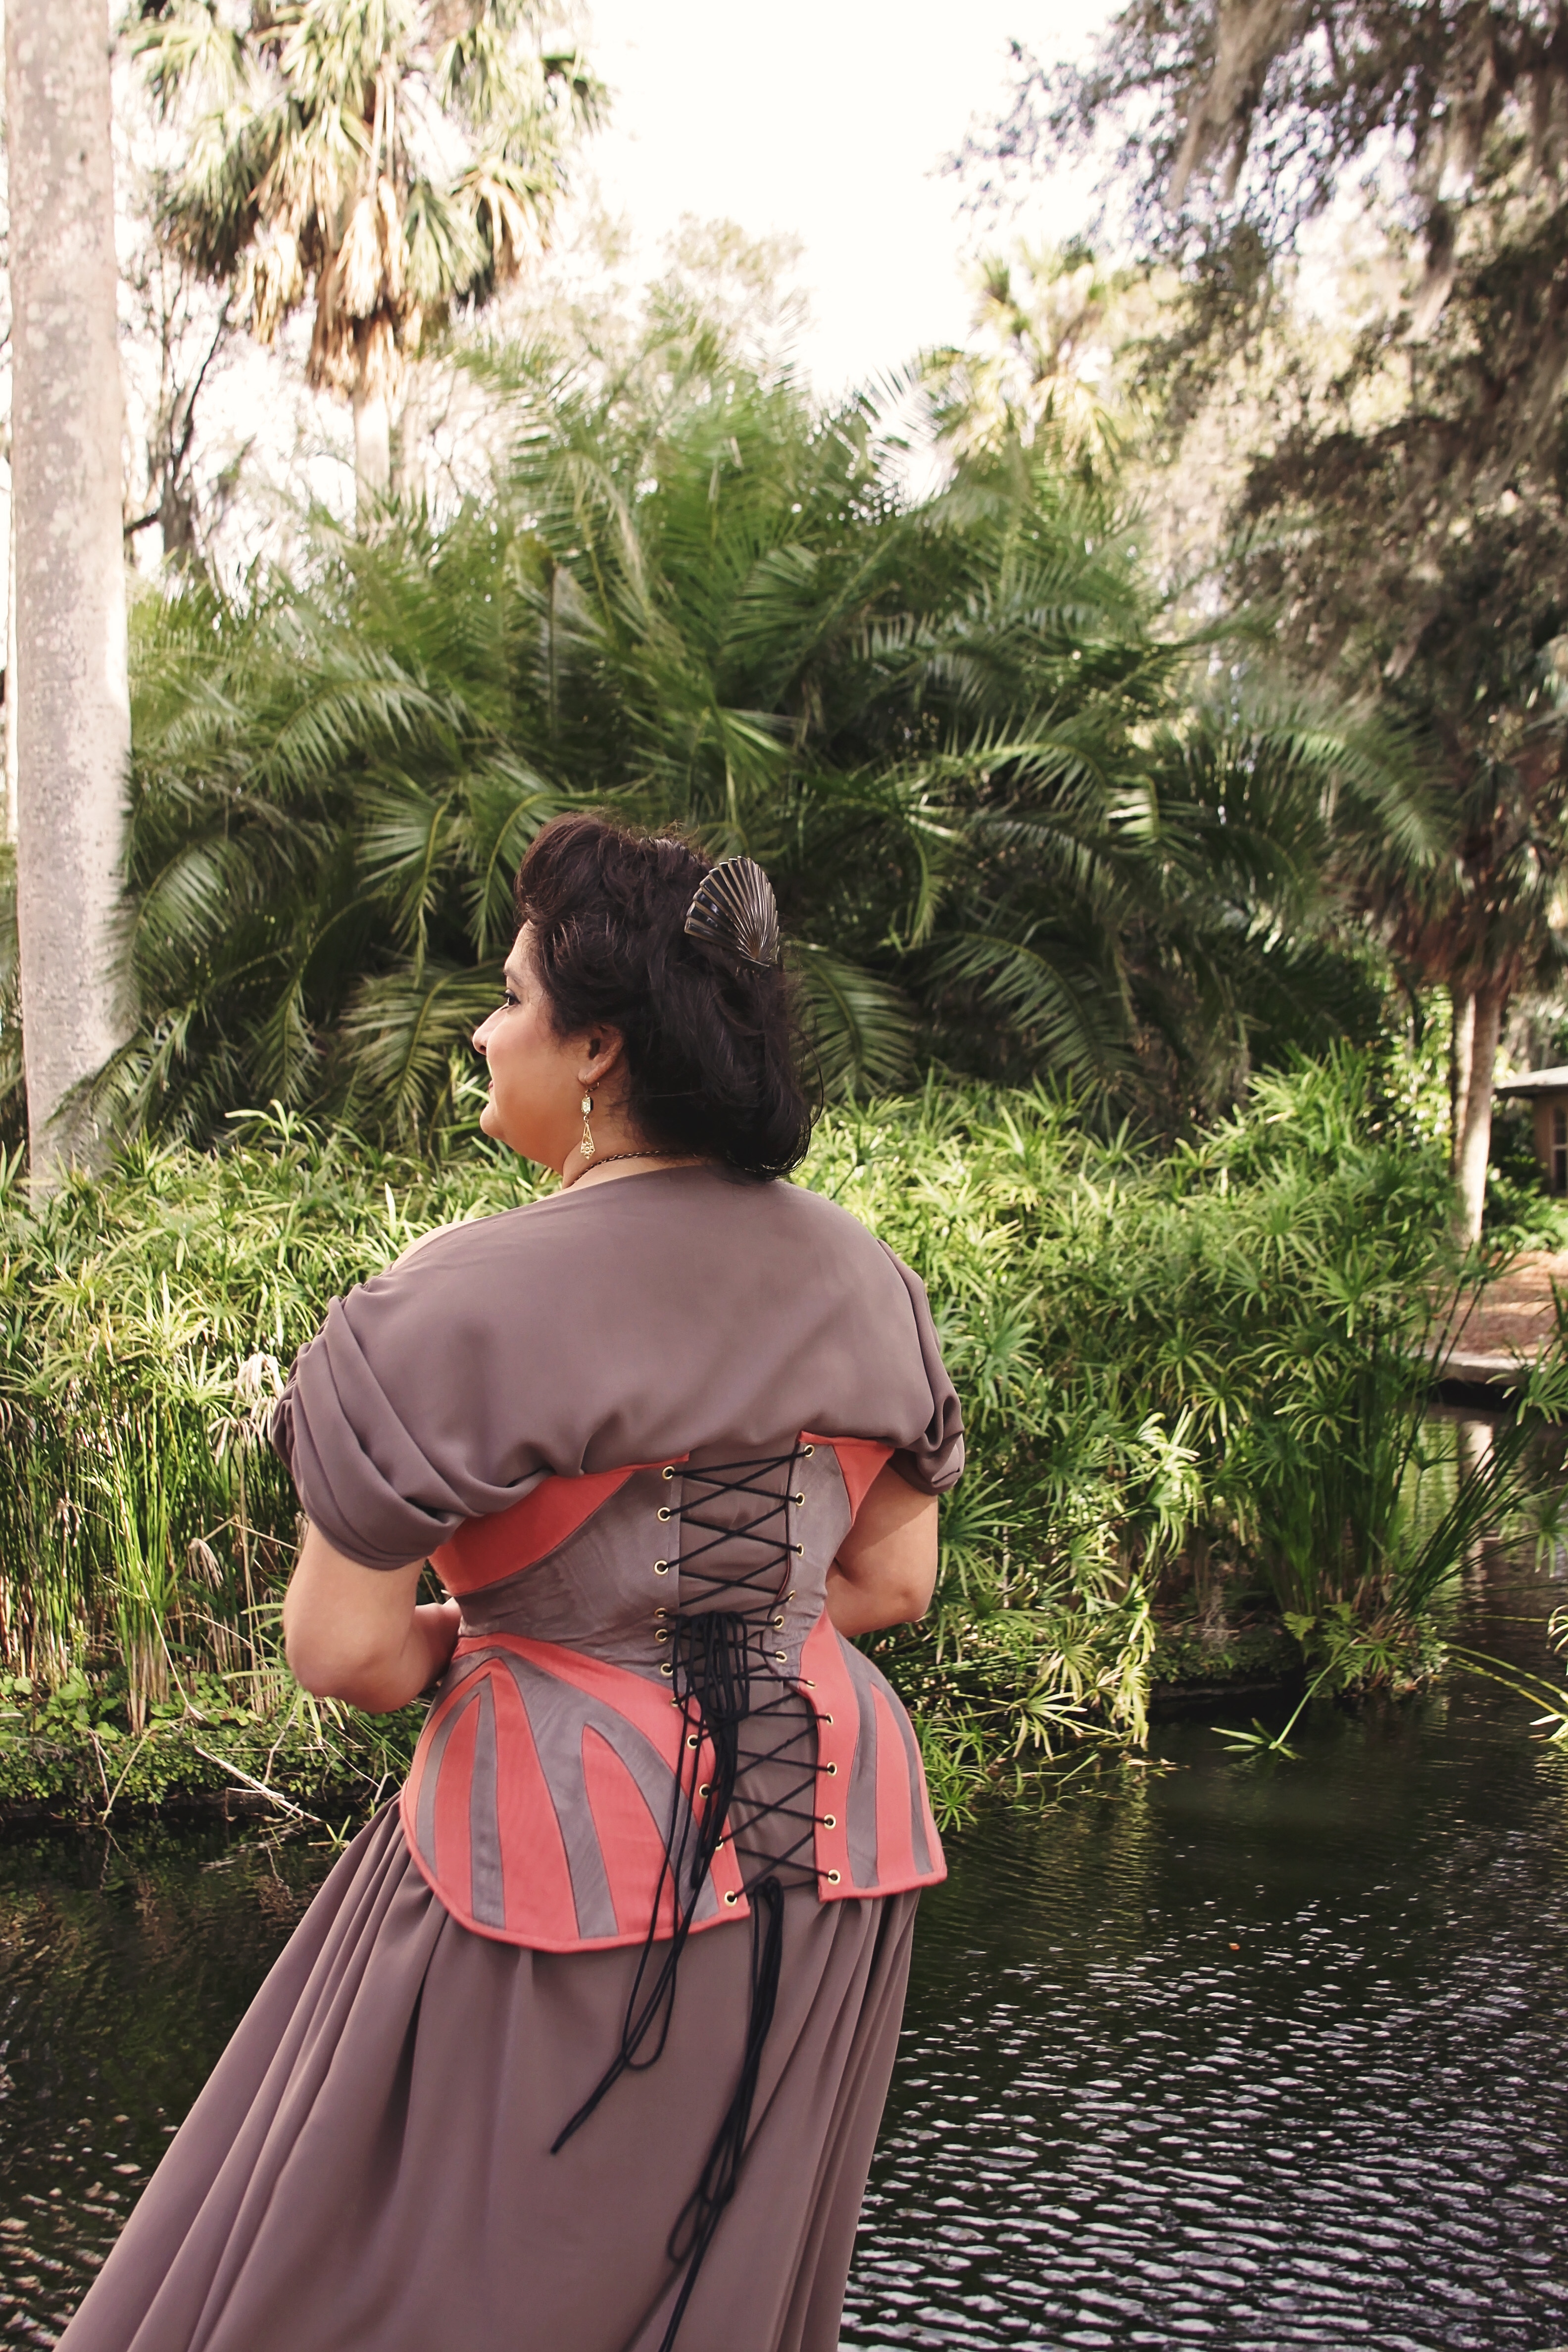
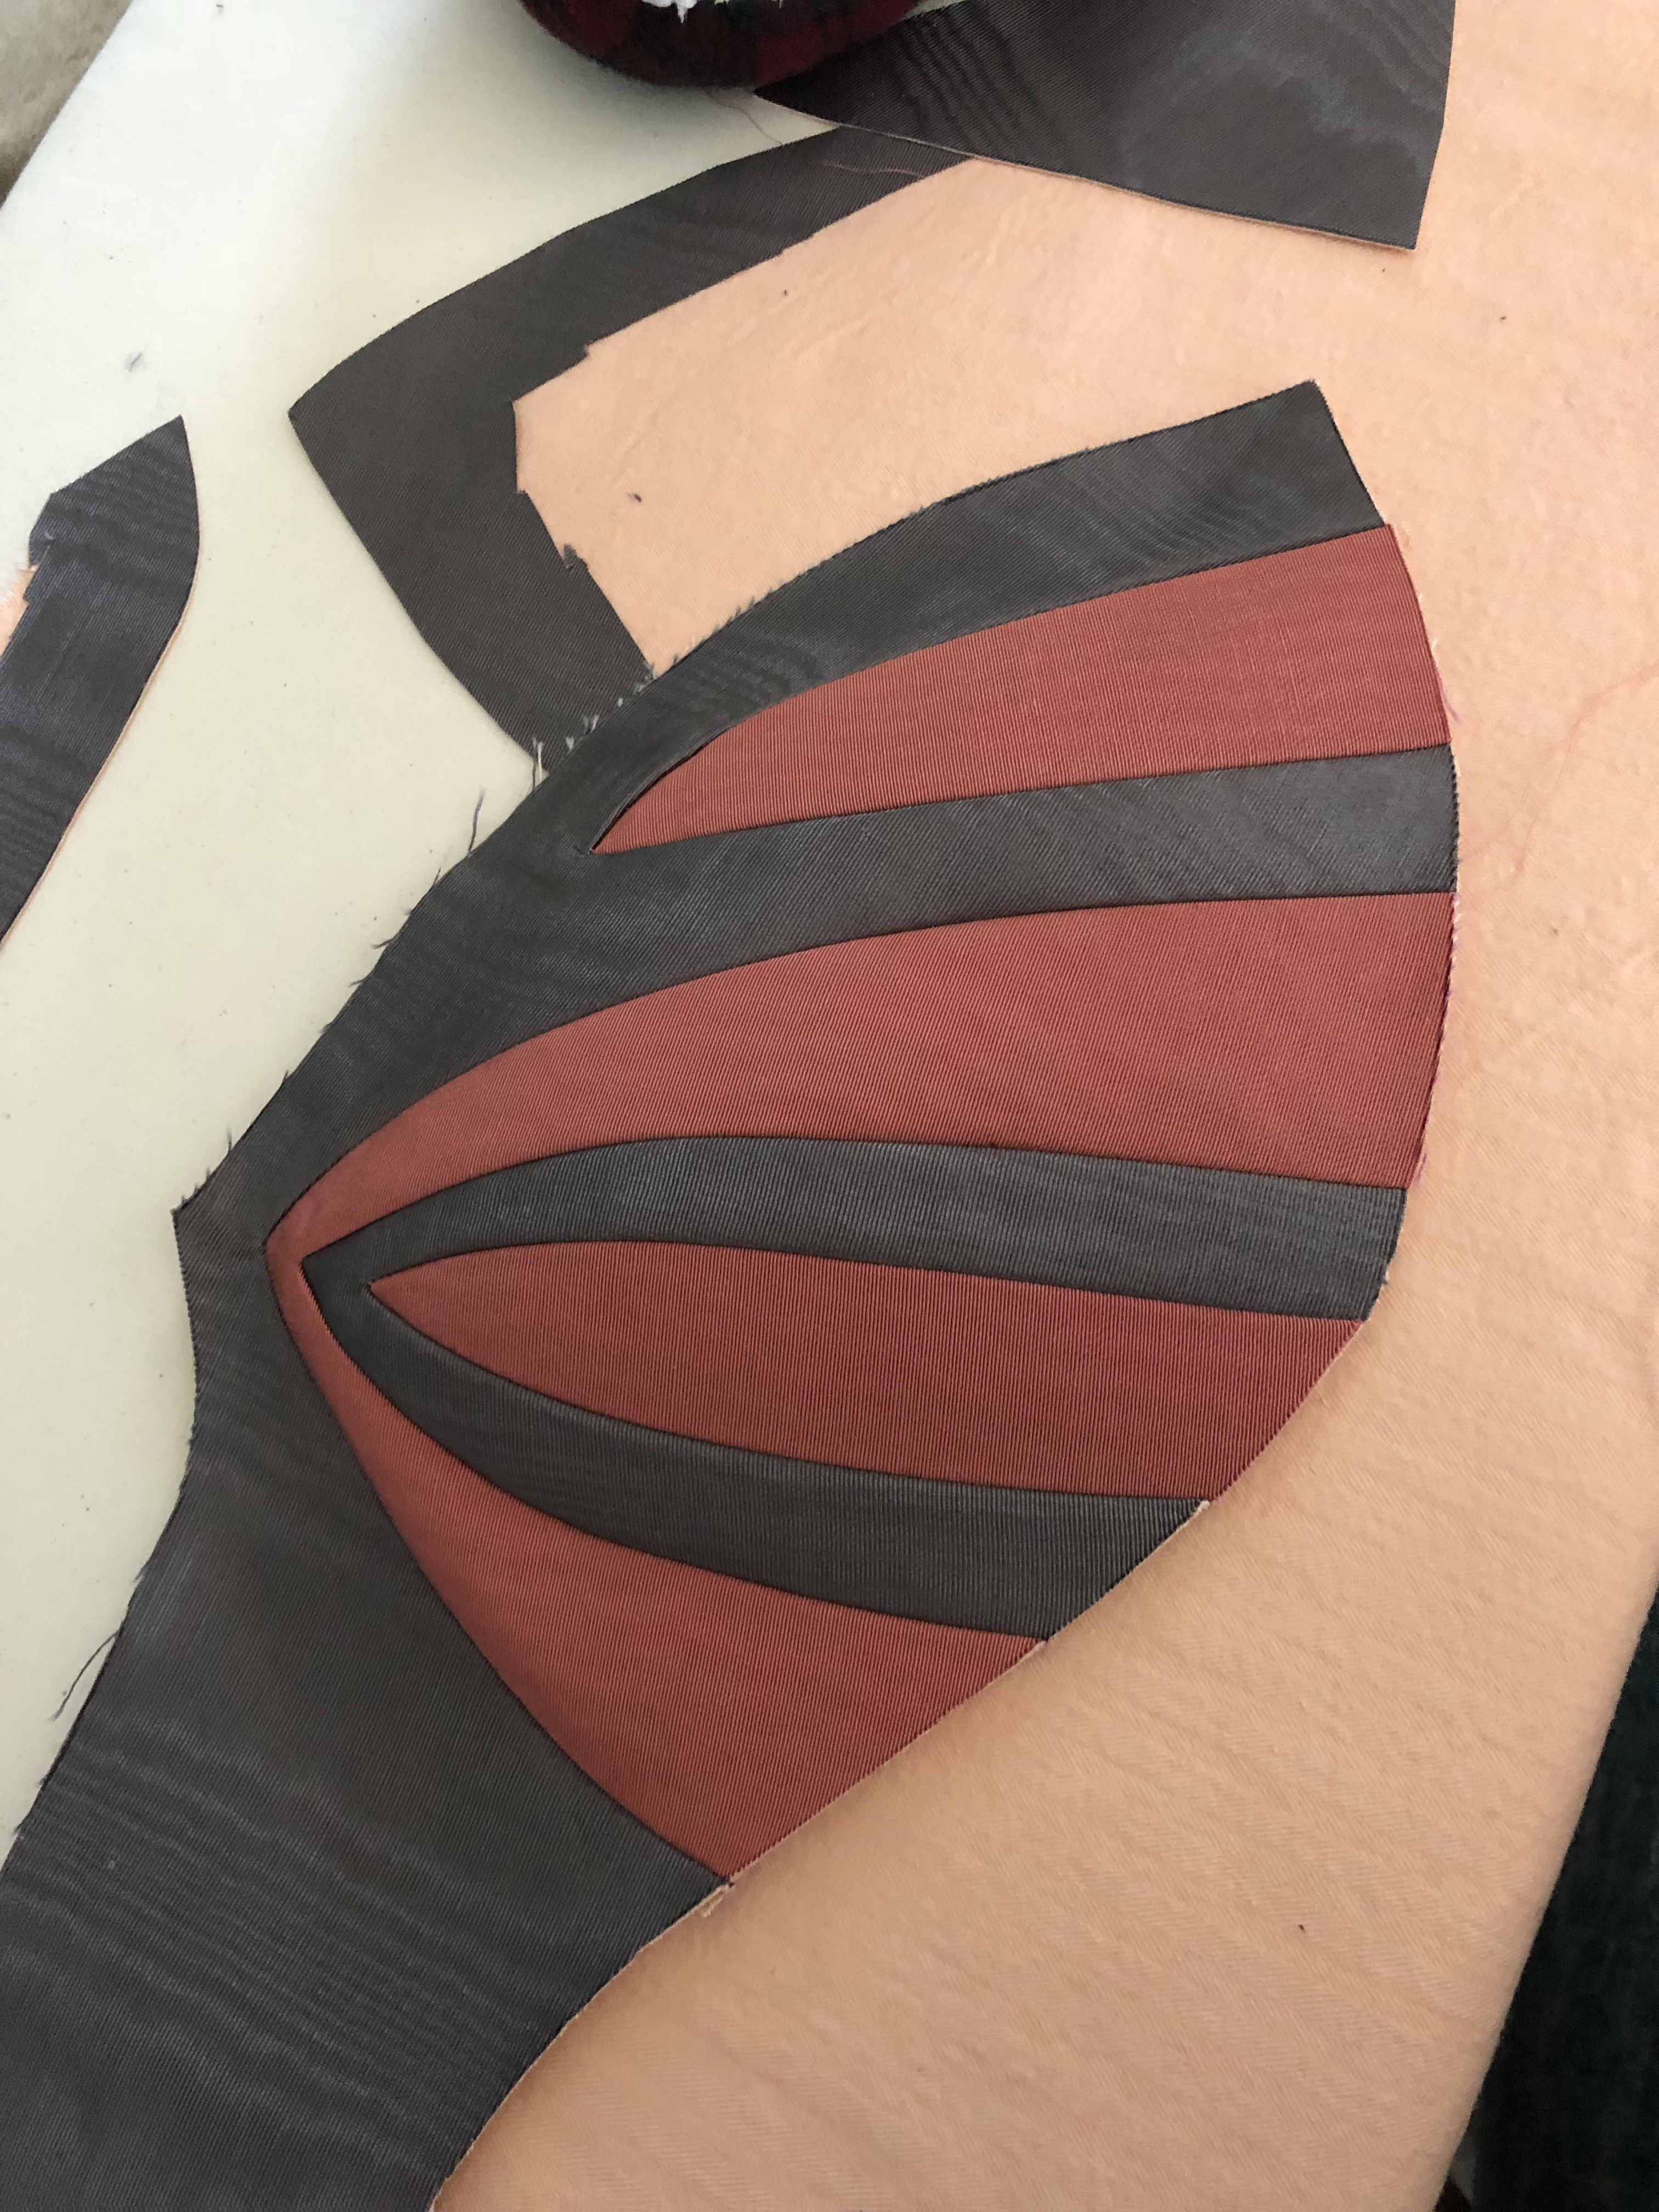
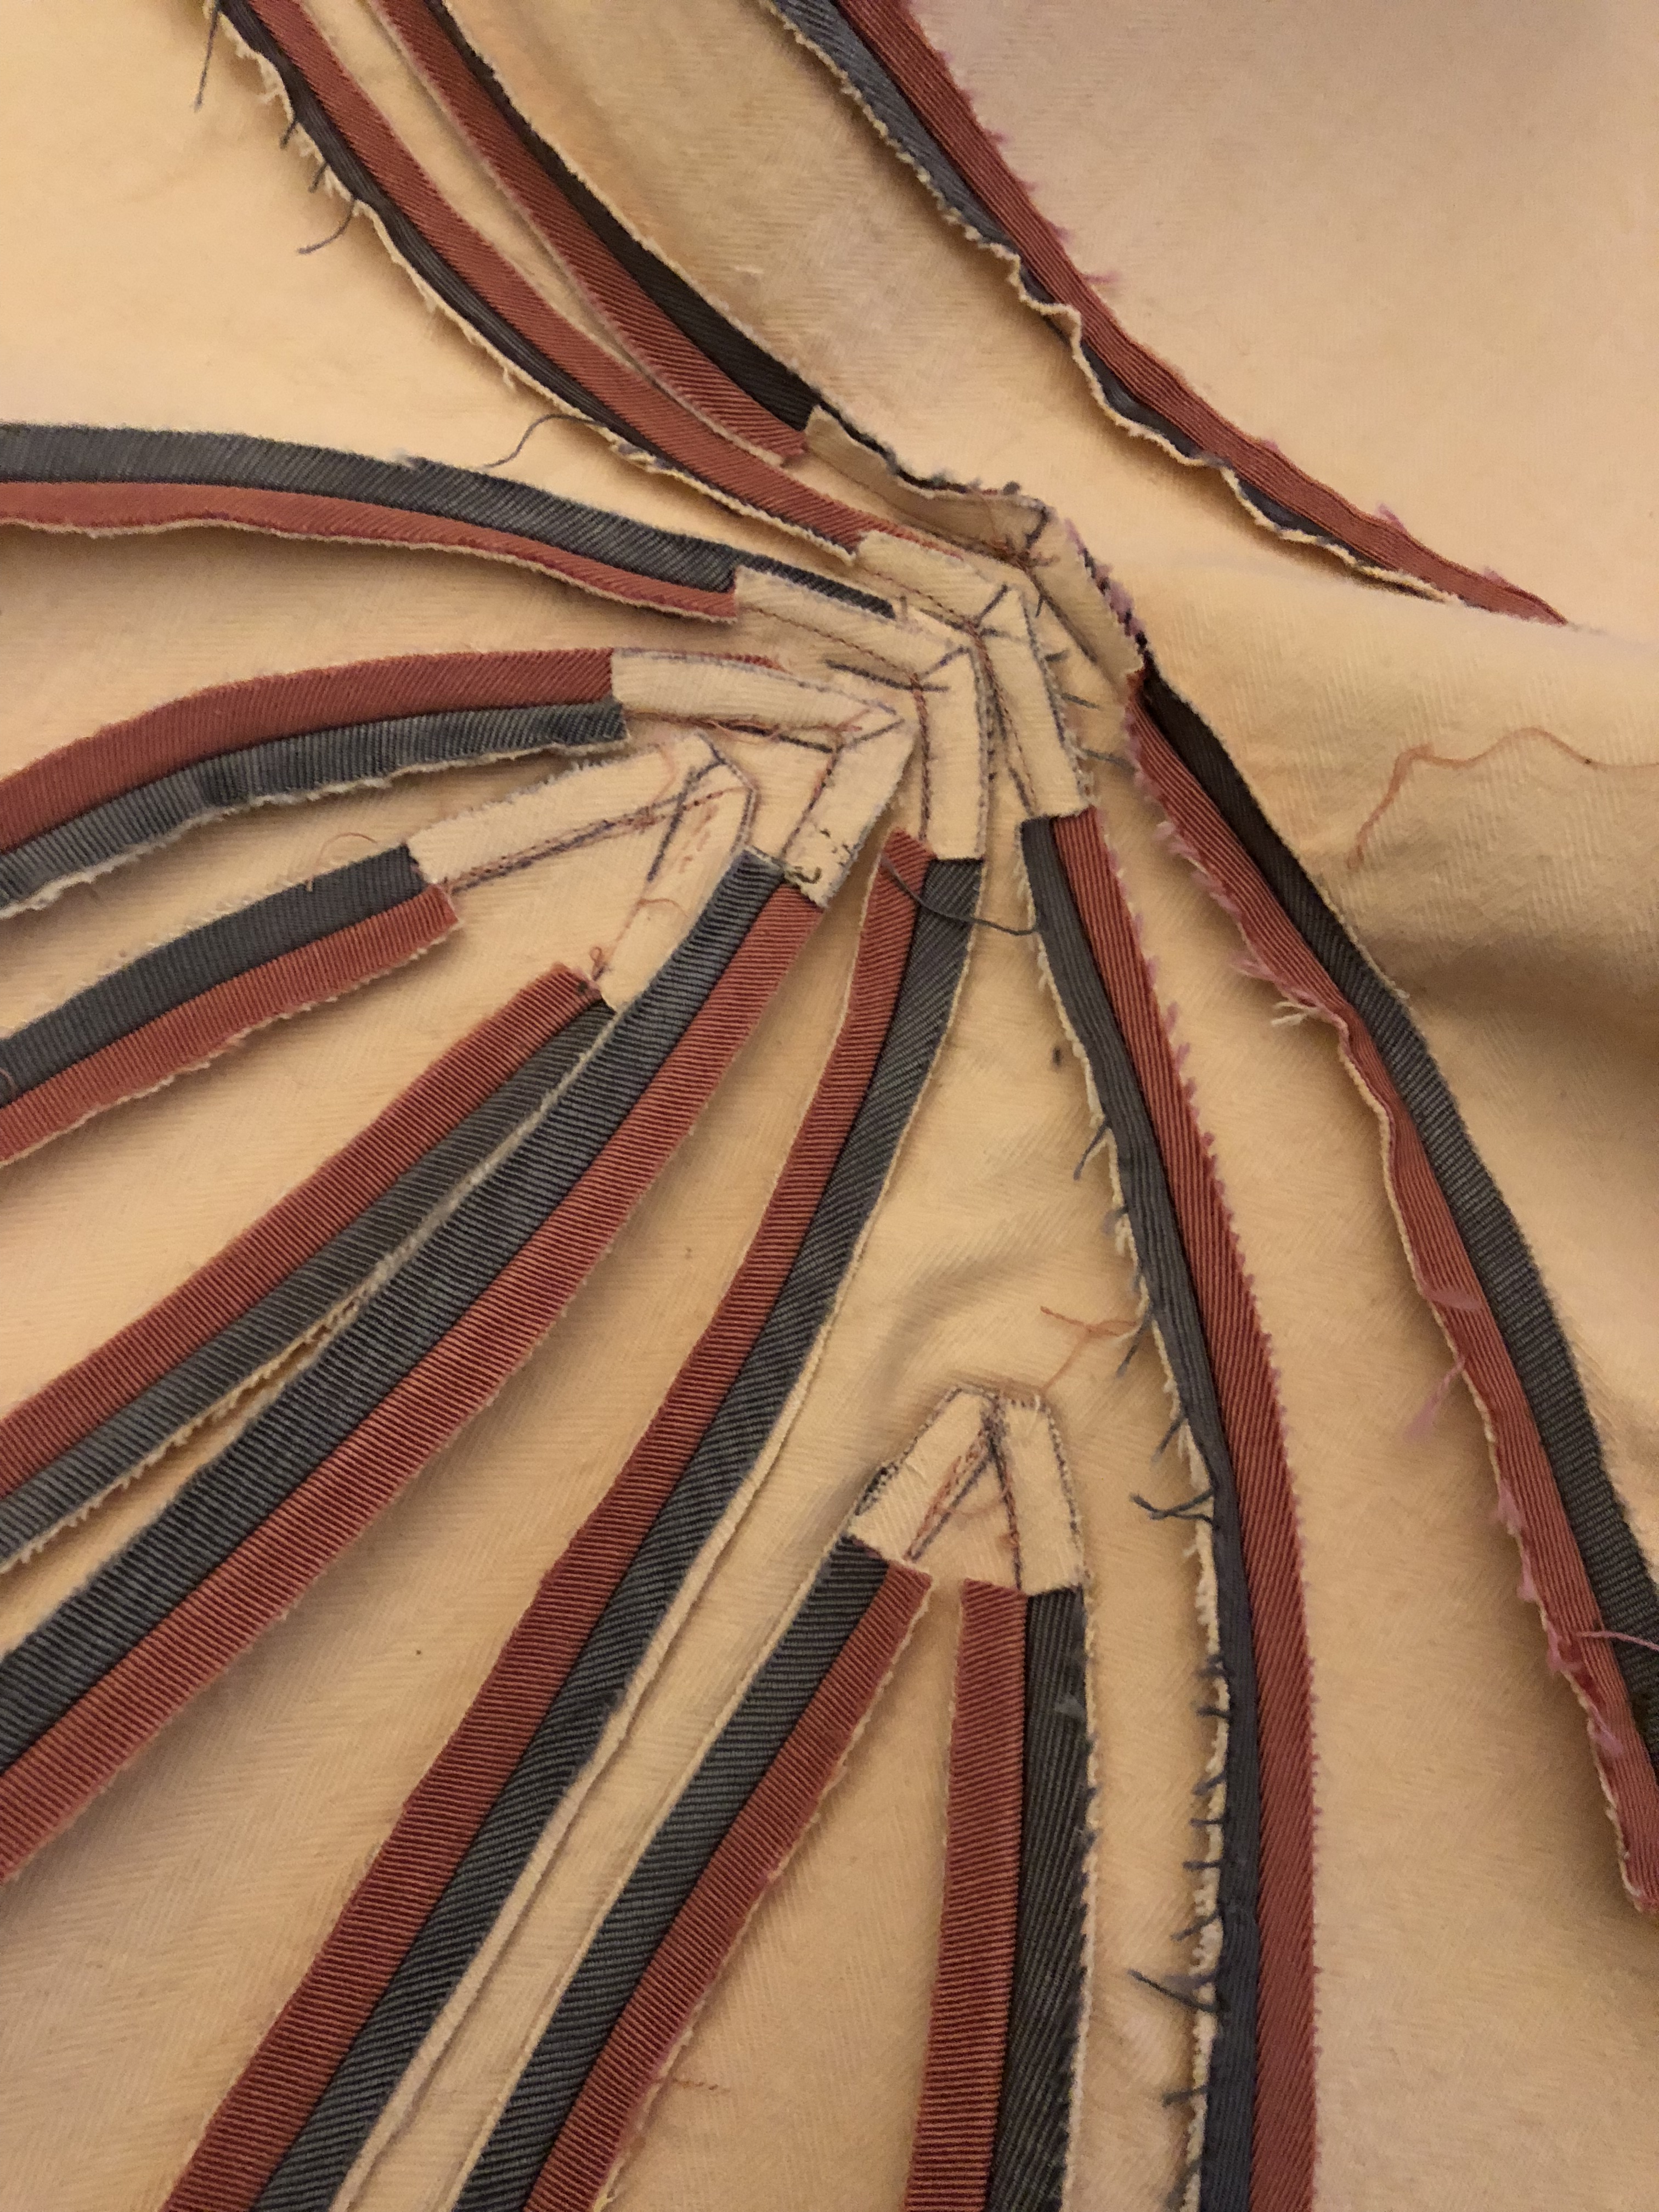
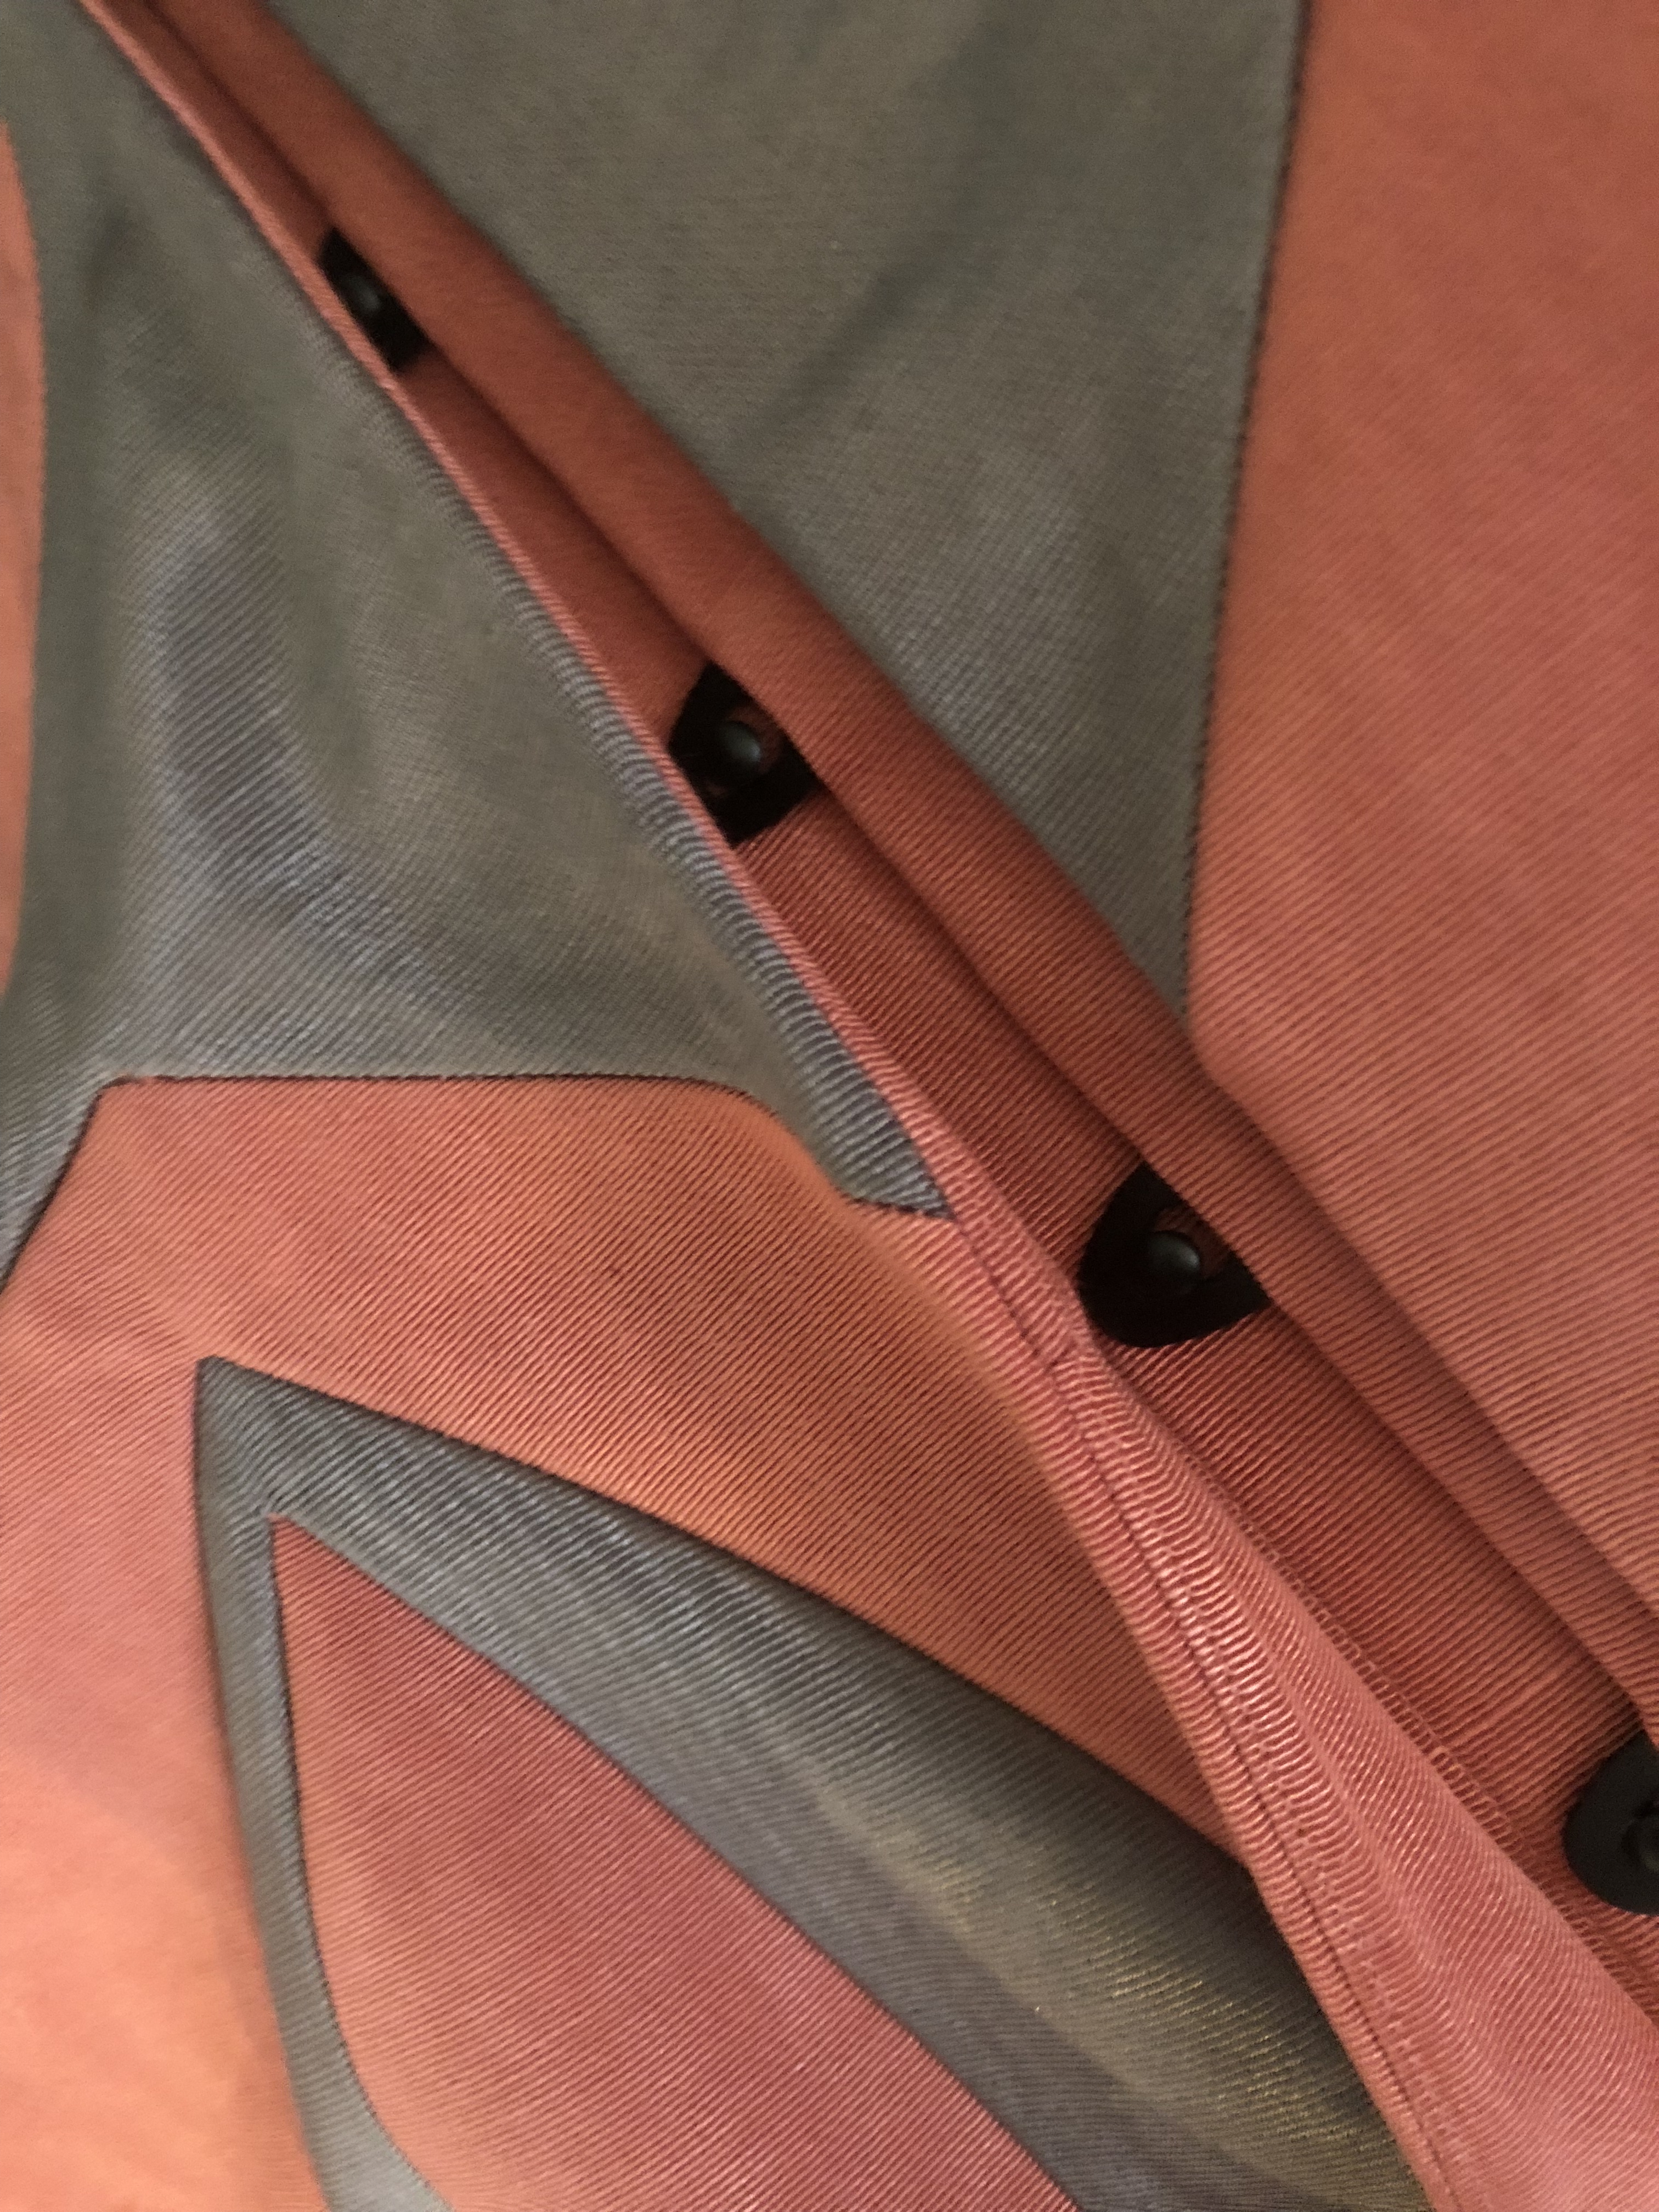
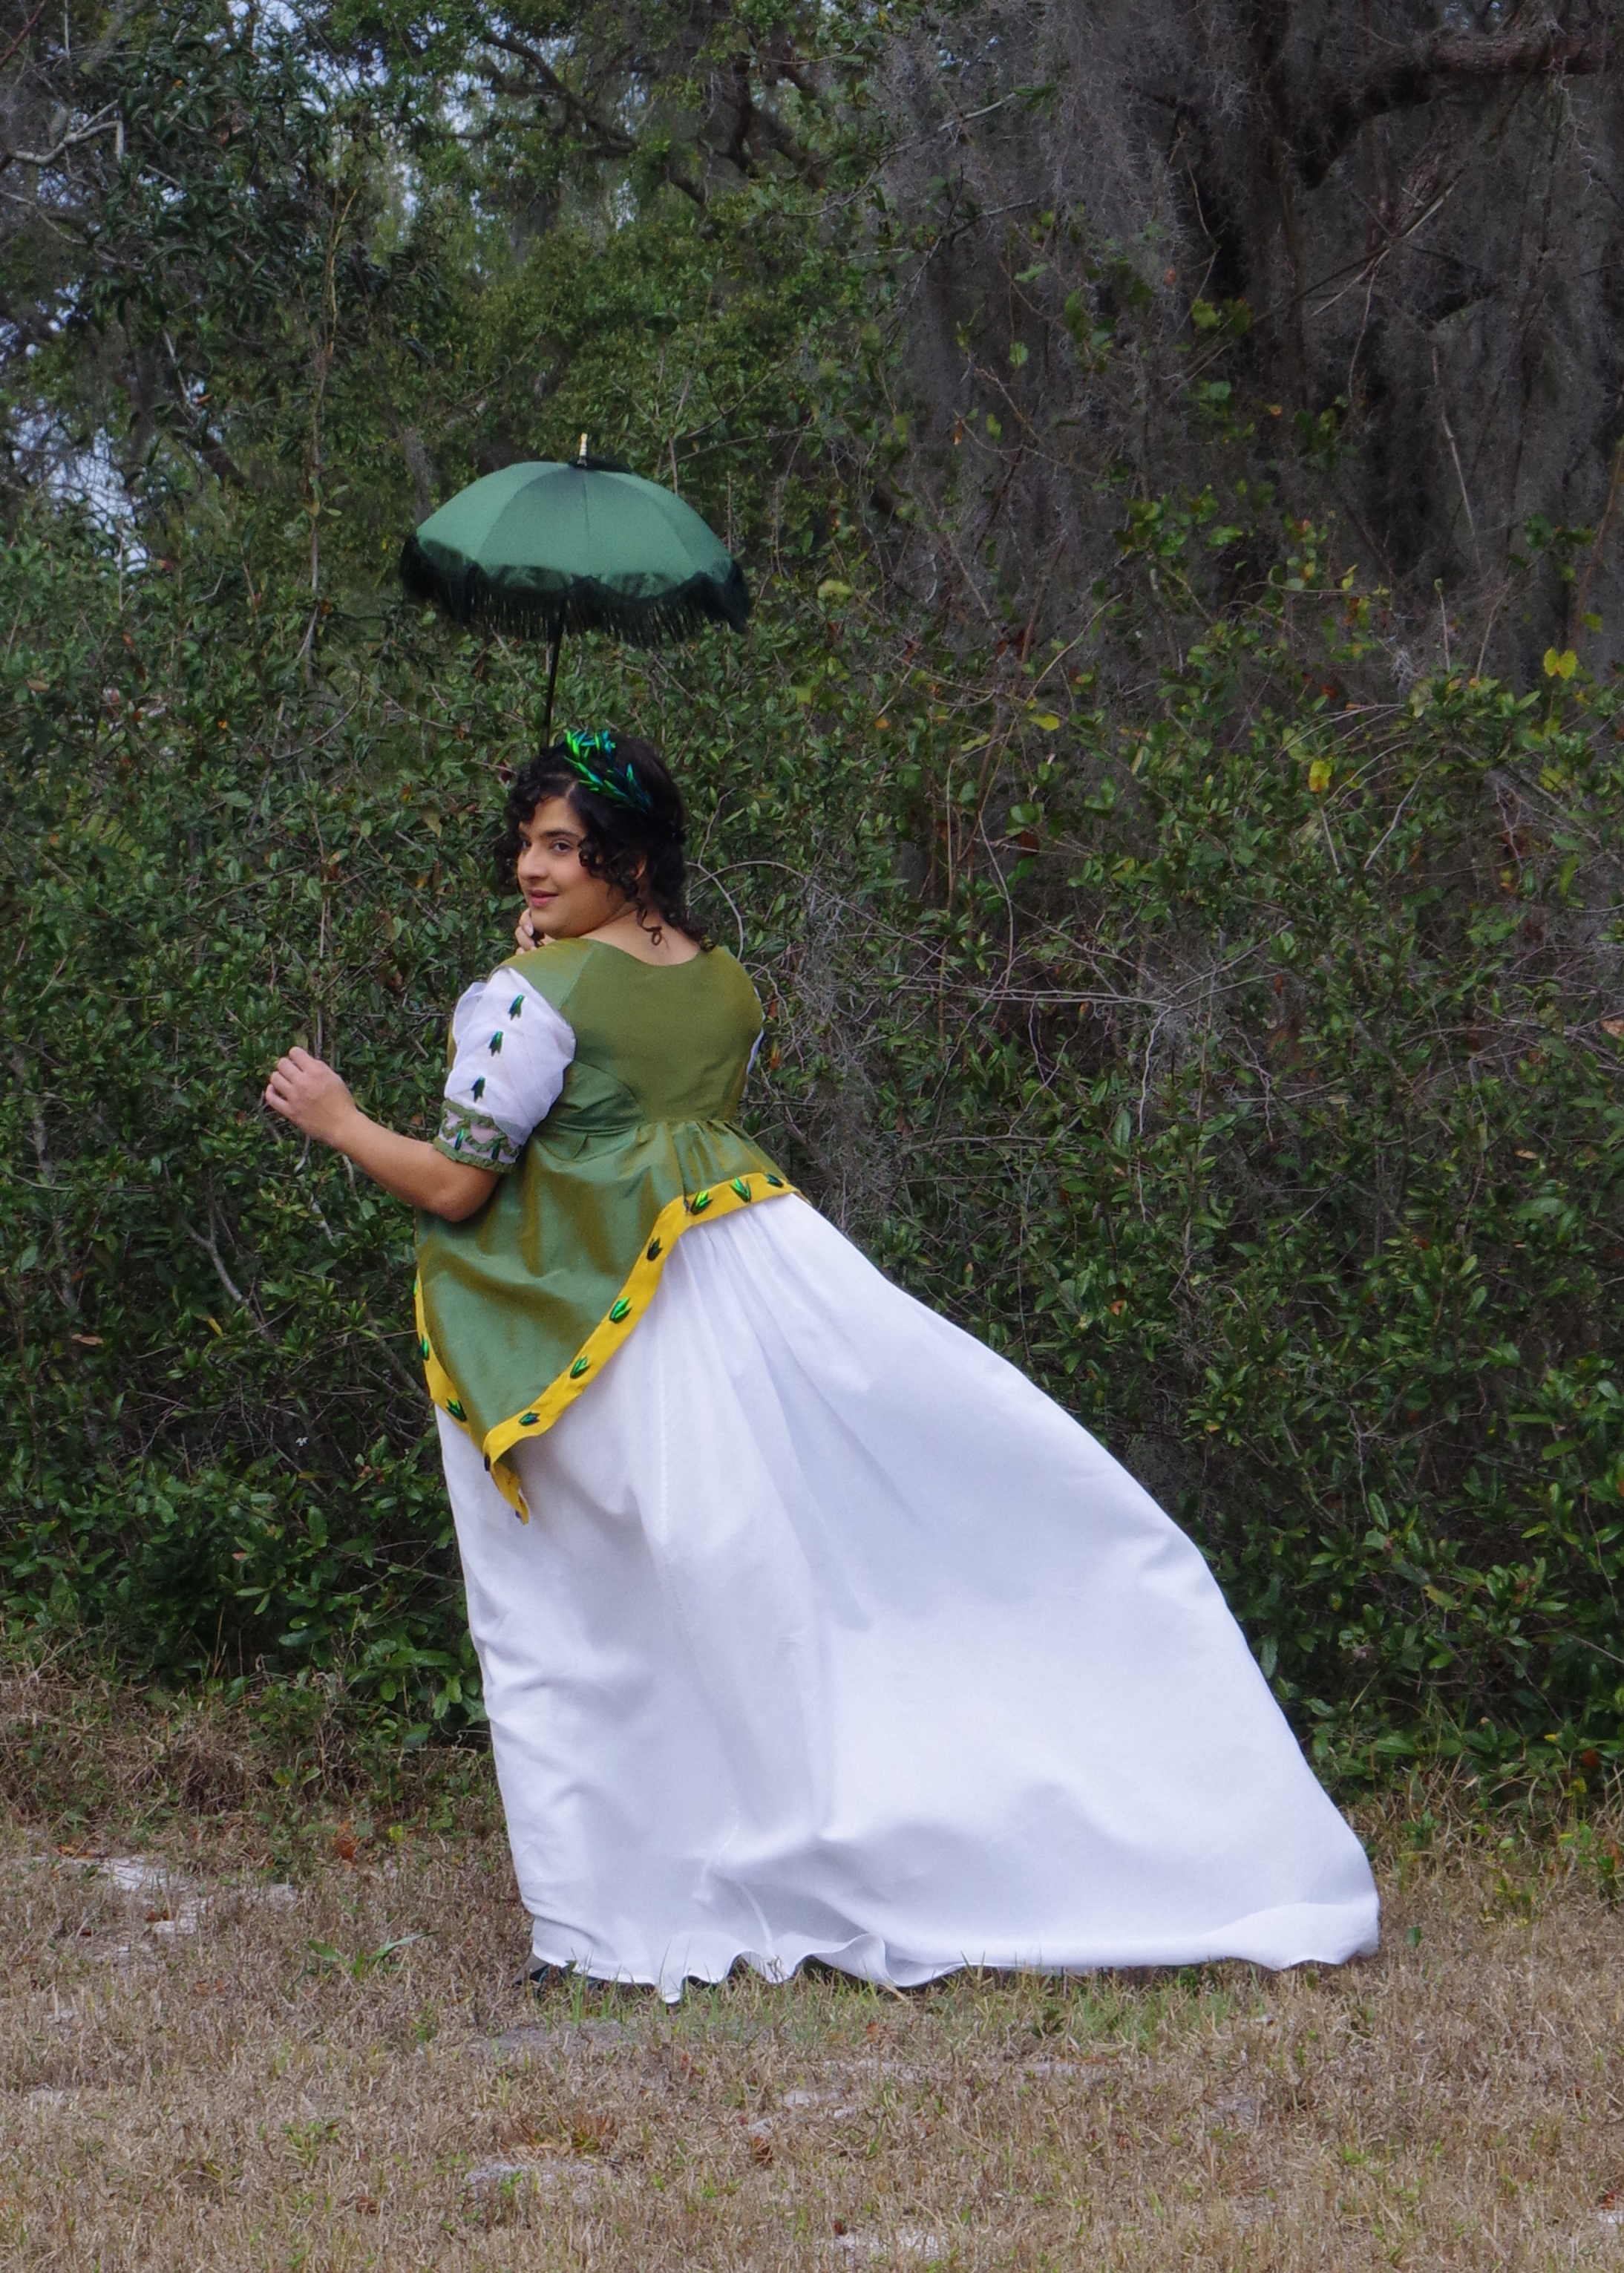
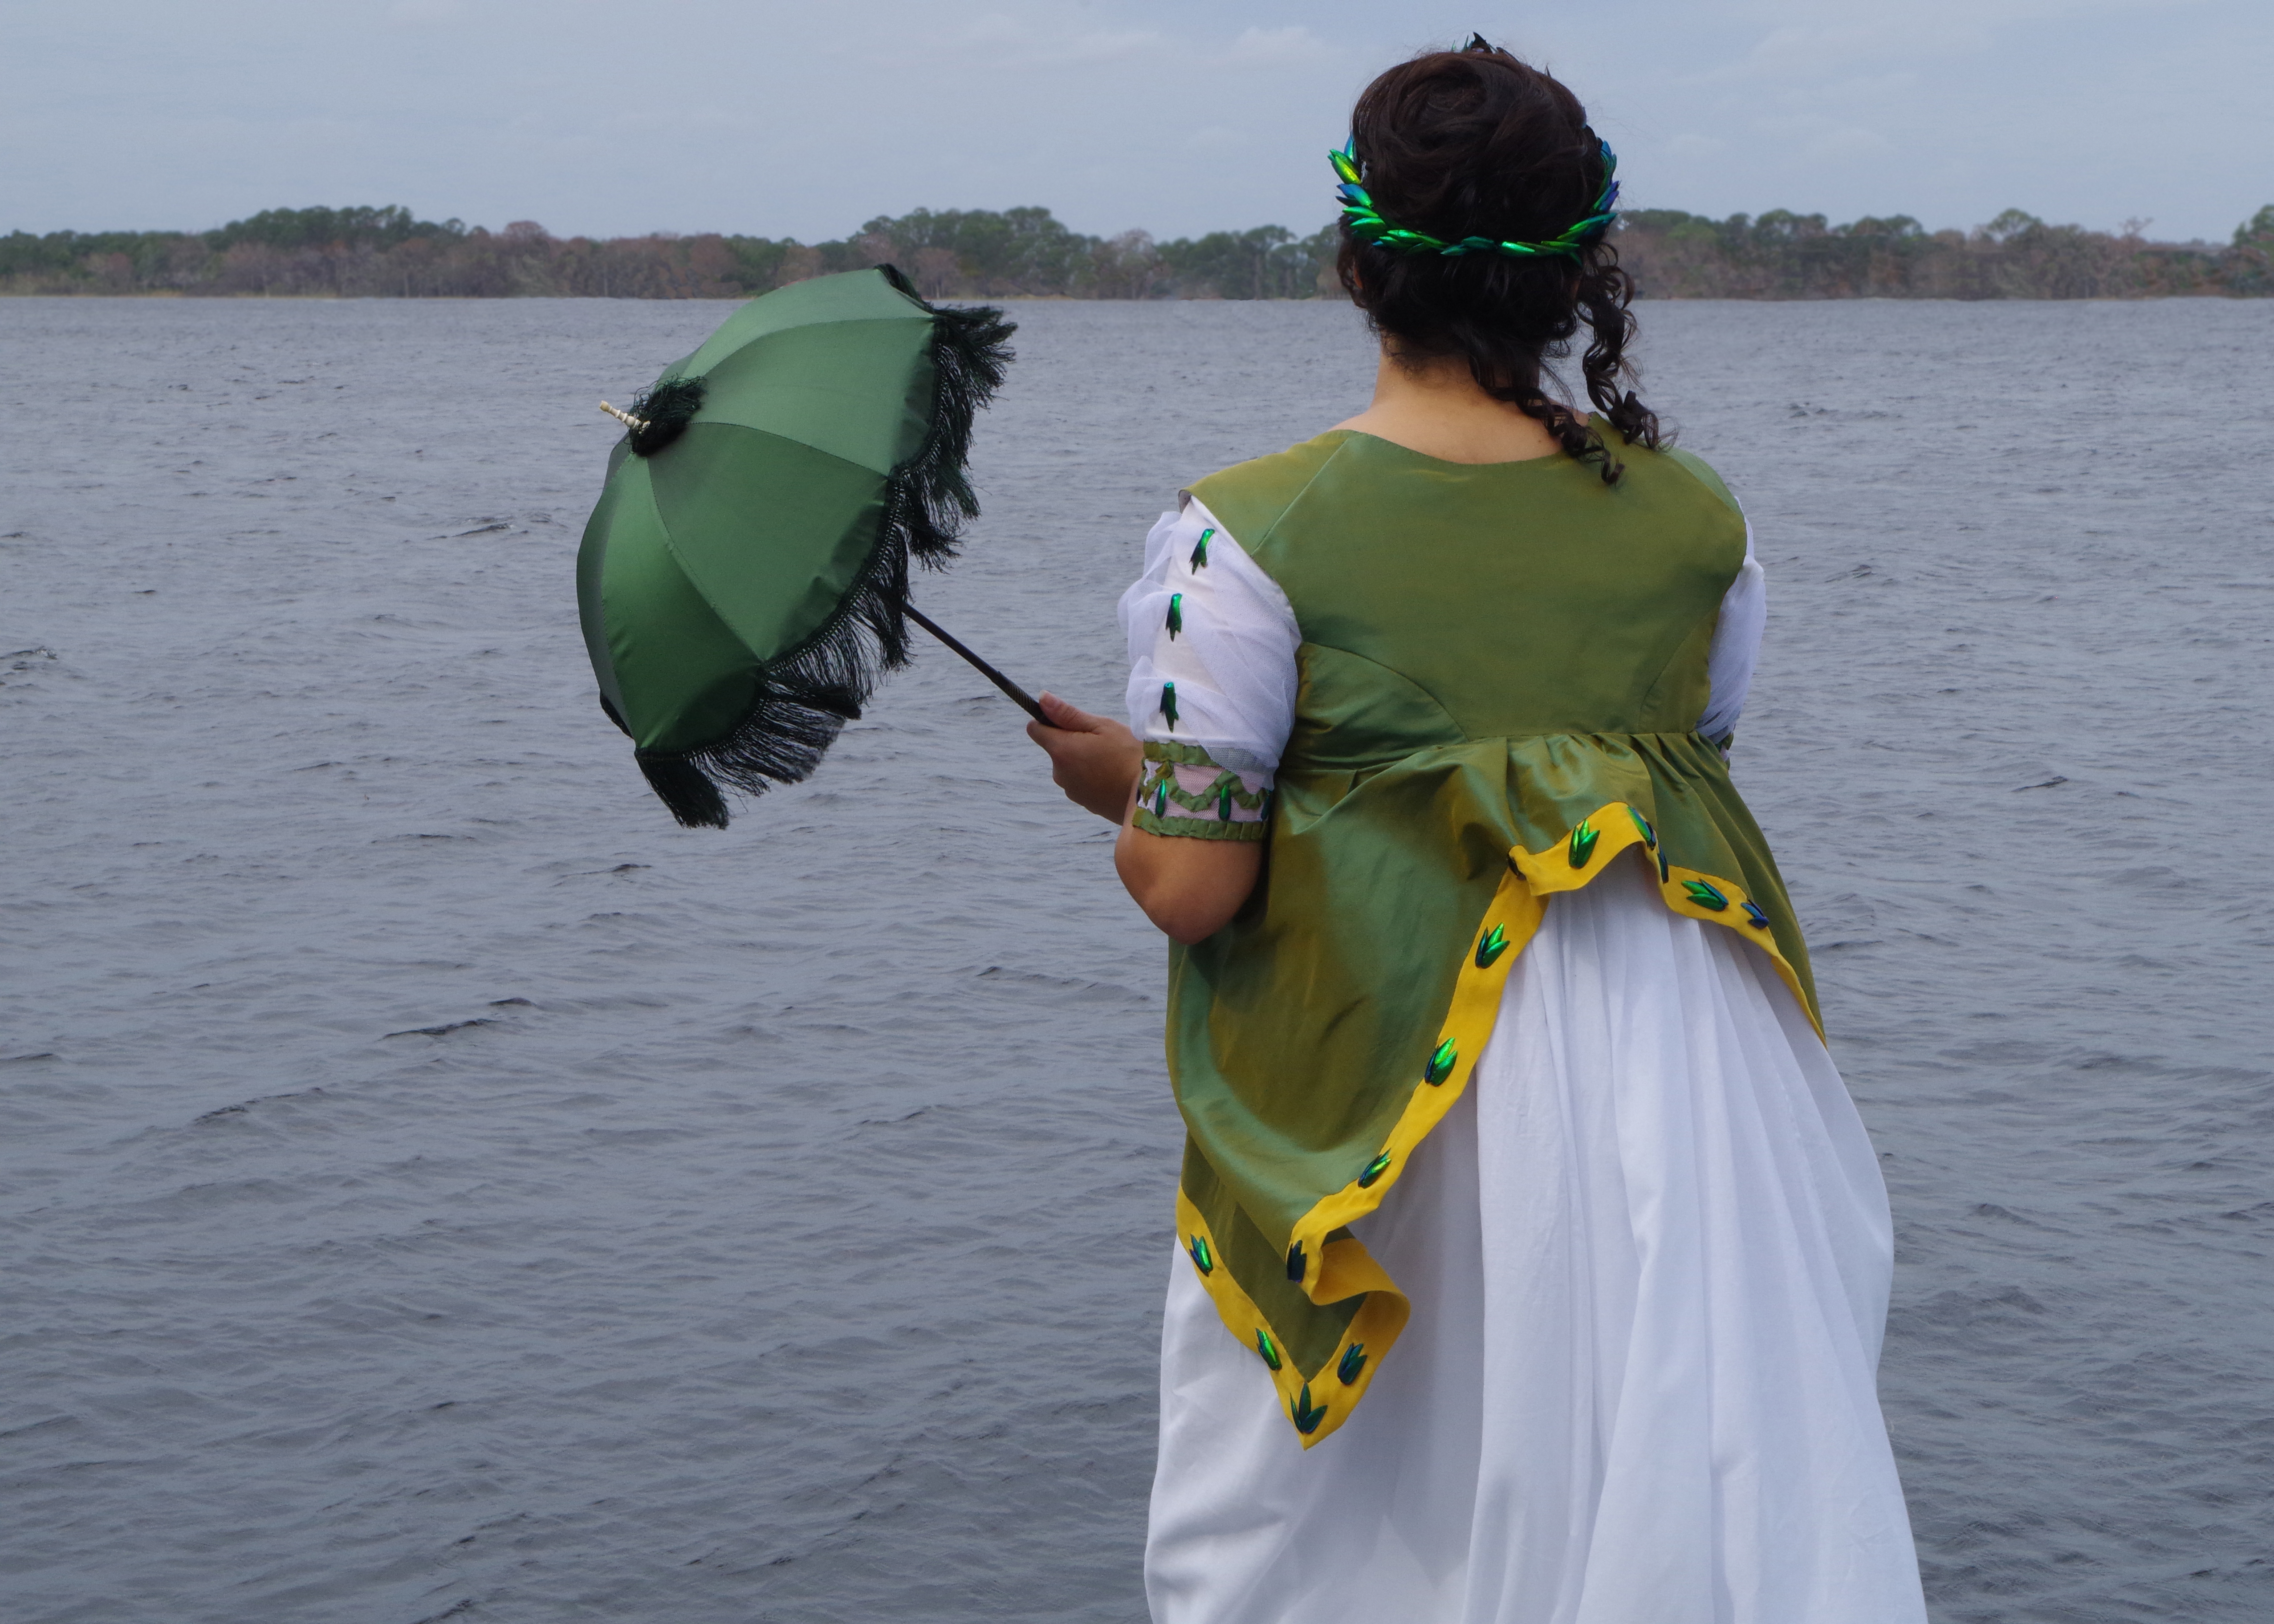
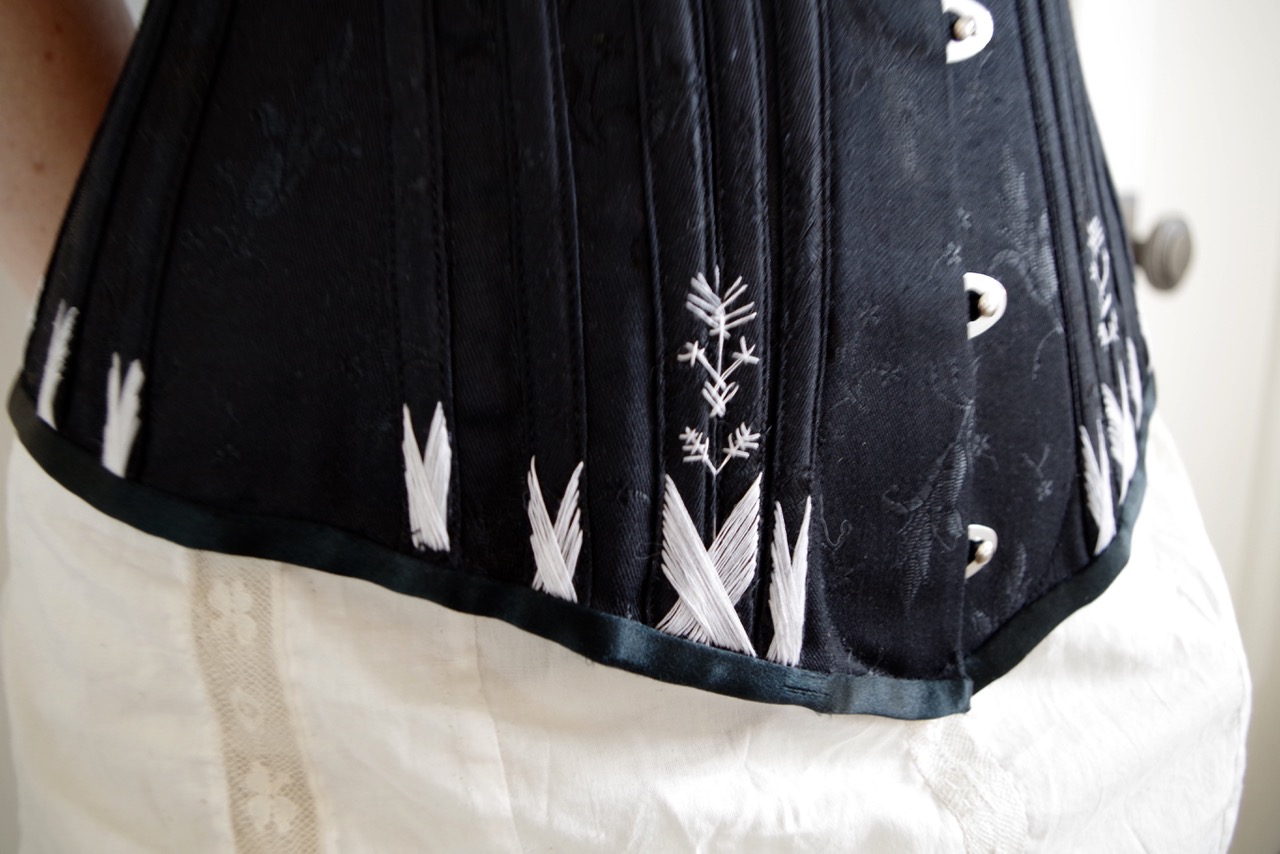
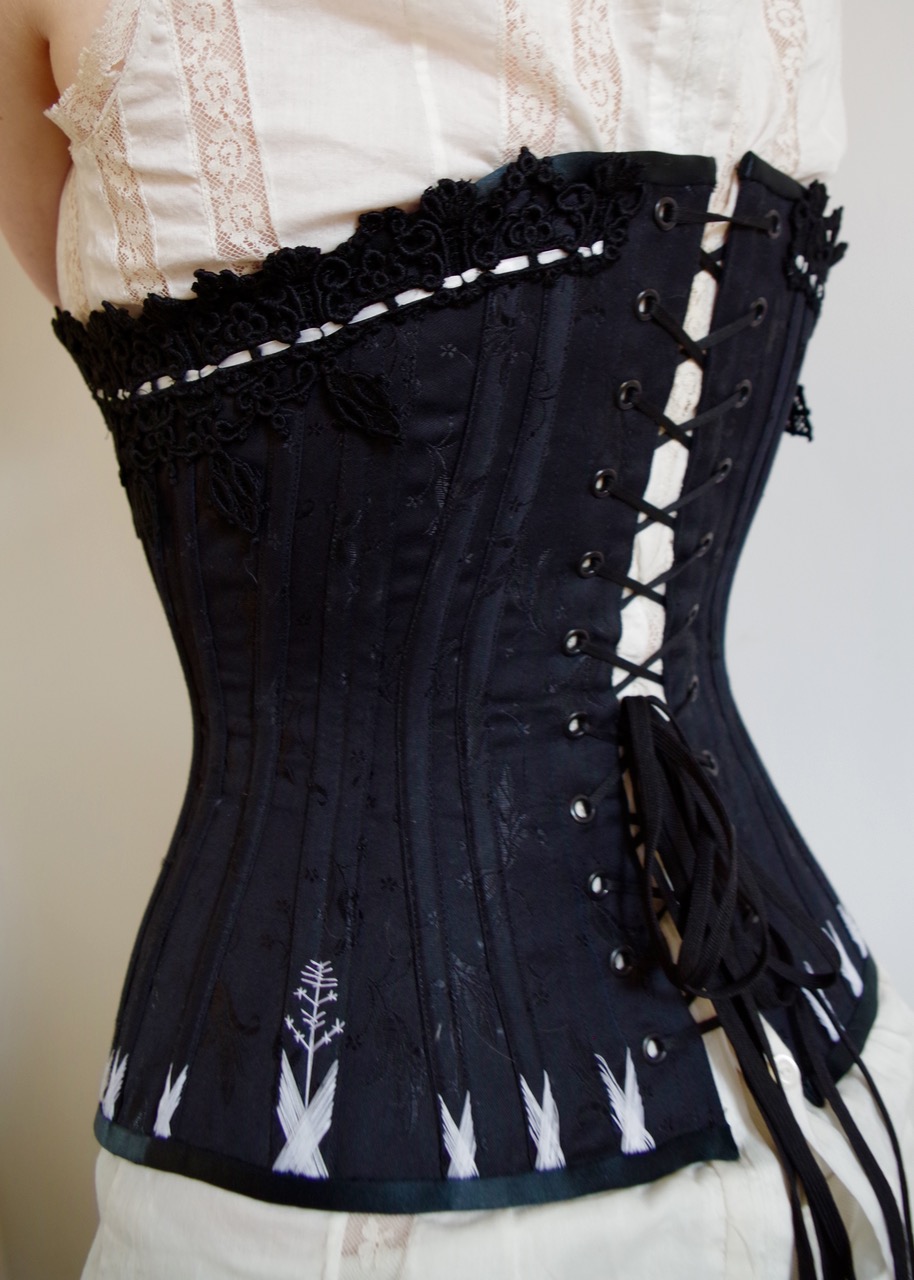
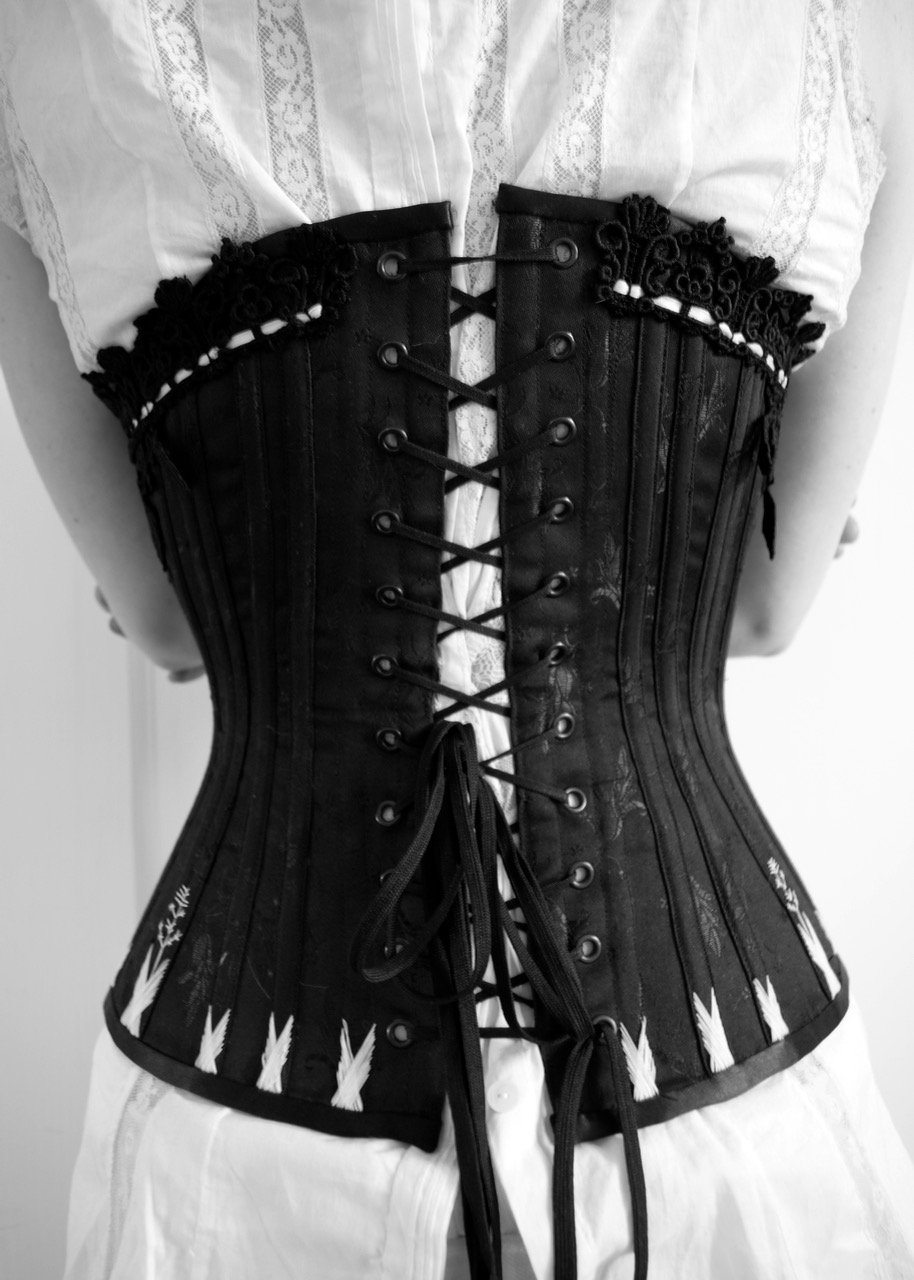
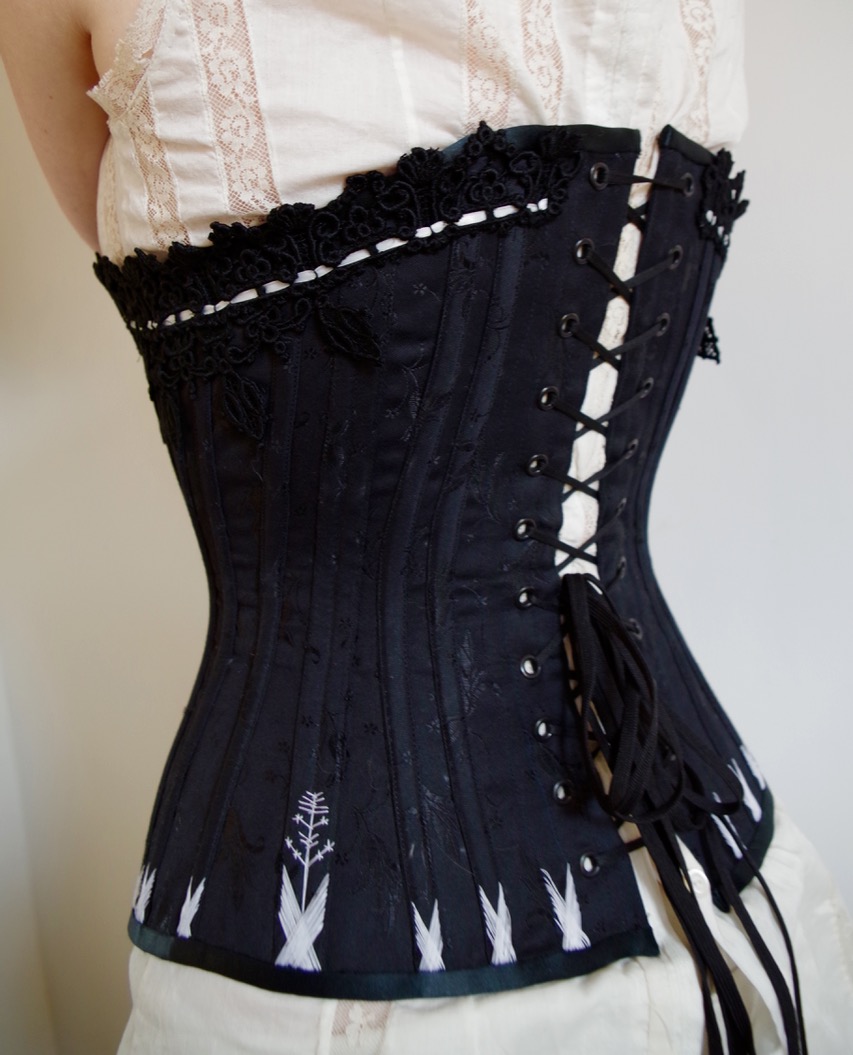
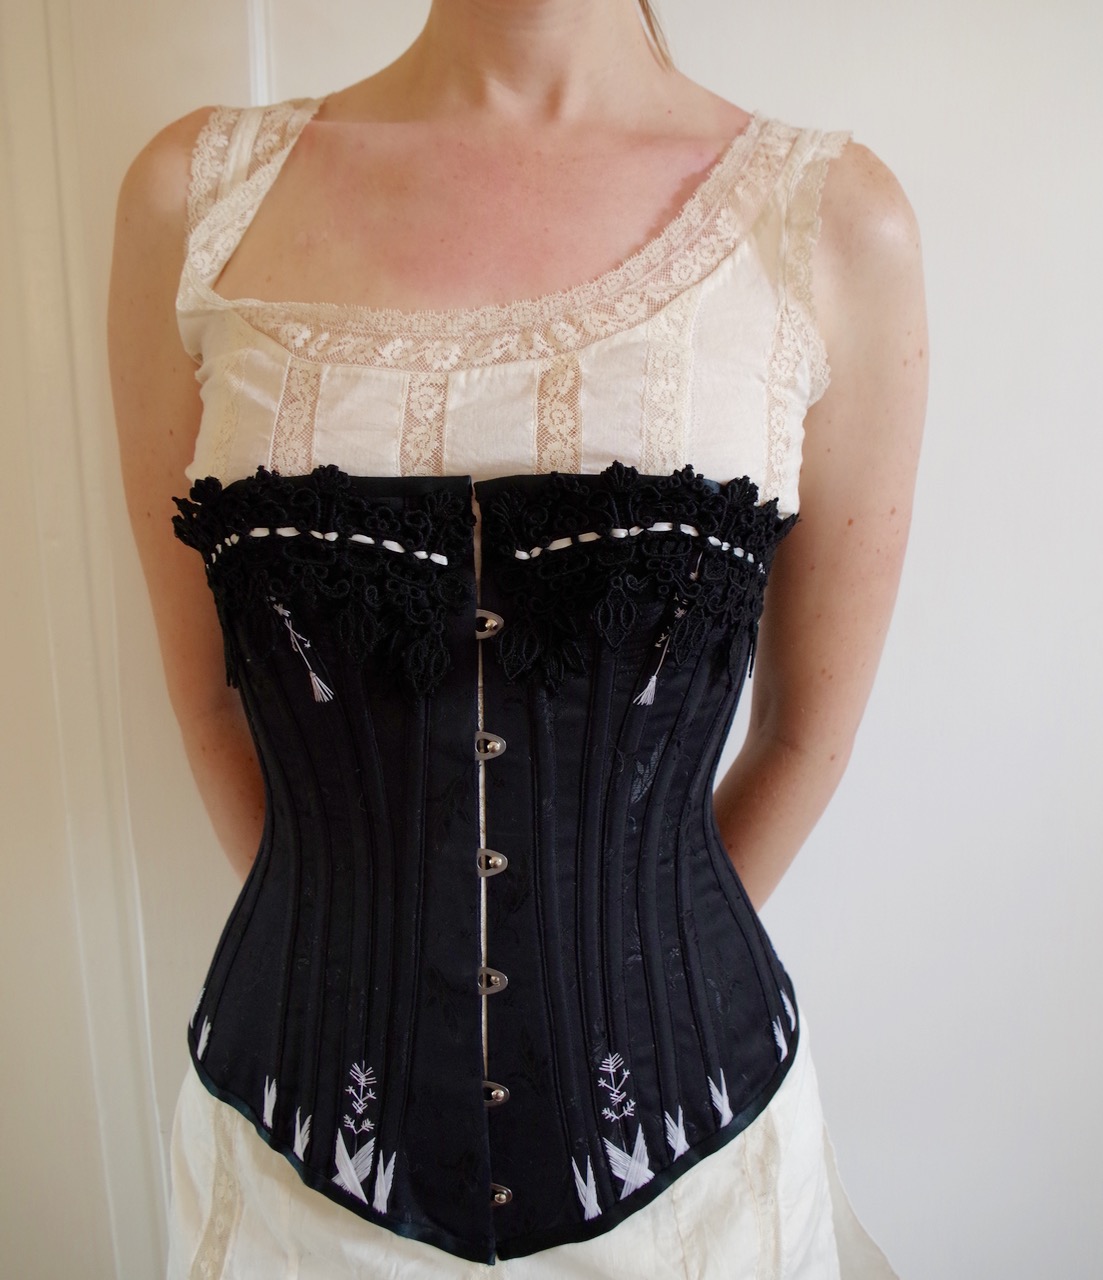
The dress is made of a light weight linen and decorated with a heavy silk twist. The embroidery for the collar, cuffs, and hem was all done using a satin and stem stitch on a frame prior to being cut out. I used the Pricilla Smocking guide from 1916 to teach myself how to smock. It took trial and error and sampling to get to the desired look. Smocking took the bulk of my time. All the sections of the dress had to be pleated using a pleater machine before being stitched together so I kept all the pleating threads extra long so I could sew first. After the seams were completed the threads were pulled to create incredibly tight pleats. The smocking stitches were sewn strategically over the dress to control the fullness. Once all the smocking was done, I could finally remove the pleating threads. A waist tape keeps the smocking tight around the waist fitted over a corset. The back is finished with a placket that closes with snaps and decorative embroidered buttons. The embroidered elements were added last. I wanted there to be no visible machine sewing on the dress.

This image has an empty alt attribute; its file name is img_2673.jpg
This is the top of the dress pleated tightly before smocking.
This image has an empty alt attribute; its file name is img_2667.jpg
The cuff while smocking.
This image has an empty alt attribute; its file name is img_2731.jpg
The interior waist tape and back closure.

Foundations Revealed 2019: Architecture

The intriguing mix of Neo-Gothic Art Deco at Architect Milton B. Medary‘s Singing Tower inspired the creation of tea gown with matching under gown and overbust corset. Bok Tower Gardens was the dream of Edward W. Bok the editor of Ladies’ Home Journal from 1889-1919. The sprawling grounds were designed by Frederick Law Olmsted Jr. the son of the renowned designer of the Great Colombian Exhibition in Chicago.

I took inspiration from the repeated arches and strong graphic lines of the Tower. The of pink Etowah marble and gray Creole marble inspired my choice of textile. The main silhouette was taken from Edwardian home wear, Bok is credited with the invention of the idea of the modern living room. The tea town was an informal garment worm when entertaining in the home. The corset would never show of course but I was going for historically inspired not historically accurate. Overall I wanted the final look to reflect the Southern Gothic gardens.

My pictures were taken on the 90th anniversary of the Singing Tower February 1st 1929. Edward W. Bok was laid to rest at the foot of the Singing Tower January 9th 1930.

My main fabrics are hot rolled rayon/cotton moiré. I used a synthetic chiffon for the under dress. The corset pieces are fused to washed cotton coutil using wonder under. To pattern the corset I used a basic corset block that fit me well and cut all the pieces out of stiff brown paper with no seam allowance. I carefully taped the pieces together to create one half corset. I then sketched out my lines to mimic the arched forms on the Singing Tower. Once the pieces were cut out I traced them on the fresh paper and trued my curves adding 1/4″ seam allowance. The corset self was then sewn together on my trust Singer Featherweight 221. The tricky part was making a corset with no visible boning. The lining has 16 bones placed in between the layers. I then flatted the lining to the self at the top and bottom edge after setting in my busk placket and clean finishing my center back. Once the two layer were secured I stitched in the ditch in all my seams starting and stoping after each bone. There are still some wrinkles but the smooth effect was worth it. There is one visible stitch line behind the grommets that was a necessary concession. The tea gown was made using a heavily altered Truly Victorian pattern. I drafted the sleeves, belt, and the collar and cuffs to match the Watteau pleats. The matching underdress was made from 2 layers of French seamed chiffon and has interior elastic to keep it snug to the body but not visibly fitted. The construction was all about using hidden elements to support the visible design.

See more photos below.

Foundations Revealed Competition 2018 Dress Diary

IMGP0938SophiaKhan2

The return to nature in post-revolution French fashion immediately came to my mind when brainstorming for this gown for the Foundations Revealed 2018 competition. Although stays were still present in controlling the female figure the sheer natural style of dress was incredibly different than what came before it. This style of dress was very short lived much like the sternocera aequisignata beetle that I used as embellishment.  I wanted to create something that was a little  inspired by the form of beetles. When looking through the Neoclassical styles of the Directoire period 1795-1799, I found many beautiful colored fashion plates of white gowns with pops of color. I found two dates on my main inspirational fashion plate from Costume Parisien one of 1799 and one of 1804, although I cannot find the original source (darn you pinterest) I am inclined to think it is the earlier date comparing it to other fashion plates from that year. From that jumping off point I decided to create a sleeveless spencer over a white cotton gown that mimicked the wings of  a beetle. I looked at many different 19th century examples of beetle wing embellishment and jewelry. I decide to not use any jewelry but instead create a laurel wreath inspired crown constructed of beetle wings instead. The hardness of the beetle wing embellishments contrasted nicely with the soft white gown.  The spencer acts as the hard outer wing casings or elytra that covers the sheer hind wings used for flying. The sheer bobbinet also acts as a nice point of contrast with the pleated silk taffeta placed on top. The sleeves of the under gown are really what tied the whole garment together.

1804
Costume Parisien Unconfirmed date 1799 or 1804

1797
Costume Parisien 1797 

The pattern for the under gown was Franken-patterned from several regency patterns from Janet Arnold’s Patterns of Fashion 1 and the guides laid out in the American Duchess Guide to 18th Century Dressmaking by Lauren Stowell and Abby Cox. I then used the bodice pattern from the under gown and altered the neckline to make the pattern for the sleeveless spencer. I draped the peplum on the form out of muslin to get the shape I was after, but once it was made out of silk I was not happy with the overall silhouette so I had to remove it and recut the entire top line. The long stays were made from an altered pre-made pattern from Cynthia Settje of Redthreaded. I ended up taking a bit out of the length because I am rather short waisted.

The sleeveless spencer or over bodice is made from a green silk taffeta shot with gold, lined with with natural unbleached linen and trimmed with hand dyed yellow silk. The under gown is made from a white light weight cotton organdy with English cotton bobbinet trim. Both pieces are trimmed with sternocera aequisignata beetle wings. The bodied petticoat (not pictured) is made of a plain weave cotton. The long stays are made of drab colored English coutil, with a wooden busk, German synthetic whale boning. The chemise is made of white light weight linen. All pieces were stitched using natural fibered thread including cotton, linen, and silk.

SophiaKhan1

The sleeveless spencer was hand sew together using the English Stitch as its main joining seam a technique I have never used but quickly fell in love with. The neckline has channel for a thin cord to give the neckline a smooth fit. All the beetle wings are hand applied in clusters of three. If I could go back again I would not have had the beetle wings pre-drilled, as I found out I could sew right through them with a sharp needle. I filled the tips of all the wings to give them a more manicured smooth shape.


The under gown is made up of a 4 paneled skirt and a 5 paneled bodice with 1 part fitted sleeves. I did cheat and machine sew my long skirt seams that were then hand felled down. The bodice neck and waist also have have channels for a thin cord to keep them snug. My favorite part of this whole project was the sleeves. I traced the sleeve pattern on to a larger piece of cotton organdy. I then placed the the into a large hoop that fit almost the entire sleeve shape. Once the sleeve was taught I draped the cotton bobbinet shoulder swags into place and secured with three beetle wings. The elbow trim was created by using thin strips on silk taffeta with both edges pleated onto the bobbinet base in a scalloped pattern. I then basted the trim to the sleeve base and applied the straight strips of pleating. After all layers were attached I carefully removed the sleeve fabric from underneath the trim. Once the sleeve was cut out I carefully joined the underarm seam to be hidden beneath the pleating and beetle wing to create a continues line.  The sleeves were then set into the armscye using a running back stitch.

The long stays are really deserving of their own future long post. They are constructed from a single layer of coutil using external boning channels. The busk has and interior pocket. The bust line has a drawstring from under arm to center front. The back has hand sewn eyelets and a criss-cross lacing pattern. Although less accurate I wanted stays that were easy for me to tie myself. I added small flossing details to keep the boning in place.  I love the silhouette of this pattern and would highly recommend it.

I would still like to go back and add move beetle wings and bobbinet to the bottom hem of the gown before I wear it at Costume College this July.

Credits:

Yellow silk dyed by  Athel Artistry

Rosewood marquise parasol, ca 1845-55 was loaned by Brandon Mckinney Parasol Restoration

Hair by Bonnie Belvedere

Photos by Bonnie Belvedere

SophiaKhan2SophiaKhan4SophiaKhan1

1780s Gainsborough Hat HSM: #3 The Great Outdoors 


What the item is? A velvet riding hat modeled after Gainborough hats. The hat will accompany my 1787 Redingote for the July fashion plate challenge. This style hat would be worn to outdoor activities in the late 18th century. 

The Challenge: The Great Outdoors 

Fabric: Black cotton velveteen, Black buckram, Yellow silk dupioni.

Pattern: none 

Year: late 1780s 

Notions: vintage ostrich feathers, wire, silk and cotton thread.

How historically accurate is it? 75%, it is all hand sewn and natural fibers, although dupioni is not an accurate weave of silk. The buckrum also has modern glue on it. 

Hours to complete: Around 8. 

First worn: For photos. 

Total cost: Under $20. 

The Mode Illustrée Project: Introduction

DSC_0153

As it happens in costuming, I stumbled into turn-of-the 20th century completely by accident. I began collecting La Mode Illustrée issues from the 1930s, then the 1920s, and then I got curious about 1910s and eventually 1900s. I would find an issue with a coat that I liked, a skirt that was interesting, and a year later wound up with a shamefully large collection of issues from 1900-1904, a timeframe that I have absolutely no experience in.

For those of you who haven’t heard of La Mode Illustrée before, it was a French-language pattern magazine that ran weekly between the mid-19th century and early 20th century. Most magazines came with a color gravure (illustration) and a large pattern sheet from which to make a selection of styles shown in the magazine. The patterns included womenswear, undergarments, childrens’ outfits, bags, and embroidery layouts. Some of my favorite finds include riding or hunting outfits, Edwardian swimsuits, and shoe bags with little embroidered shoes.

Costume College 2017 is quickly approaching, and I’ve decided that this is the perfect excuse to dive into the deep end and make a 1903 ball gown from the ground up. This page will serve as an index to log each project as they are completed.

I’ll be making the following components from original patterns and directions:
*une chemise de bal (a ball slip/chemise)
*un pantalon élégant (elegant drawers)
*un jupon elegante (an elegant petticoat)
*un jupon en drap (a petticoat made from sheeting)
*une robe de bal (ball gown)

Additionally, I’ll be making these necessities not patterned from La Mode Illustrée:
*an Edwardian Bust Improver
*an Edwardian Hip Improver
*Early 20th century corset

Hope you will follow along and enjoy the process!

–Erin

La Mode Illustrée Project: Un pantalon élégant, 1901

I’m so excited to share with you part two of my 1900s undergarments set. The pattern for these drawers are from a 1901 issue of La Mode Illustrée that was full of bridal and ball gowns. They are typical special occasion Edwardian drawers, lots of lace, frills, and bows!
pantalon elegant

This kind of super big and frilly pantalon was really common around the turn of the century. You can see that the two legs are only closed by about 3.5″ a the front, and the rest of the crotch seam is left open. However, when you wear them they feel like full coverage because they are full and voluminous!

DSC_0108
My version of the 1901 originals

DSC_0115
Back View: Note that the crotch seam is completely open and finished with a narrow hem.

BOSTON MFA DRAWERS
Extant examples from MFA Boston (Top, Center, Bottom)

For these, I did not pay attention to sizing and made the pattern exactly as seen on the pattern, as these were closed with a drawstring. I plan to wear these over the chemise de bal and under the corset so they don’t get in the way of the corset garters (I could also use a little extra padding in the hip area, so these may give me the boost I need!). There are photos of undergarments worn both ways, so although I believe it’s more common to wear drawers over the corset, this is also historically accurate.

I dipped my toe in the water of lace insertion for the Edwardian starter kit chemise, but these drawers forced me to dive in. All insertion was handsewn in, and I think the effect came out really beautifully. I will absolutely be trying an abundance of insertion when working on the petticoats!

DSC_0110

Sorry this is such a short post, but I will be showing this garment more in-depth when I do a full Edwardian dressing post!

Now the details:

Material: Organic cotton batiste (Grown and woven in USA! Buy yardage here)
Pattern: La Mode Illustrée 1901, Issue #34
Notions: Cotton thread, antique lace, silk ribbons
How historically accurate is it? Close to 100%, though I am not a master of finishing techniques, and my French isn’t fluent.
Hours to complete: 20+ (this was entirely hand-sewn, insertion takes time!)
Total cost: around $60 USD


HSM 2017 #1- an Edwardian starter kit

Right under the wire for the deadline for January’s Firsts and Lasts challenge, but I made it! I present to you my first undergarments for a larger project I will be working on for the next few months: a 1903 ball gown based on original Mode Illustreé patterns. I’ve been obsessively collecting these for about a year now, and I’m challenging myself to actually put them to use.

To create the foundation for an Edwardian silhouette, I needed a lot of  help. I’m naturally pretty small with none of the fashionable voluptuousness of the period, so in addition to a corset I made bust and hip improvers to go under the corset and create the shape. It is necessary to do this first, because sewing patterns from this time period are based on measurements of your created measurements and not your natural measurements (which is why you’ll see so many patterns with a 36″ bust and 24″ waist, rare in real life but abundant on old patterns!) 

For the corset I used a pattern from Atelier Sylphe with a waist size that is about 3″ smaller than my natural waist and bust and hip measurements that were about two inches bigger (I planned to fill this out with my “improvers”). This company does not give dates for the corsets, but I guessed which one was accurate based on a lot of illustrations and extant extant from the turn of the century. I made no alterations to the pattern and it went together beautifully. She gives a ton of photos a detailed construction information, I highly recommend using her patterns if you have the chance! My corset is a bit of an experiment in boning. The last corset I made was 1880s and I boned it with spring steel, which did not give the shape that I wanted and was historically inaccurate. This go around I tried industrial zip ties, but I read conflicting reports of how to use these. Some resources said to use two zip ties per channel, others said you only needed one, so I’m using this as a tester. I inserted a single tie into the channels on wearer’s left, and two per channel on wearer’s right. Without spending a lot of time wearing this, the channels using one tie apiece look better, but I’m curious to see how I feel about it after wearing them for an evening. I’ll keep you posted!!

dsc_0091
The corset is made of coutil and busk from Richard the Thread with vintage lace trim and vintage nylon ribbon threading and bow. I will be adding suspenders once I receive the garter clips I ordered!

The base later is a ball chemise from Mode illustreé, with ribbon ties that can be untied and tucked in if the final gown bodice is too skimpy. I used organic cotton batiste from Organic Plus (grown and made in USA! http://organiccottonplus.com/products/batiste-white-60) for the base layer. This turned out to be a little heavier than what I wanted (a special occasion chemise probably would have been much lighter), but it would be great for daily use undergarments. For the lace insertion, I used Wearing History’s e-book  to try a historically accurate technique. The book lists a few different ideas for insertion, I used the whip stitch version. This took some practice and you can definitely tell the difference in quality between the first and last insertion that I did. For the straps I used silk ribbon ties in a royal blue – a pastel color would have been more accurate but my resource for silk ribbons was limited. The poly ribbons that were available were bulky and stiff, and did not have the drape or grace of the illustration. The entire chemise and everything else from here on out was hand sewn as my sewing machine broke while sewing the corset, and unfortunately for me the repair shop is only open during my working hours. 


The bust improver is made from Wearing History’s pattern, I altered it only a little to make it smaller to fit me. I wanted it to match the chemise, so I used the same batiste backed with a medium weight muslin. I trimmed it in modern poly bias tape and vintage lace, stuffed with normal synthetic batting. It’s entirely hand sewn, which is probably not historically accurate but my sewing machine was broken. On a positive note, I’m getting really good at hand sewing.

screen-shot-2017-02-01-at-11-40-43-pm
The hip pad is my own pattern based on a period example. I made this really simply with two layers of muslin and one layer of batting, as I went a little overboard trimming all the other components and almost missed the deadline for this project! Couldn’t resist adding some freehand quilting to give it some shape…

Looking at the photos of this worn, I realize that I could have added a bit more coverage in the side hips- the bottom of the corset looks like it’s gaping. I might update my pad at some point with extra hip flaps to fill in the corset hips even more.


I’m really happy with the way these all came together. Even though this will never be seen by anyone by you, dear readers, it’s a great start to creating the period shape that I wanted! The photo below is my 2017 shape vs. 1903 shape. Note that I’m wearing the “bustle” and bust improver under the corset, and then measured over the top!

screen-shot-2017-02-01-at-11-11-36-pm

The Challenge: #1 Firsts & Lasts – This is the base layer for an ongoing Mode Illustree recreation I’ll be creating this year!

Fabric/Materials:

Corset: Coutil, lace, nylon ribbon
Chemise: Batiste, lace, silk ribbon
Bust Improver: Batiste, muslin, lace
Hip Improver: Muslin, twill tape

Pattern: Atelier Sylphe corset, Mode Illustree 1902 chemise, Wearing History’s Edwardian bust improver, self-drafted hip improver.

Year: 1902-03

Notions: cotton/poly threads, busk, synthetic batting, grommets, twill tape, zip ties

How historically accurate is it? The corset may be 90%, as it’s from a pattern taken an original. The chemise almost 100%, it’s made from all period accurate materials, from a period pattern, and 100% hand sewn. The bust and hip improver are maybe 50%? I don’t really have anything accurate to compare them to besides photos, and I used synthetic batting.

Hours to complete: 40+ 


First worn: This evening 1/31, for it’s first photoshoot!

HSM 2017 Challenge #1 Firsts & Lasts 

Sophia here! It’s been a long time since we last made a post. I am going to try and participate in more HSM challenges this year I even have them planned out in a spread sheet. So for the first challenge of the year Firsts & Lasts I’m submitting my new linen chemise and fully boned stays with stomacher. 
The details: 

The Challenge: #1 Firsts & Lasts 

Materials: Vintge block printed cotton from Cheney Brothers a mill that was full operational from 1833-1929, it continued to produce industrial fabrics after the Great Depression. The rest of the stays are 100% cotton coutil lining, kid skin leather binding and stomacher.The chemise   is 100% linen.

Pattern:  I used American Duchess for Simplicity 8162 as a base for the stays. I dropped the armscye, removed the straps, fully boned them, and changed the criss cross lacing to spiral lacing. For the chemise I started by laying out the simplicity pattern but decided to make it more traditionally out of rectangles with under arm gussets. 

Year:  the intention of the American Duchess pattern is to fit the time period from Outlander so 1740, but I think they create a sutible silhouette into the 1770s. 

Notions: All my thread and lacing were stash so I can’t count for their fiber content. I used industrial zip ties for the boning to simulate whale bone. 

How historically accurate is it?  The chemise gets a much higher rating as it’s hand sewn although the mystery thread knocks it down to a 90% . The stays are a mixture of hand and machine sewing, I think they would be passable in their own era so 70% .

Hours to Complete: The chemise took less than 10 hours, the stays took a long time over the course of a few months. 

First worn: Today for photos, but I hope to wear them to an event next weekend. 

Total Cost: The stays were around $30 and the chemise around $15. 

The inspiration : 

From top right clock wise; Memory of the Netherlands, Augusta Auctions, Met Museum, Met Museum. 

I’m going to take a chance to have a little rant, can professional Museums and Auction Houses learn to properly display and lace stays! The Augusta Auction pair are backwards and incorrectly laced, the navy blue set from the Met are also incorrectly laced. Spiral lacing is more attractive and balanced for both sets. 

Can’t wait to share my next challenge I’ve already started! 

Challenge #7: Monochrome – 1880’s Corset

Sorry for the absence, Sophia and I were busily working on our Costume College outfits.It was our first time going to College Costume and it was an amazing experience, but more about that in another blog post!

I want to preface this post by saying that I’ve been neglecting a huge part of historical sewing until now – this is my very first corset! Fitting garments and making a correct shape for a garment is totally different pre-1920, and I made a ton of mistakes. I hope if you are reading this before making your first corset you can avoid some of the mistakes I made.

I used the Norah Waugh 1880s corset pattern for shape, and the style of an 1880s corset in the collection of Kent State University Museum.  Check out the original details here!

I didn’t take many detail photos, but the museum description details list this corset as two layers, one layer of silk brocade and one layer of silk moire lining. Because generally corsets are made of coutil, I purchased a brocade coutil for the outer layer and a cotton coutil inner layer (because I couldn’t find a silk moire lining that wasn’t taffeta, and I could only find a cotton moire fabric in the correct color).

I made a muslin of the corset as is without boning, and the bust was definitely too big but the waist and hips were debatable. This was my first mistake. If you decide to make any corset pattern sew in bias strips to encase the boning, and do not get lazy about boning! I had an idea that the corset would get smaller when I put the boning in, so I ignored the fact that I only had a 1″ lacing gap in back when I made the muslin (if you’re not already aware, there should be a 2-3″ gap in your corset when you first wear it- if I’m wrong about this please let me know!).

I put together the body in coutil and the lining in cotton moire separately. First I added the cording between layers in a similar way to The Dreamstress tutorial, then I sewed both layers together separately. I added the boning channels to the outside of the corset as bias strips made from the brocade coutil. Then I topstitched them down, so the channels were on the top of the corset and the stitching was visible on the lining.

After all the channels were sewn, I added the spoon busk (using a method from Bridges on the Body here). You can also use a second method that’s a little cleaner- draft a facing pattern and sew them together with gaps in the stitching for the “hook” side to stick through. Then I inserted the boning – I used a spiral steel boning, my second mistake! Never, ever use spiral steel boning in your pre-1920s corset. It’s too stiff, and it does not form to the body the original 19th century (or earlier) or even early 1900s corsets do. Always use plastic whalebone or, less expensively, plastic zip ties. These are so much closer to the original whalebone, because when they heat up (due to body temperature when you wear it) they form to the body. You can even preemptively iron whalebone on a tailors ham to the correct shape. I didn’t learn this until after I completed the corset and took a class at Costume College from Luca Costigliolo, a true master of historical costuming who is a true master of historical sewing techniques and wrote a couple of doctrinal books along the way.

Finally, I added the flossing, and then the binding as a finish! I used a silk satin ribbon for top and bottom binding, you can also use a bias strip of matching coutil. For even further finish, you can use the lace finish of the original at the top edge, and thread a little ribbon through it (the original term for this escapes me, I’ll update this post when I remember!).

IMGP0596IMGP0603 (1)IMGP0606IMGP0603IMGP0594

Things I learned:

  1. Always add boning during the fit stage! This is extra important, because a corset will stretch during wear and a 2″-3″ gap is necessary to achieve the correct shape when you lace it! When you get a 1″ gap like I did, it’s impossible to create the correct shape and will eventually stretch to be unwearable.
  2. DO NOT under any circumstances use spiral steel boning. It’s not accurate, and it’s incredibly uncomfortable. You will not get the correct shape of the 1880s era or any era pre-1930s. I cannot emphasize this enough. I spent days and hours on the pretty flossing for this corset, but I will remove this to replace the spiral boning with plastic whalebone from Wissner or just regular zip ties.

I’m sure I should have learned some 3rd or 4th things, so please add a comment if you’ve learned some tricks that I haven’t mentioned here. My finished 1880s corset photos are below!

The Challenge: #7- Monochrome

Material: Cotton Coutil, Cotton Moire, Spiral Steel Boning (DO NOT USE THIS!), Steel Spoon Busk via Corset Making Supplies, Cotton thread for flossing (also not correct!), lace, silk ribbon, cotton rope for cording.

Pattern: Nora Waugh’s 1880’s corset pattern

Year: 1880s (ish- not specific!)

Notions: Cotton thread, lace, silk ribbon

How historically accurate is it? 60%, I’m not sure how cording was actually inserted, boning is incorrect, thread for flossing is incorrect!

Hours to complete: 30-ish.

First worn: at Costume College, Friday Night Social- July 29, 2016

Total cost: A shameful amount… I think I spent around $150. Don’t use spiral steel boning!

HSM #11 The Addams circa 1938

IMG_1636
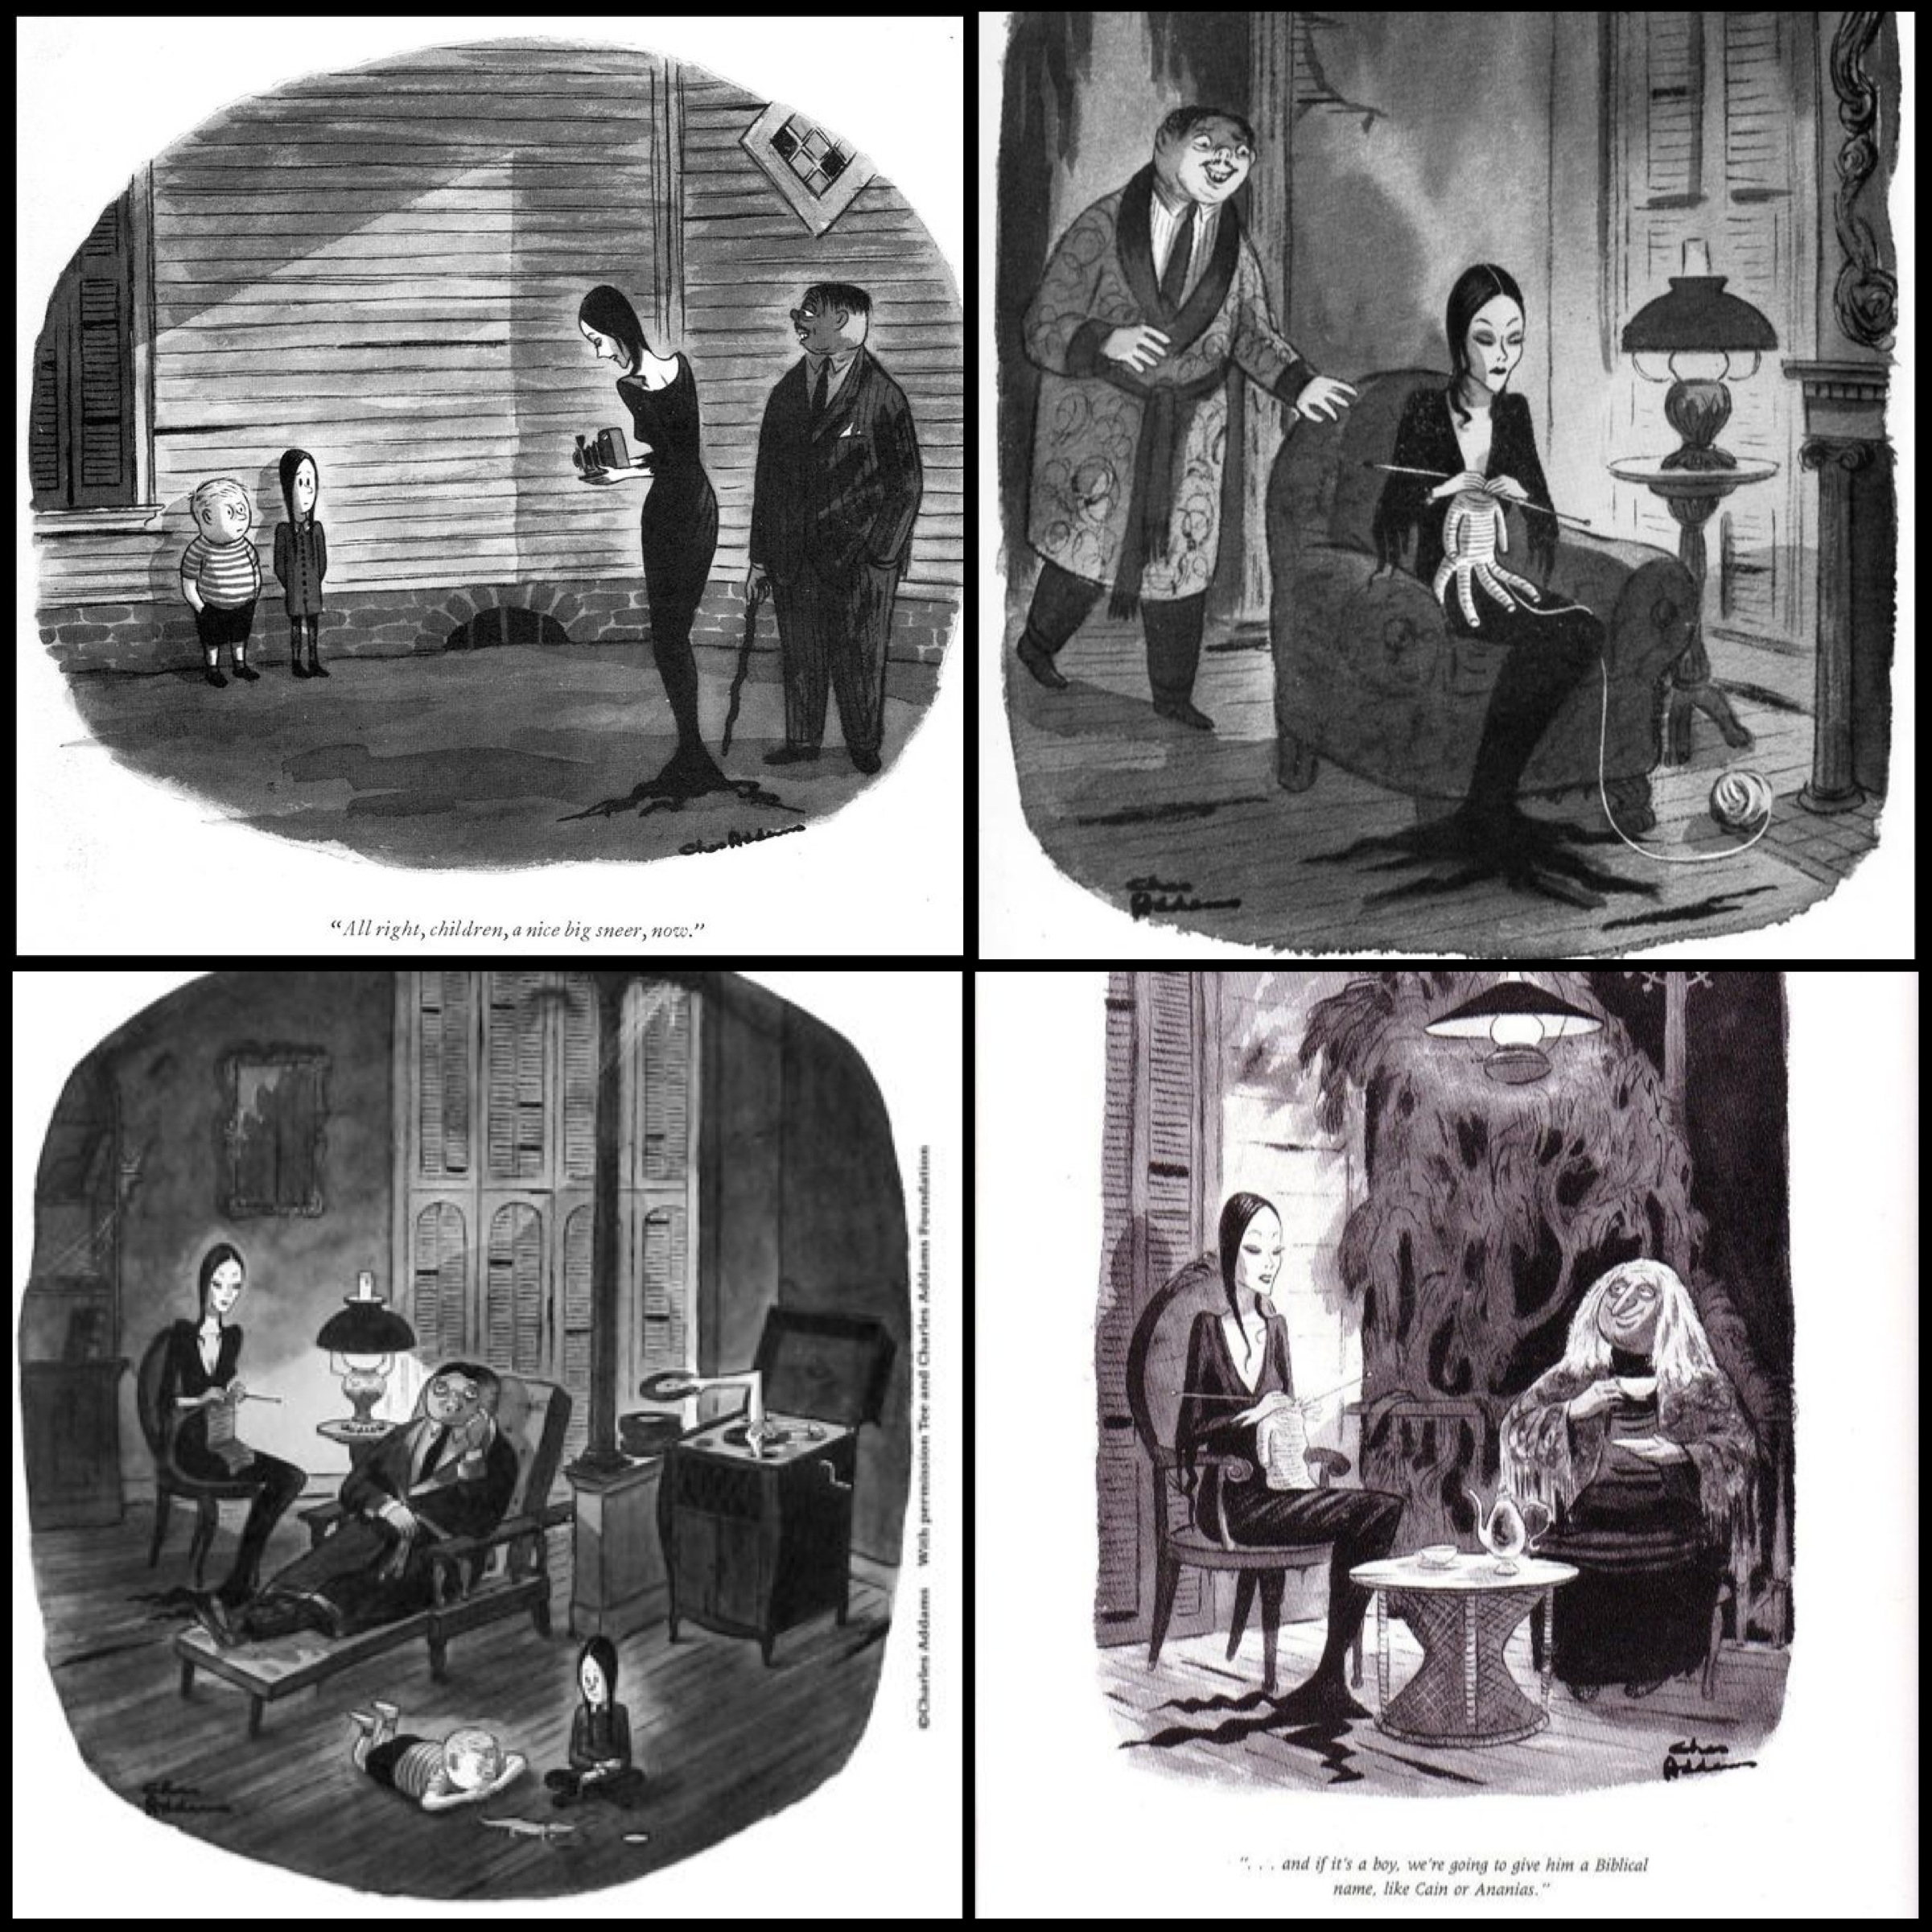
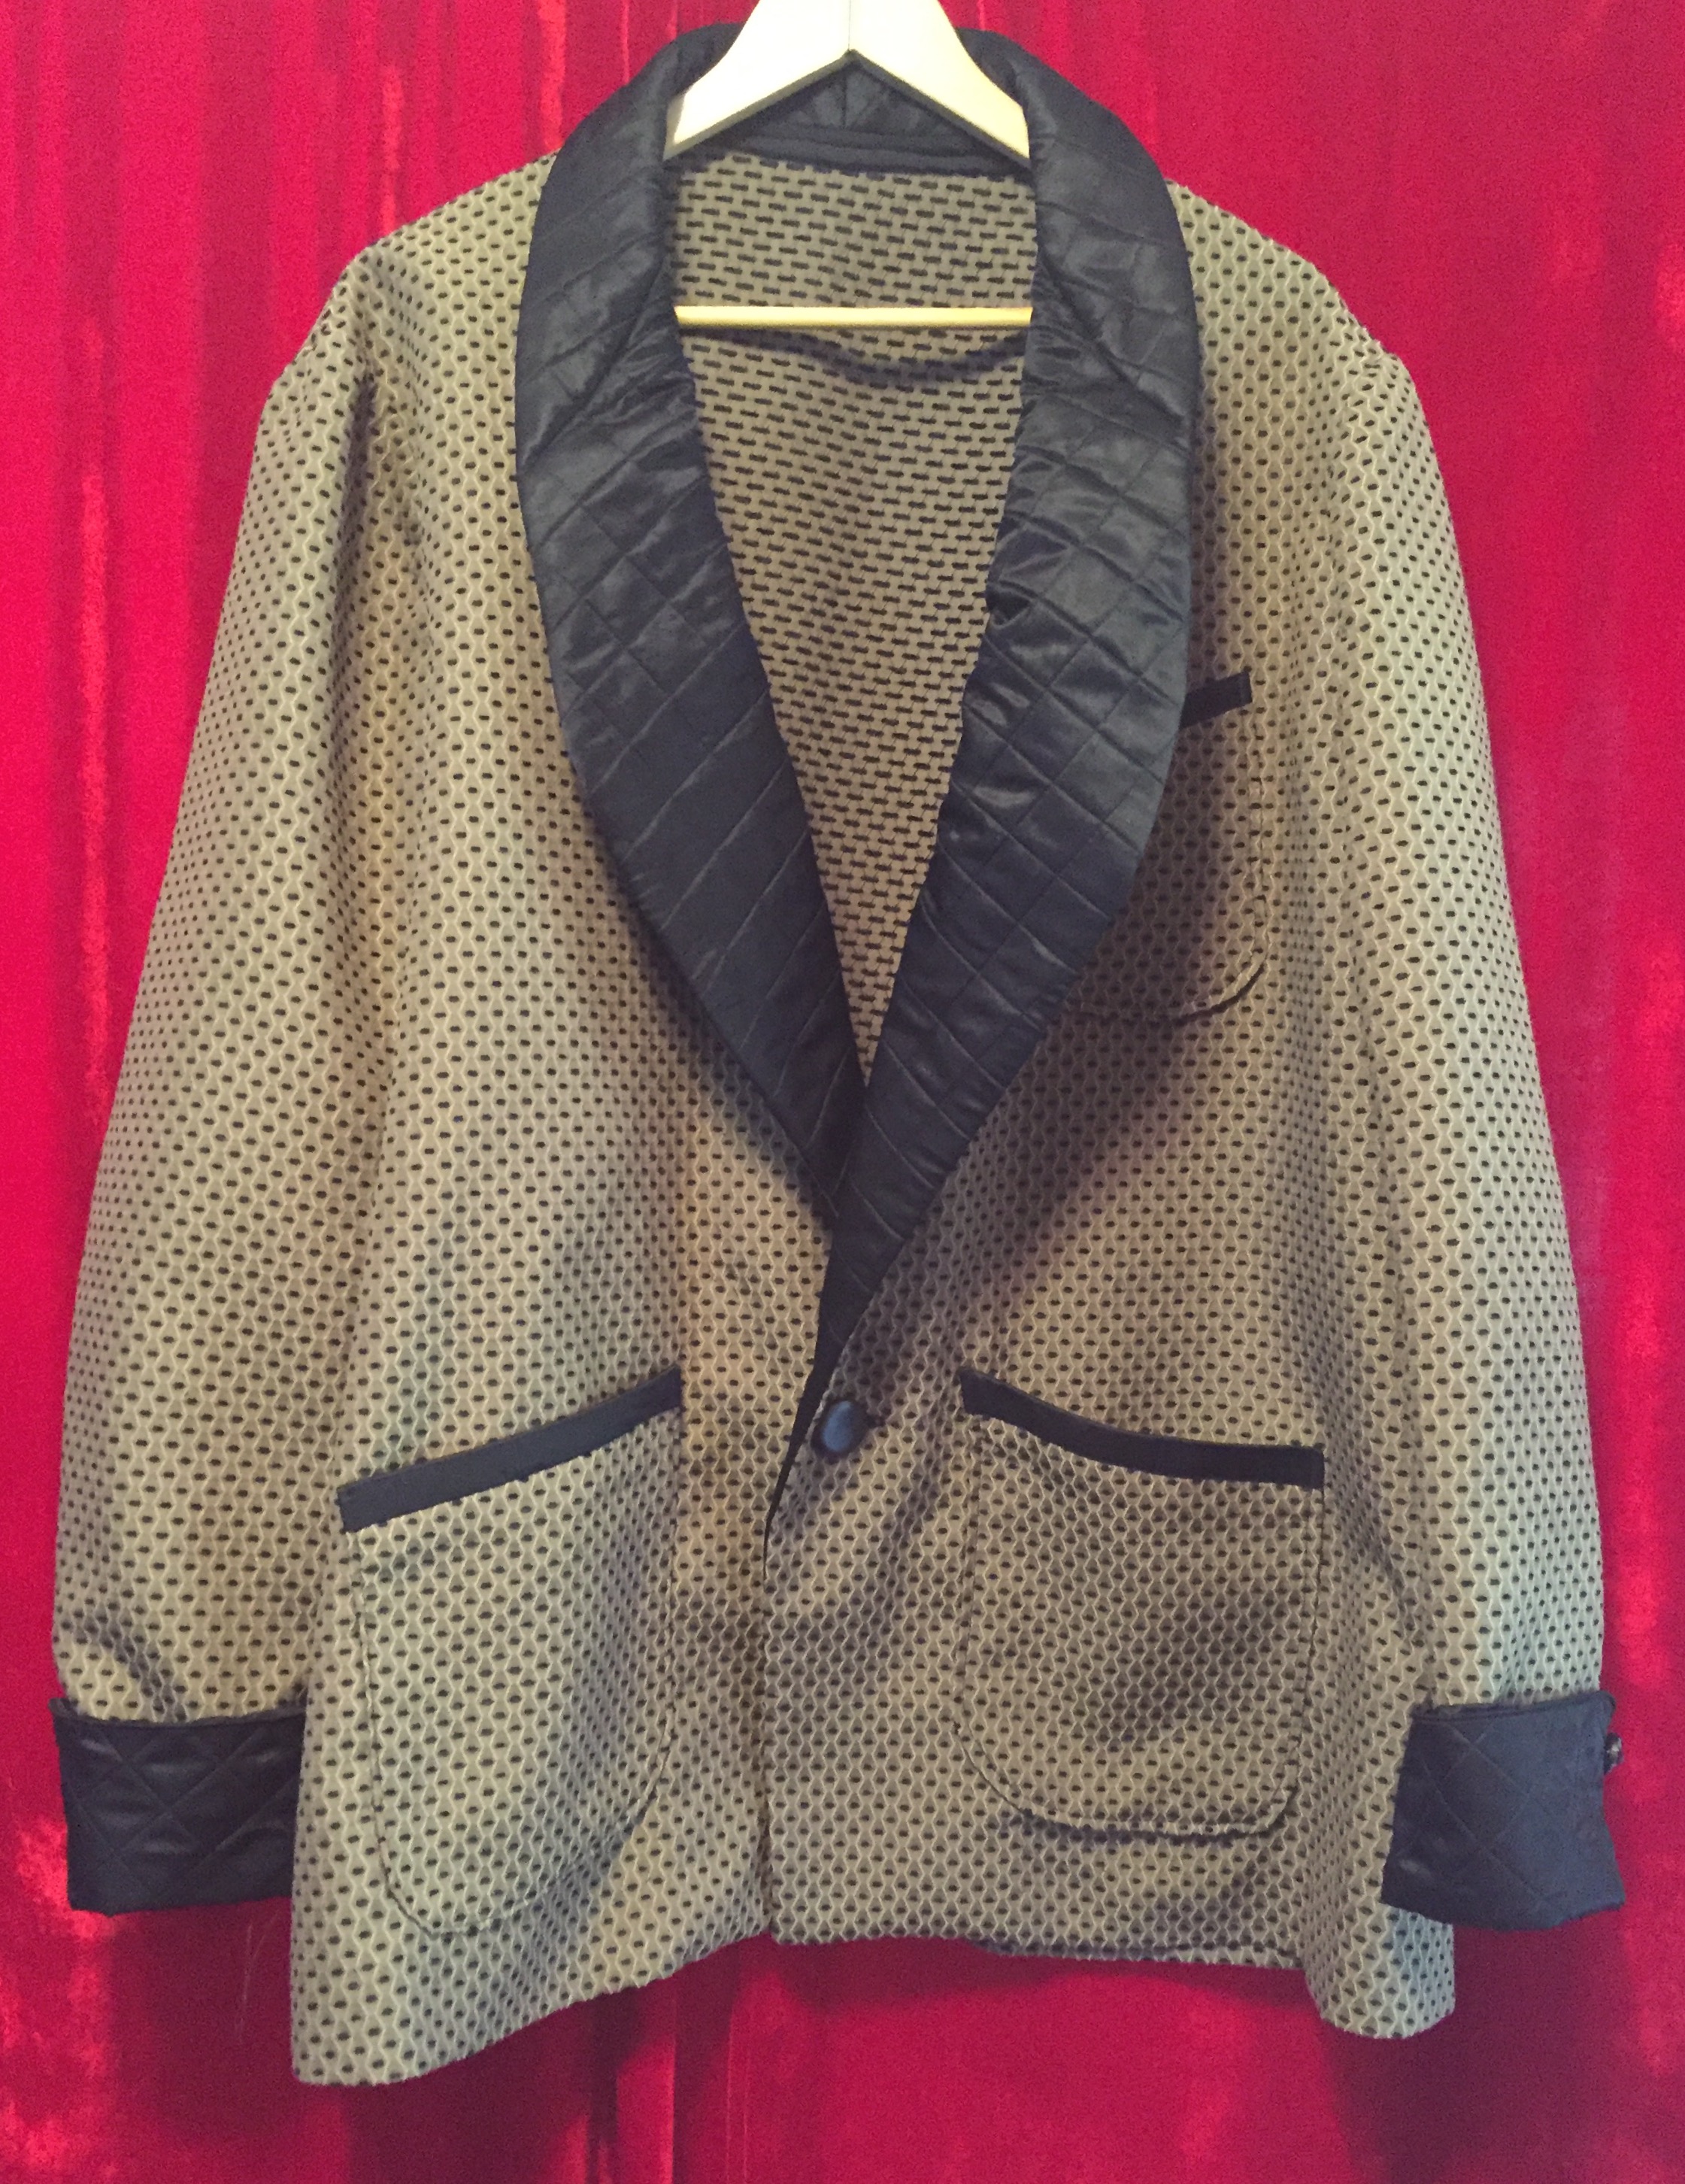
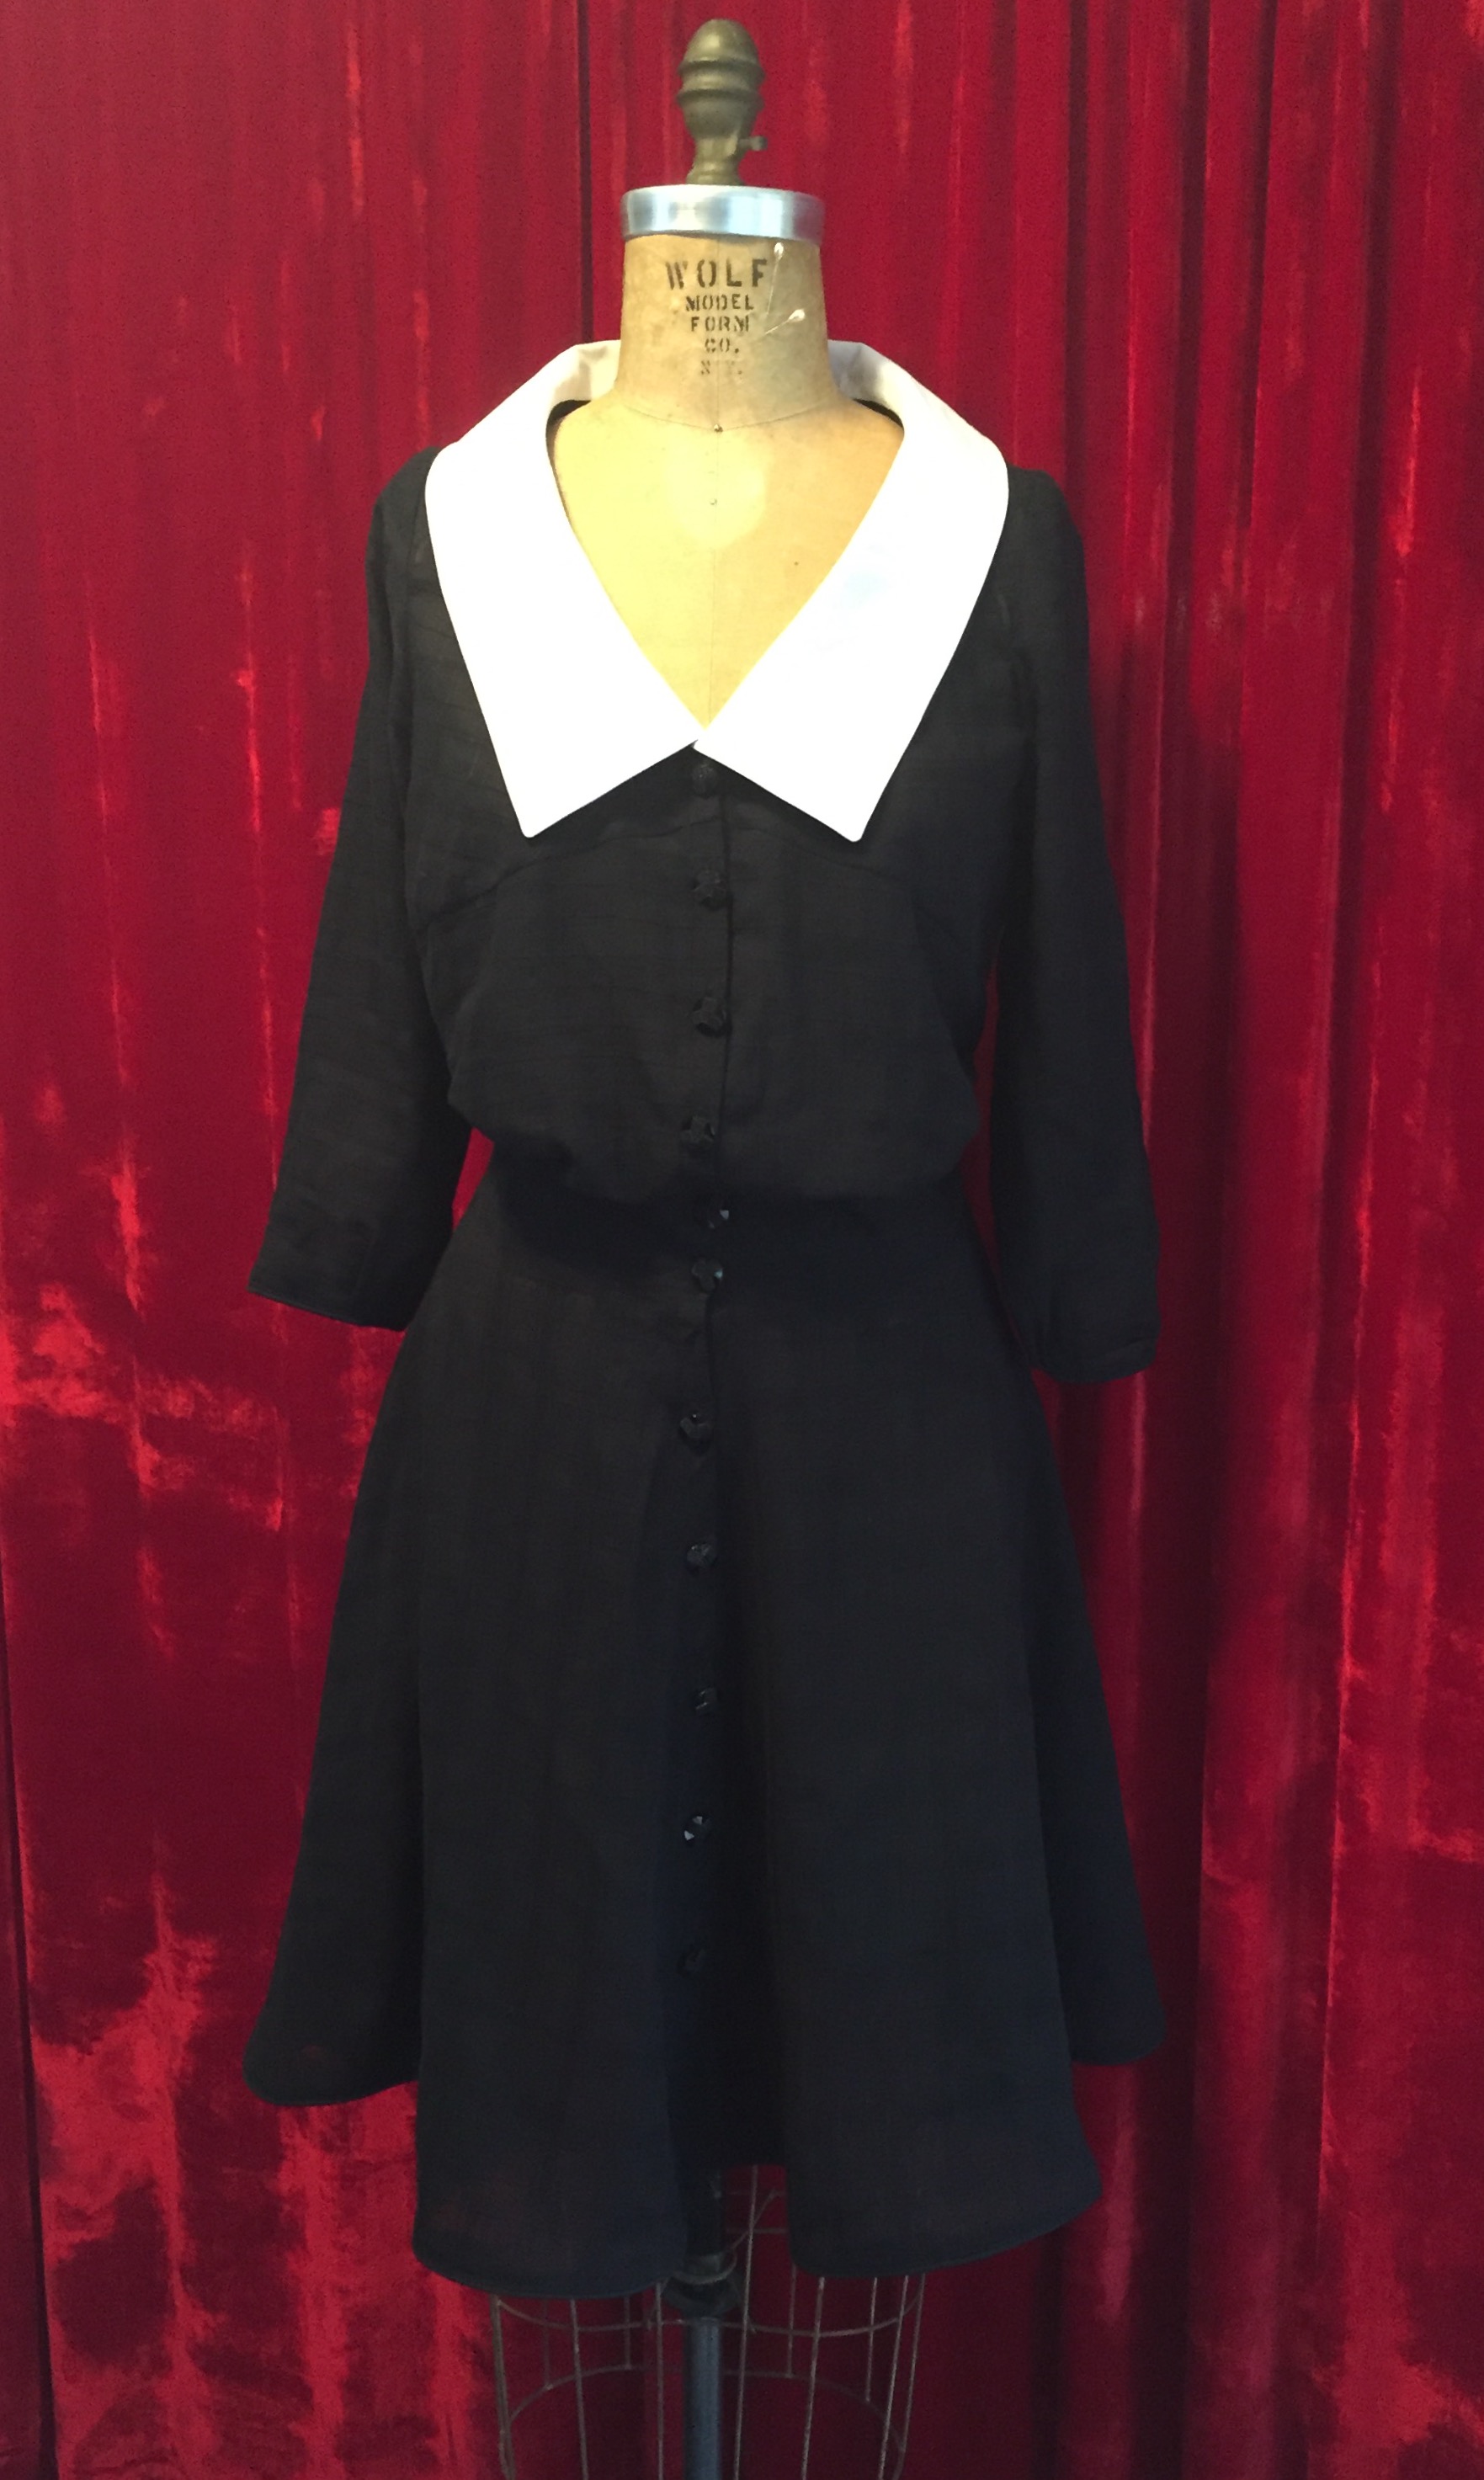
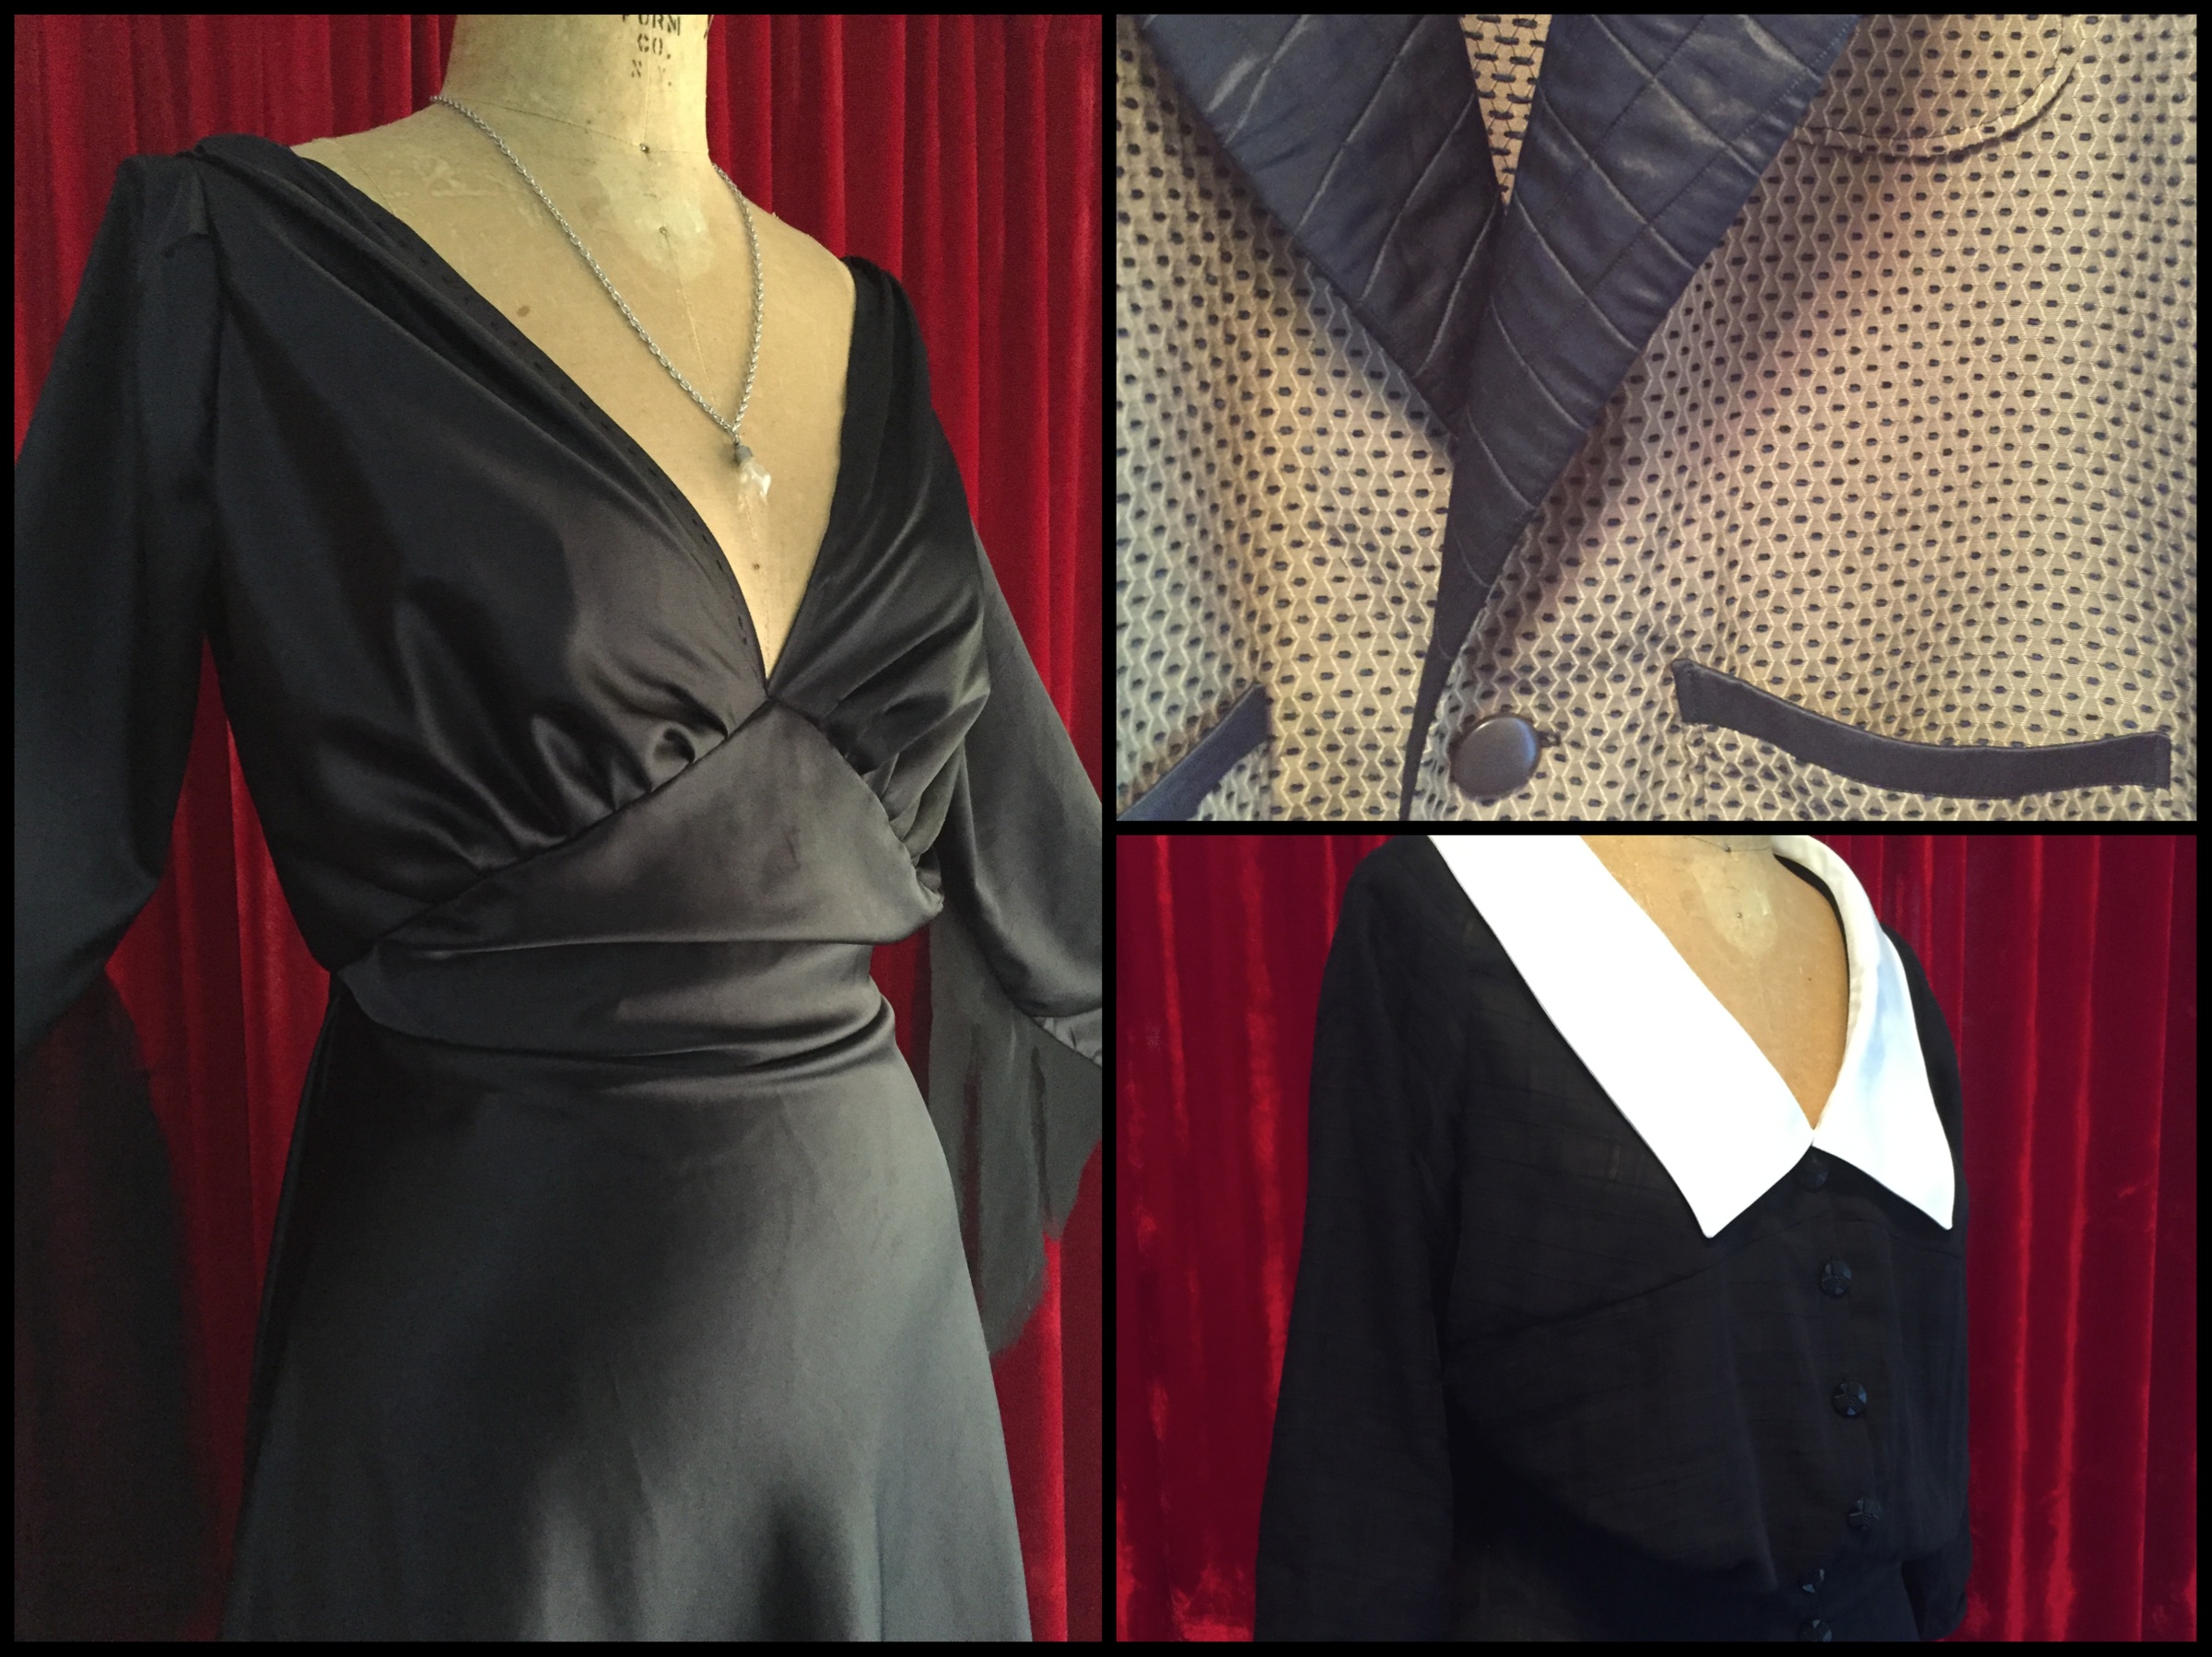
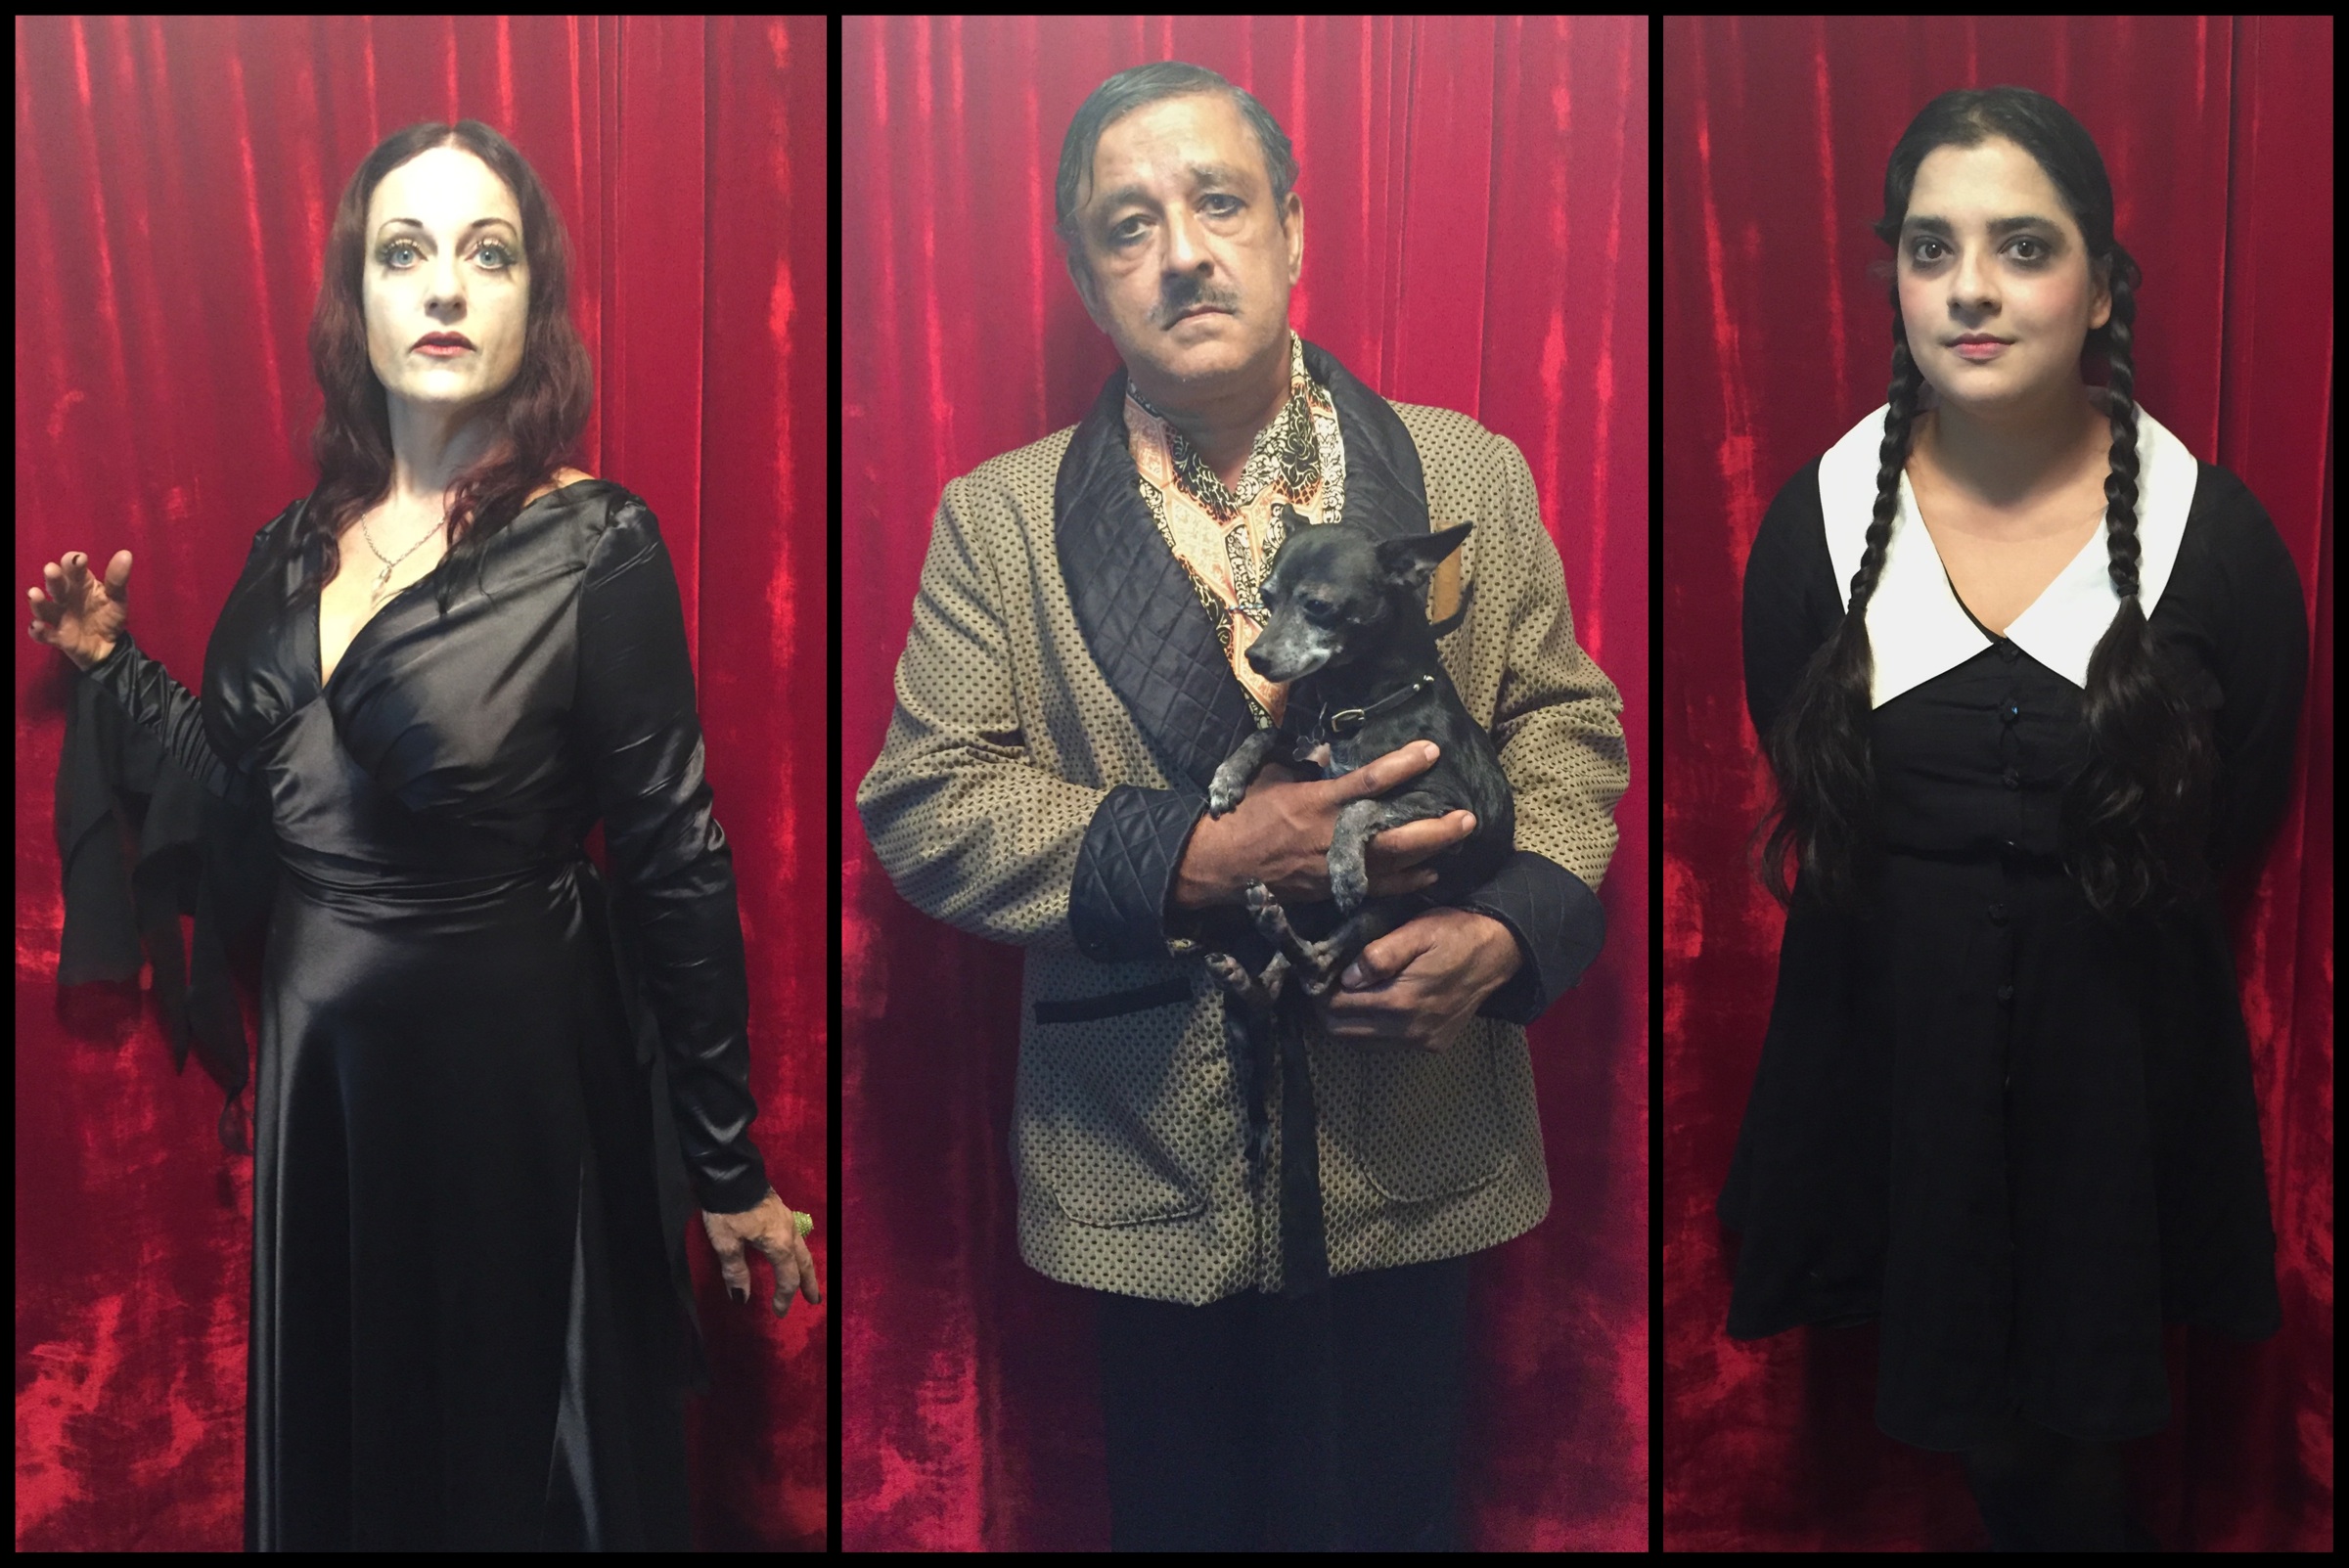
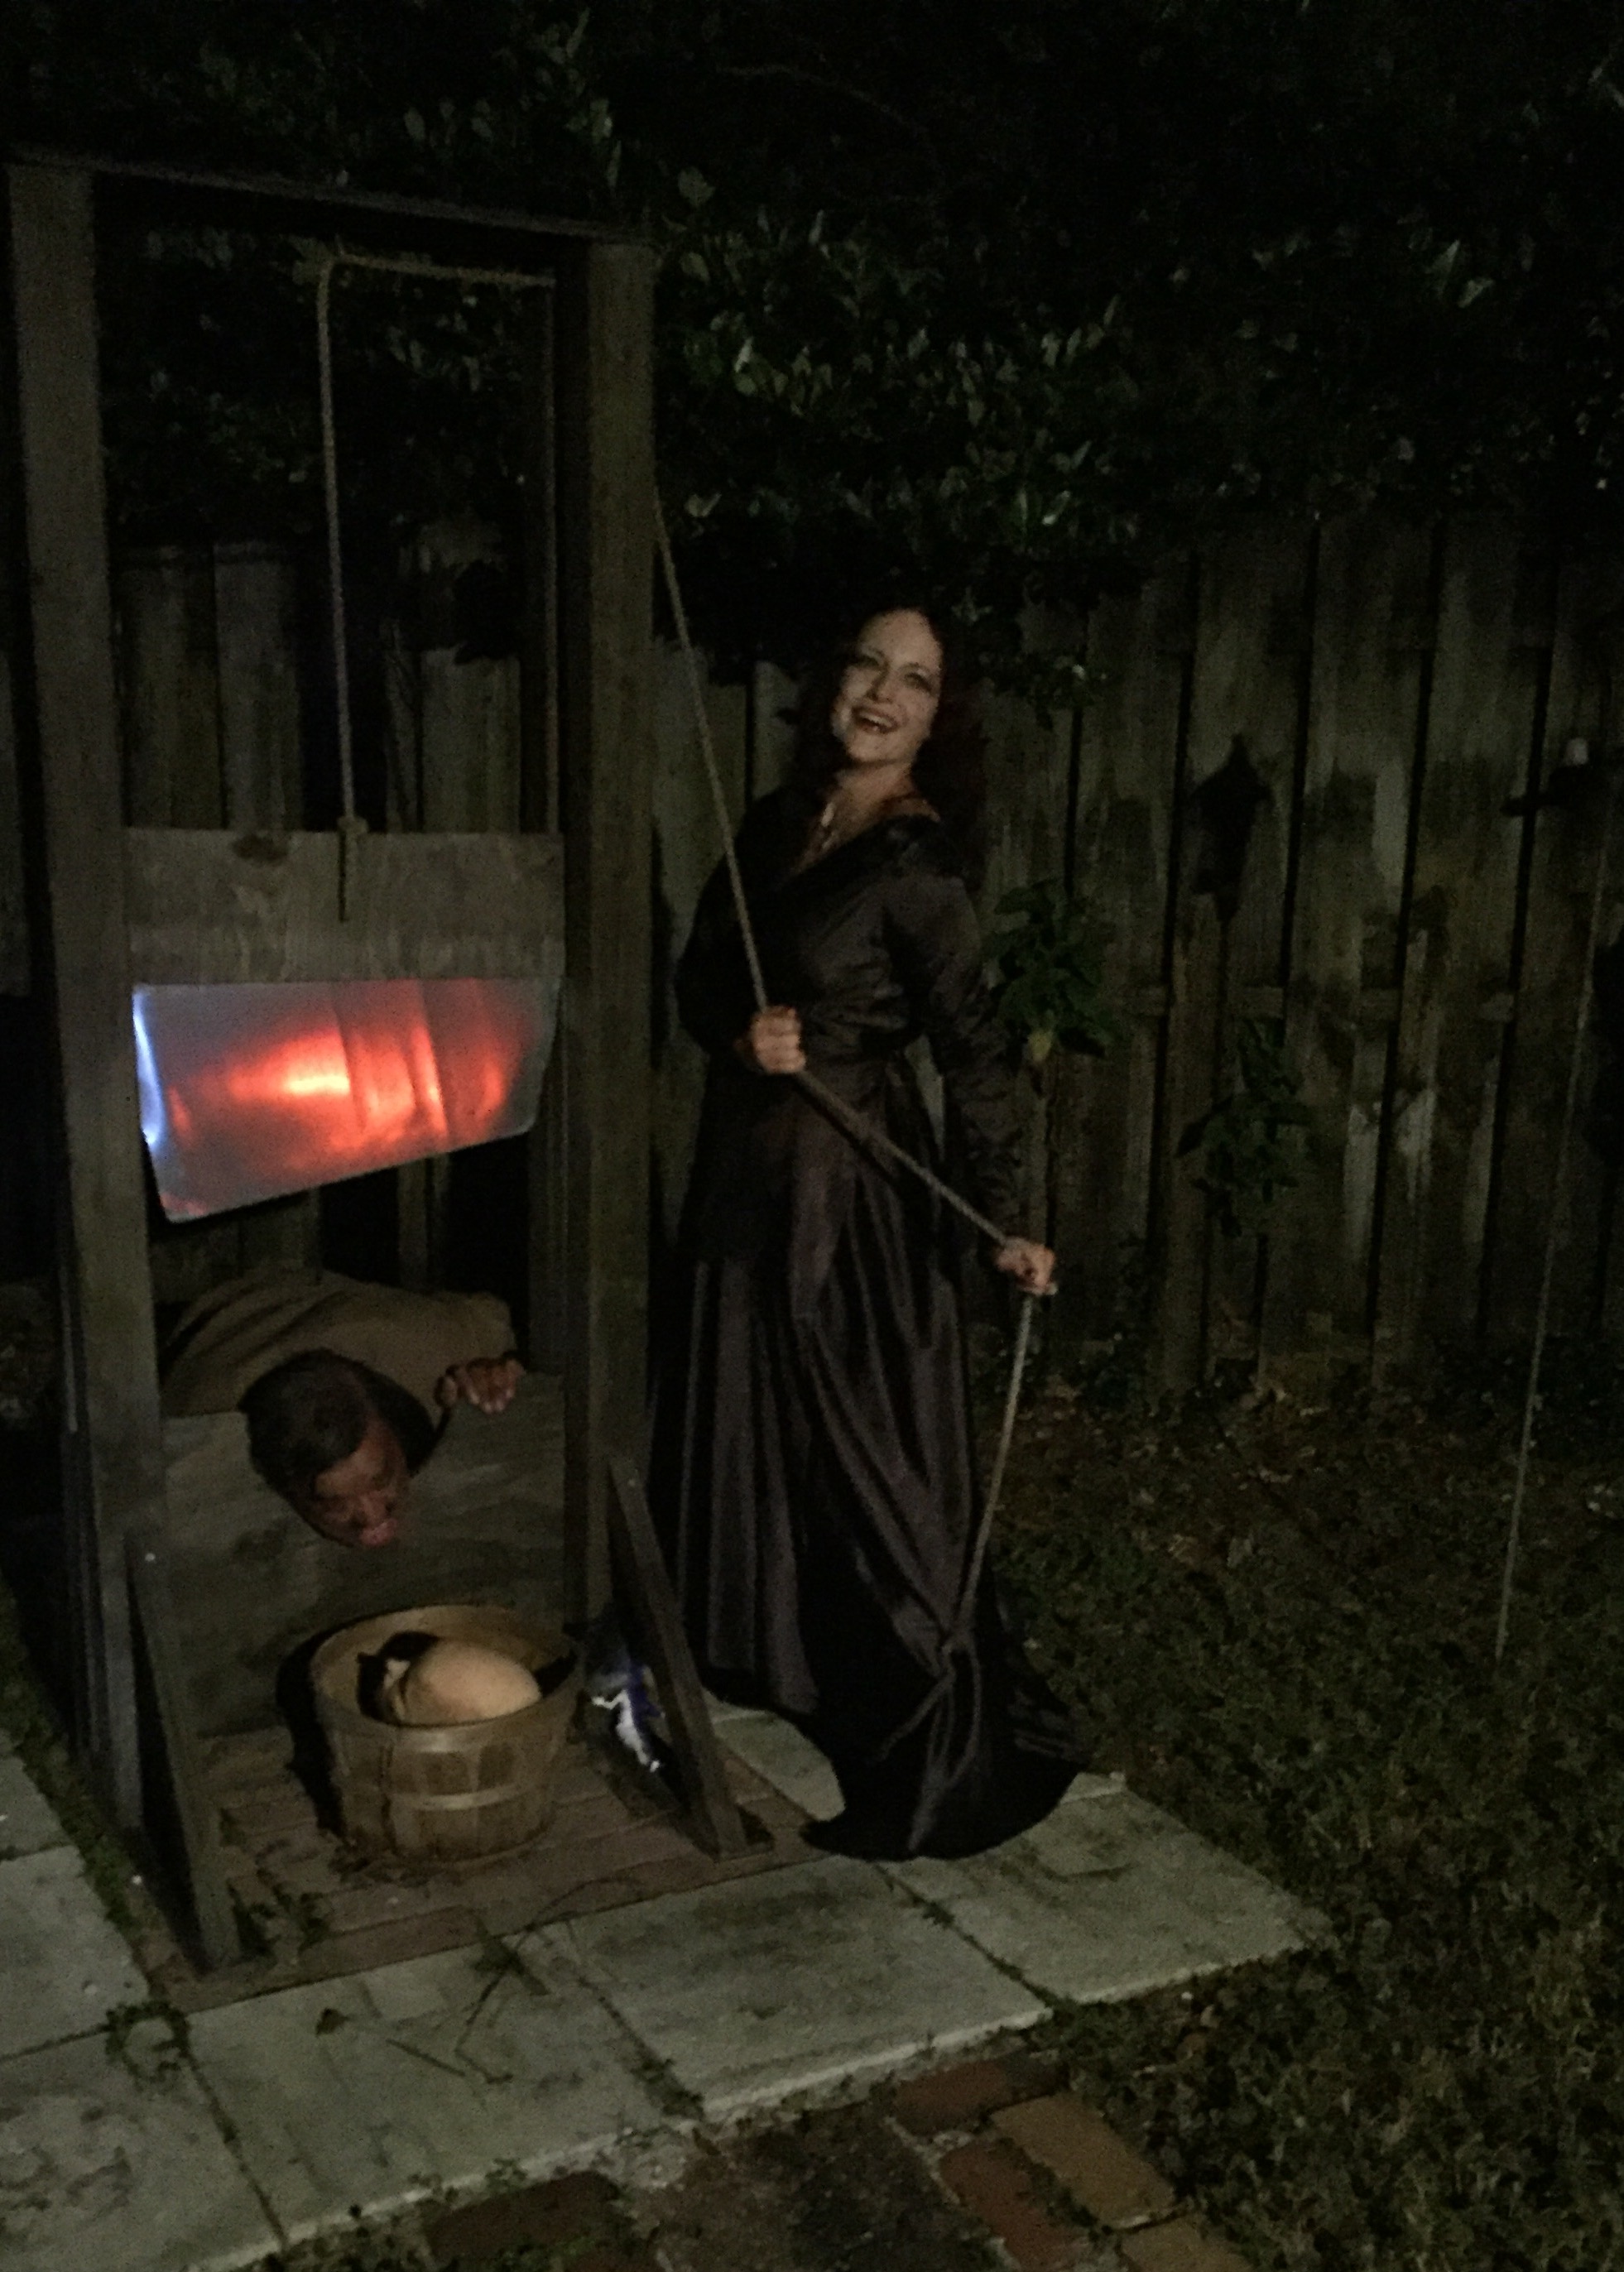
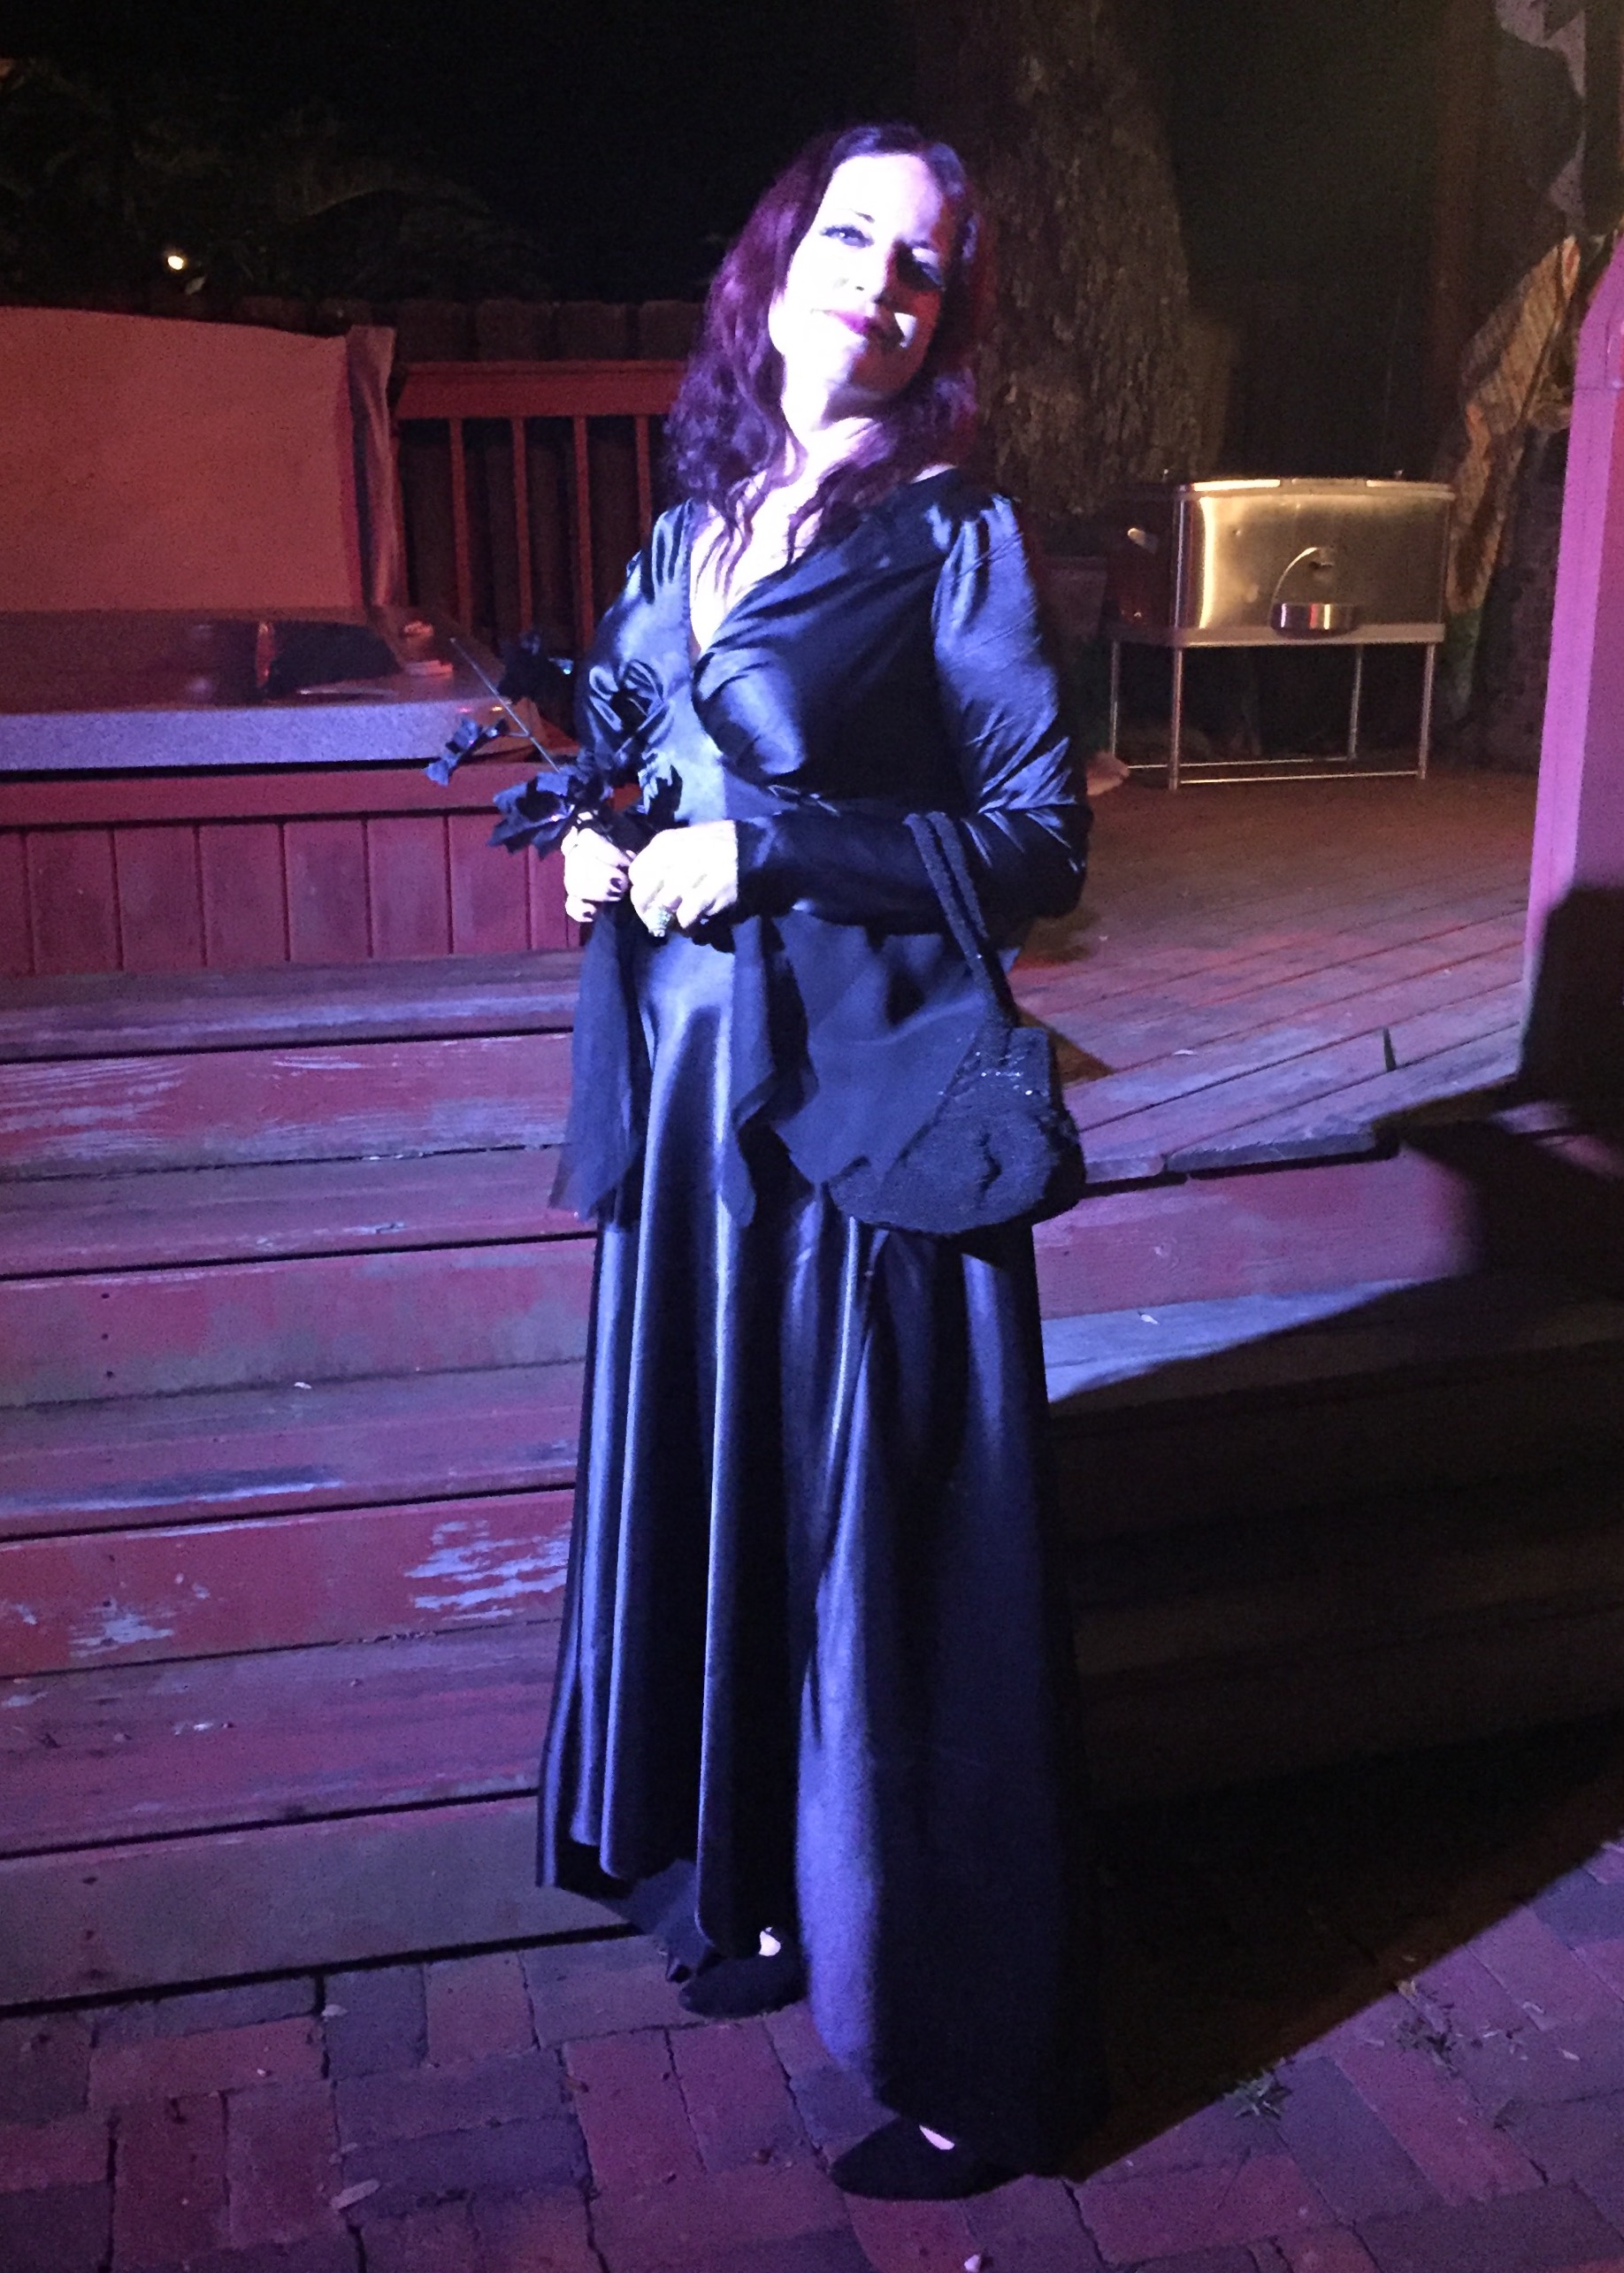
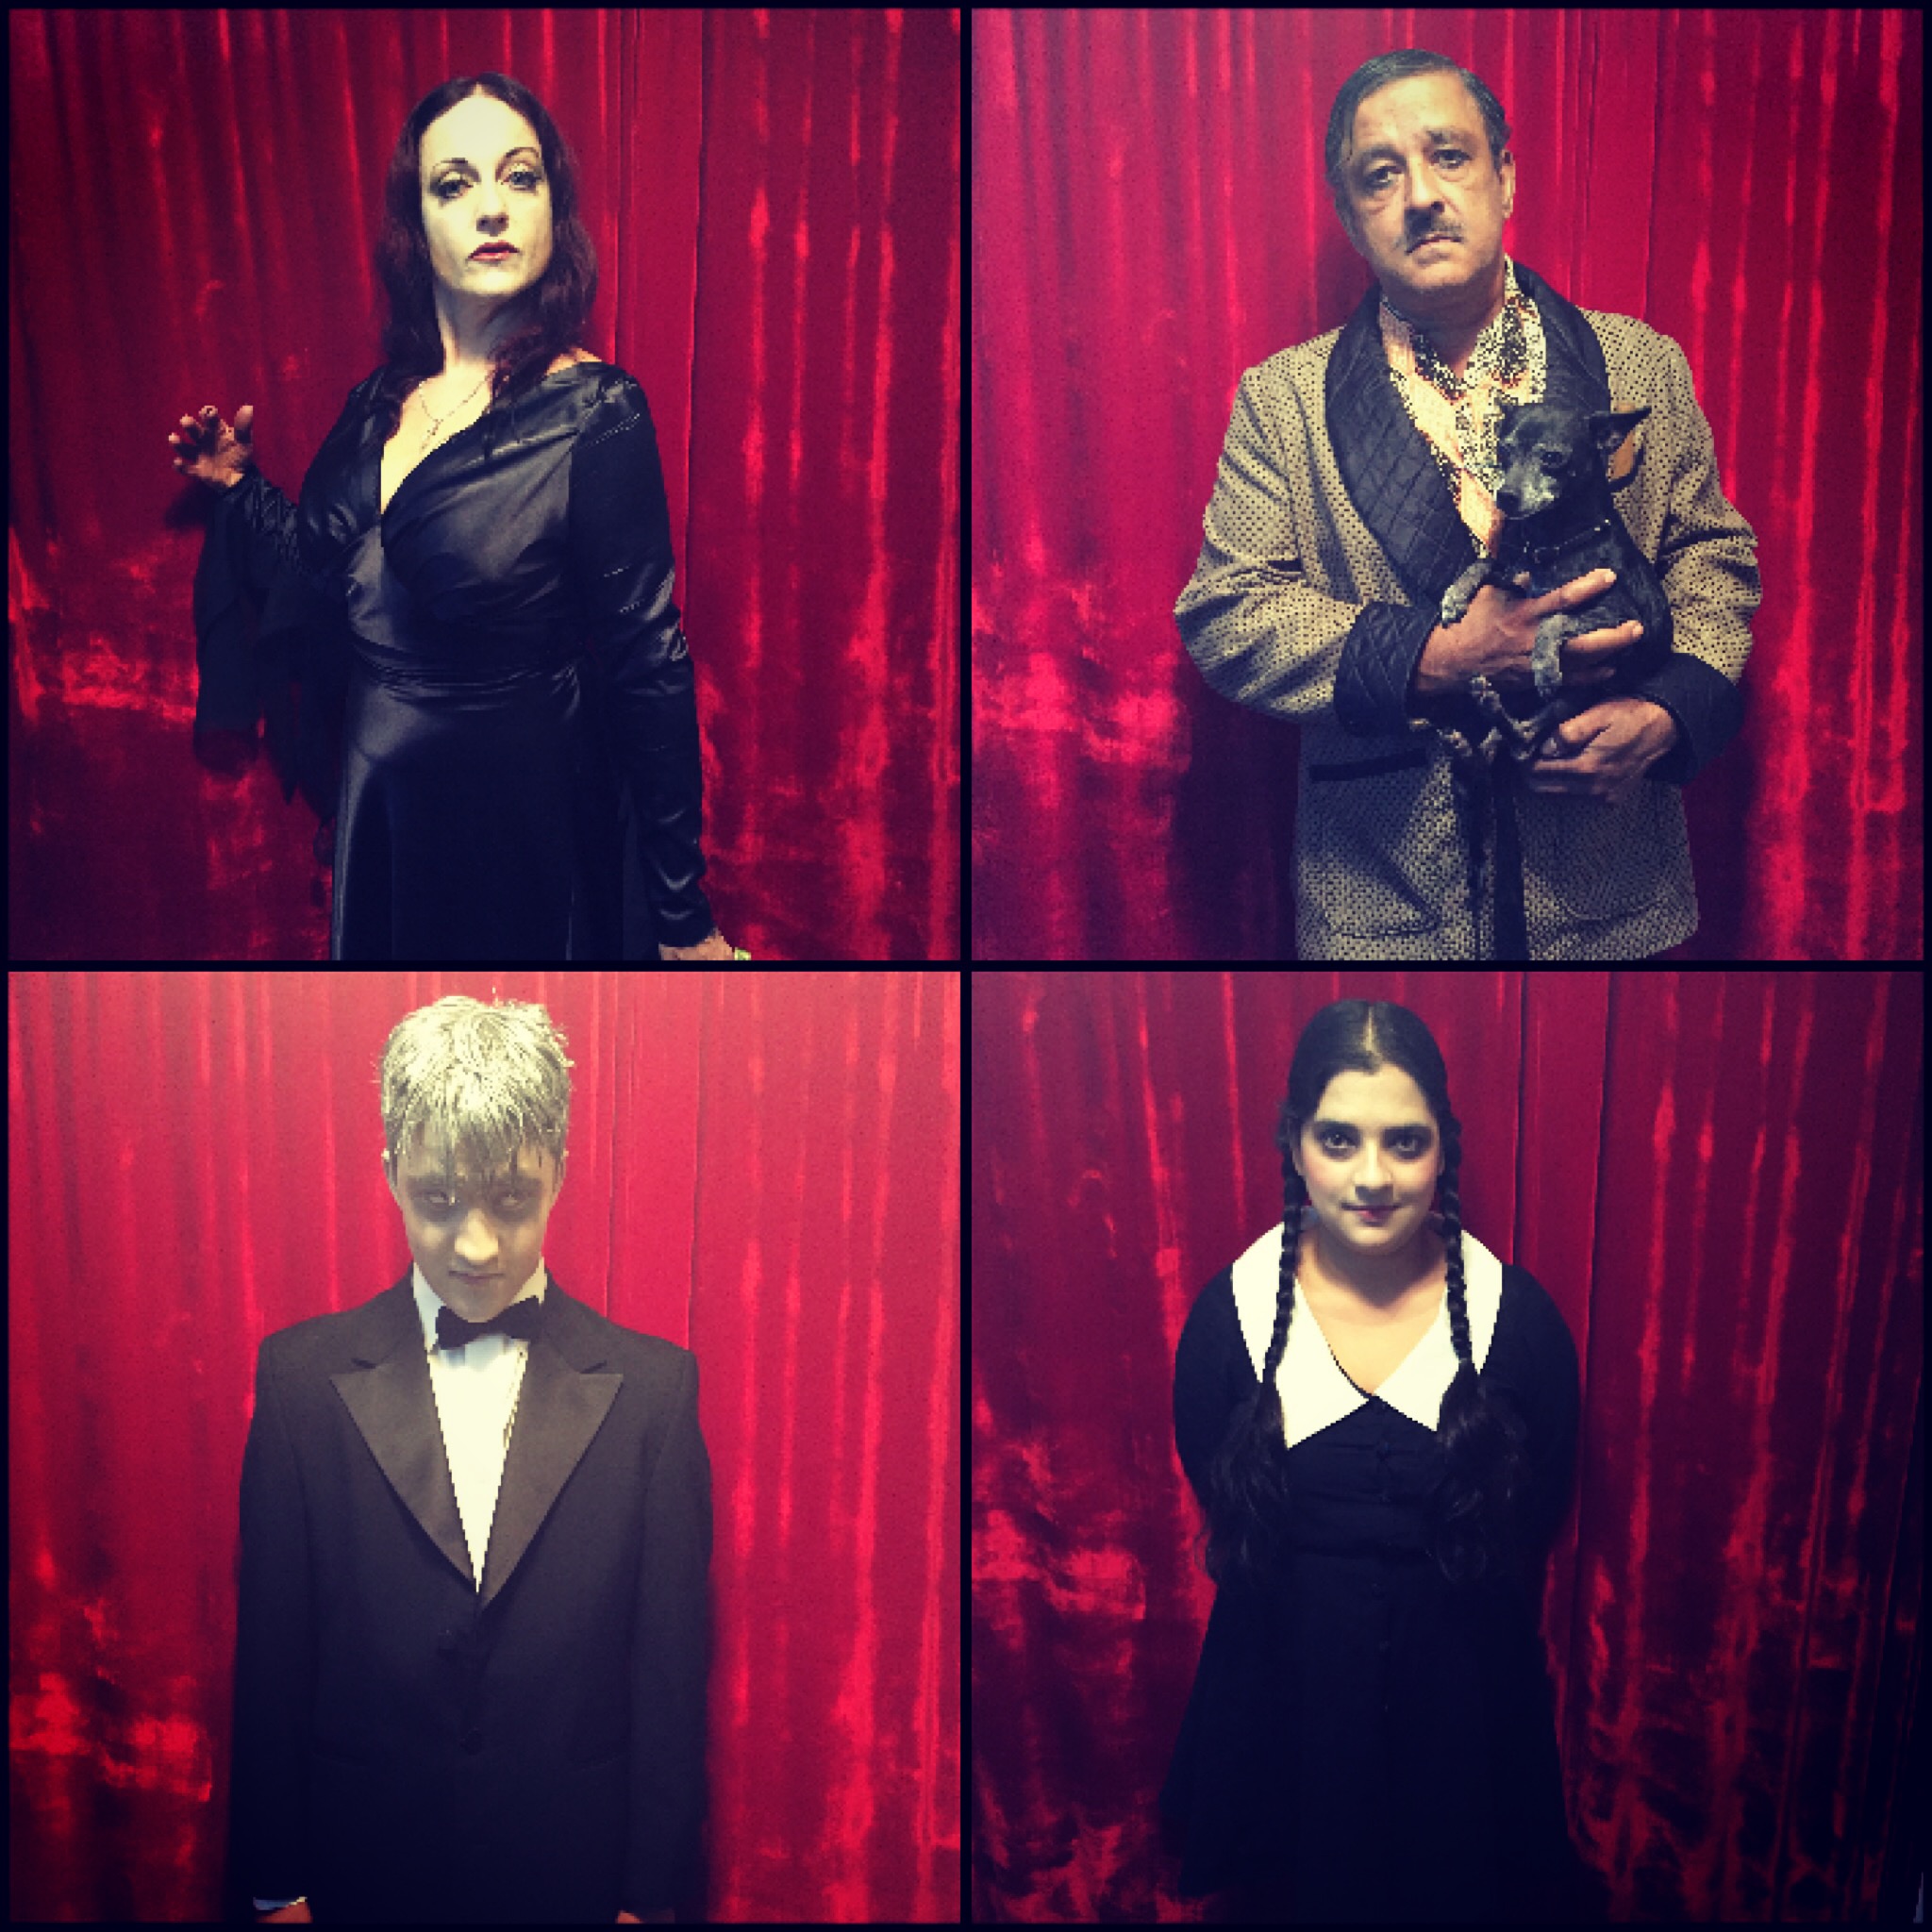
For the Silver Screen HSM challenge, conveniently due the day after Halloween, I decided to outfit my family as The Addams Family. As they were in the original cartoons from The New Yorker from 1938-1964. Most people associate The Addams Family with either the 1964 television show or the 1990s movies. Charles Addams the artist and humorist that created the Addams Family started working for The New Yorker in the early 1930s he officially introduced the unnamed Addams Family in 1938. His creation was a gothic version of the 1930s up-class, I can imagine Morticia wearing Coco Channel, Elsa Schiaparelli, Vionet and Gomez wearing the dapper double breasted suits of the time. Wednesday was certainly dressed as a young lady. Lurch had to wear a rented tux unfortunately. Addams

Cartoons from The New Yorker by Charles Addams

Examples

Charles James 1939, Travis Banton 1934, Info not available, Sulka & Co., Ltd 1930s

Wednesday

My Inspiration for Wednesday’s dress

FullSizeRender_2 copy 2FullSizeRender_1FullSizeRenderDetails

Costumes

FullSizeRender_3

FullSizeRender_2 copy

Morticia is carrying a true vintage black beaded hand bag and vintage shoes

What the item is: Morticia is wearing a bias cut satin gown with long sleeves, Gomez is wearing a smoking jacket with quilted lapels and an ascot,  Wednesday is wearing a cotton frock.

The Challenge: #11 Silver Screen

What’s your onscreen inspiration?: The Addams Family being traced back to the 1930s New Yorker cartoons by Charles Addams. I drew inspiration from the look of the 1960s television show but kept the costumes in the 1930s

Fabric: Morticia poly satin, Gomez mystery beige/black fabric and black satin quilted over felt, Wednesday black cotton gauze and white cotton sateen.

Pattern: Gomez 238 Le Smoking Jacket, Morticia self drafted, Wednesday self drafted but influenced by a children’s pattern.

Year: 1938

Notions: Both Gomez and Wednesday’s costumes have true Victorian jet buttons.

How historically accurate is it? I would say the patterns and look are fairly good if The Addams were to really exist but some of the fabrics are synthetic. 75%

Hours to complete: I worked on this project in little chunks over two months.

First worn: Halloween!

Total cost: Morticia $25, Gomez $90, Wednesday $40


Sources:

http://www.newyorker.com/cartoons/bob-mankoff/charles-addams

http://www.paleycenter.org/we-re-gonna-pay-a-call-on-the-addams-family/

https://theinvisibleagent.wordpress.com/2010/02/15/cartoons-by-charles-addams/