November HSM- Erté and the Silver Screen

Hi everyone, Erin here! I am thrilled to be back in the game and on the blog with finally another HSM project!

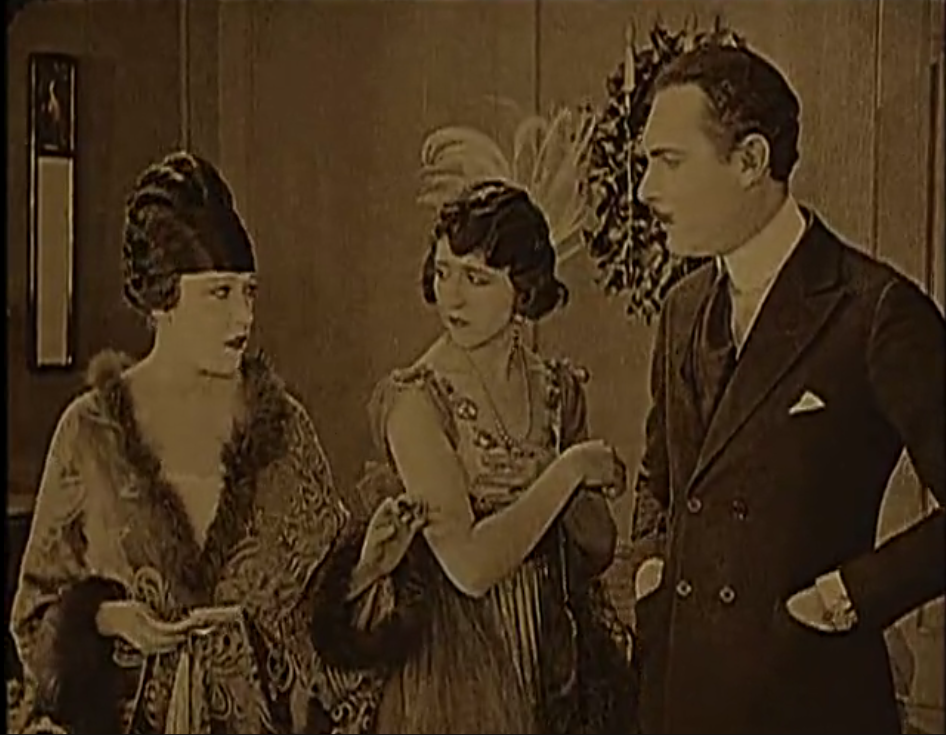
For this challenge, I wanted to capture some of the flamboyance of early silent films. I have always been inspired by photo stills of Theda Bara in Cleopatra (I will always be a little heartbroken that this film is lost), and I love over the top costume films like Don’t Change Your Husband, with Gloria Swanson dressed in the height of Orientalist fashion. (You can find this film online, it’s worth a watch for the costumes if you can stand the plot)

Gloria Swanson in Don't Change Your Husband Screen Shot 2015-11-14 at 12.08.39 PM Gloria Swanson in Don't Change Your Husband

I decided that instead of copying a costume directly, I would play costume shop and make something from an illustration. Erté is one of my favorite art deco illustrators. In addition to designing costumes for theater, he moved to LA in 1925 to design in Hollywood. His illustrations are delightfully over the top, and also famously difficult to recreate

I chose an illustration from Fashion Drawings and Illustrations from “Harper’s Bazar” that I thought was dramatic enough for Gloria Swanson, and also challenged my technical ability.

IMG_0043

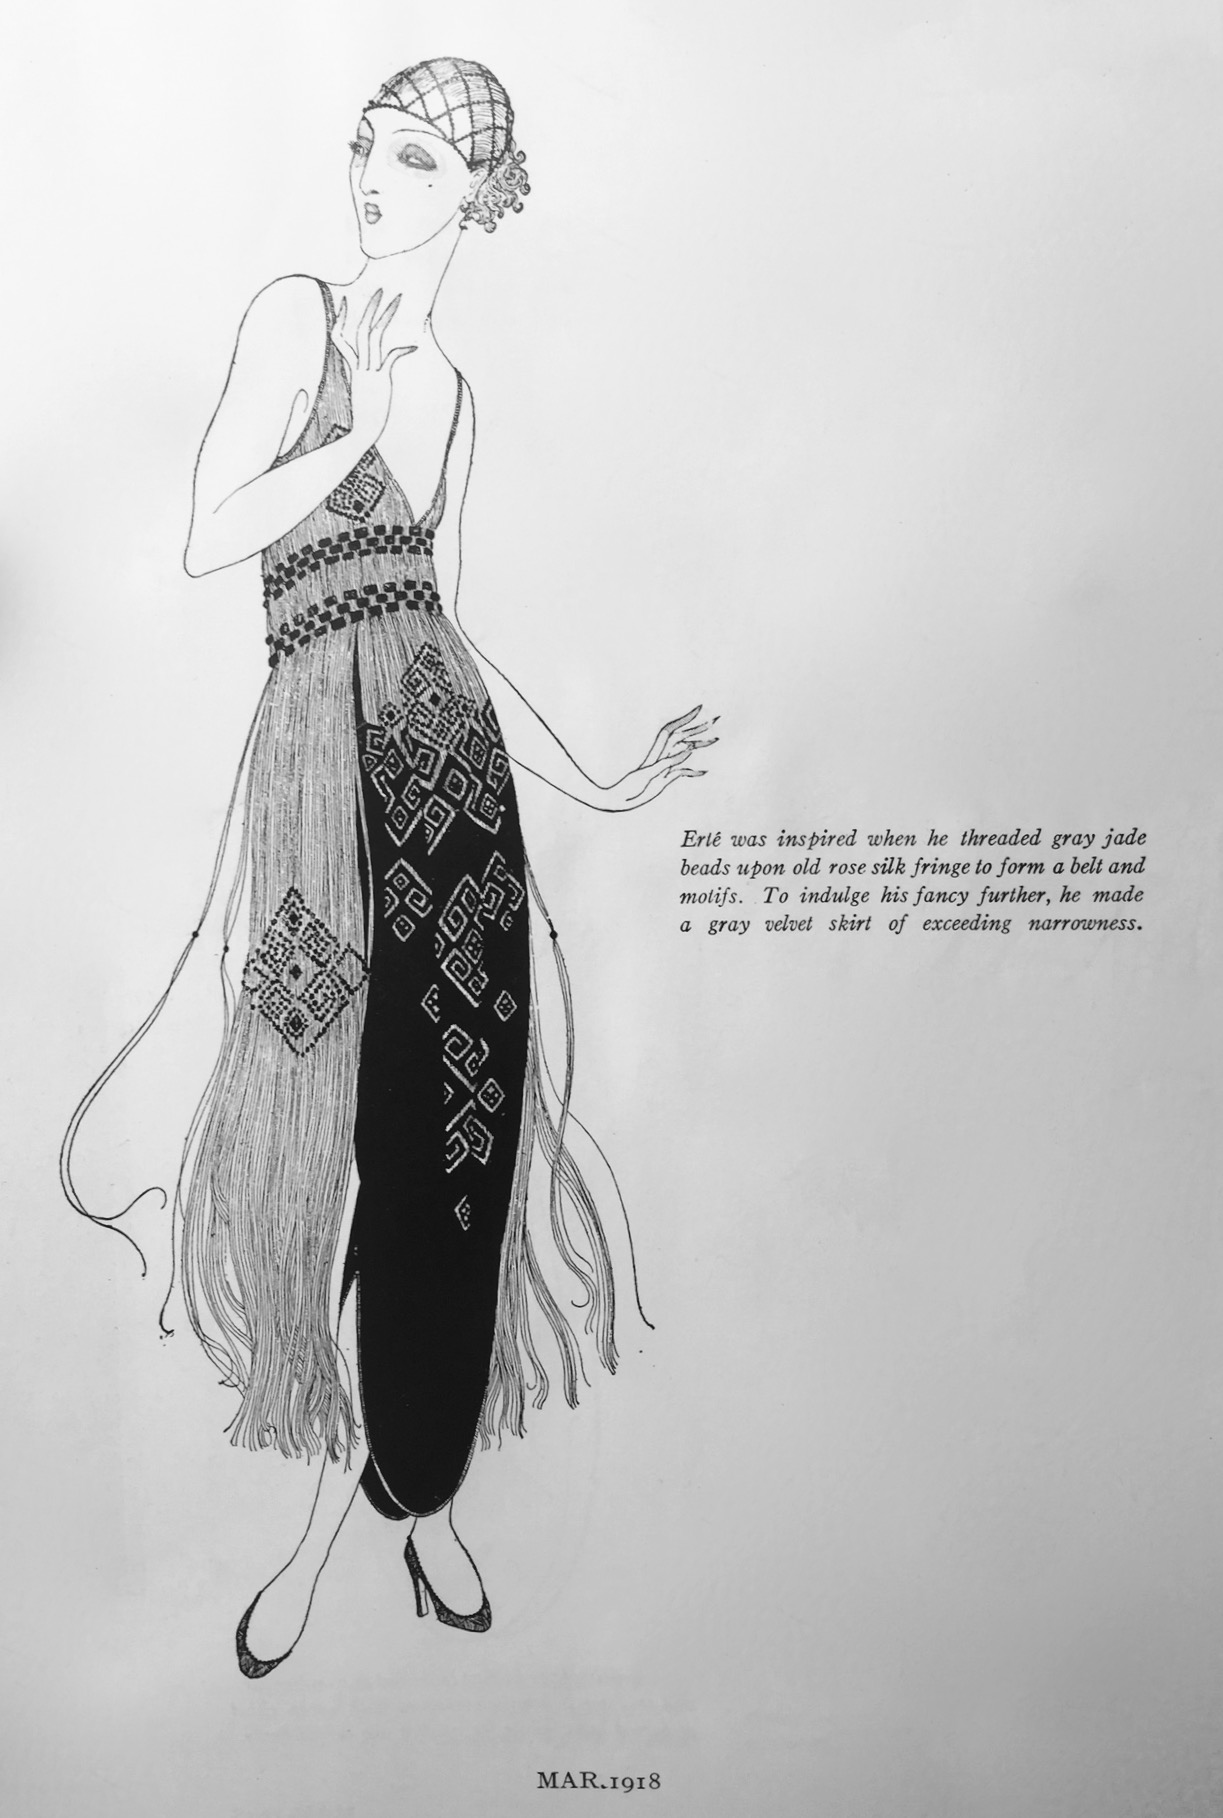
According to the caption, the dress is made with “old rose silk fringe”, “grey jade beads”, and “grey velvet skirt”. I scoured the internet and trim shops in the Garment District here in NYC, and could not find fringe trim in any rose color long enough for this project. So, I settled on a 30″ midnight blue rayon fringe and pearl grey beads and silk satin for the skirt (alas, silk velvet was out of my budget, and I was worried about it holding up to all the fringe “weaving”).

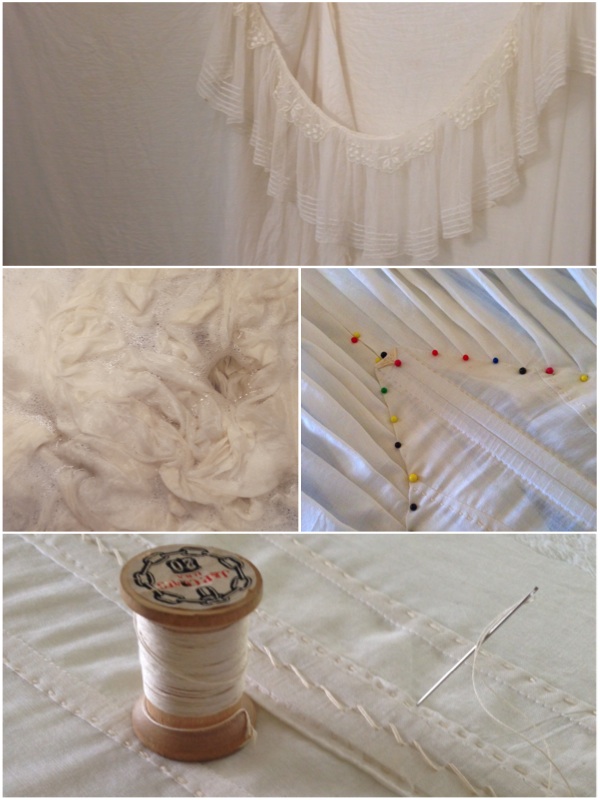
After trying unsuccessfully to thread the fringe with a bead, I ended up using a sturdy, twill weave cotton base and first stitching on the beads. Then after, I took individual strands of fringe, threaded them through a large needle, and stitched these directly to the bodice to give the impression that it was made entirely of fringe.

Bodice Progress 1
As seen in this photo- I left a 1/2″ seam allowance around the outside of the armhole where the fringe embroidery does not touch. When I attached the lining, it gets sewn into this seam allowance.

After this, I attached the bodice lining to cover all the stitching and knots, and around the neckline and armholes added a layer of seed beads to cover even finishing. Next, I added the skirt, then two layers of fringe around the seaming to make the transition more natural.

Progress shot 2
After adding the bodice lining, I added seed beads to the edges of the neckline and armholes. I also thought the neck drop was too small compared to the illustration, so I cut a notch down the center. This shot was right after I added the skirt, I finished the second layer of embroidery to the bodice and started to play around with the fringe. (Please excuse the crazy studio hair!)

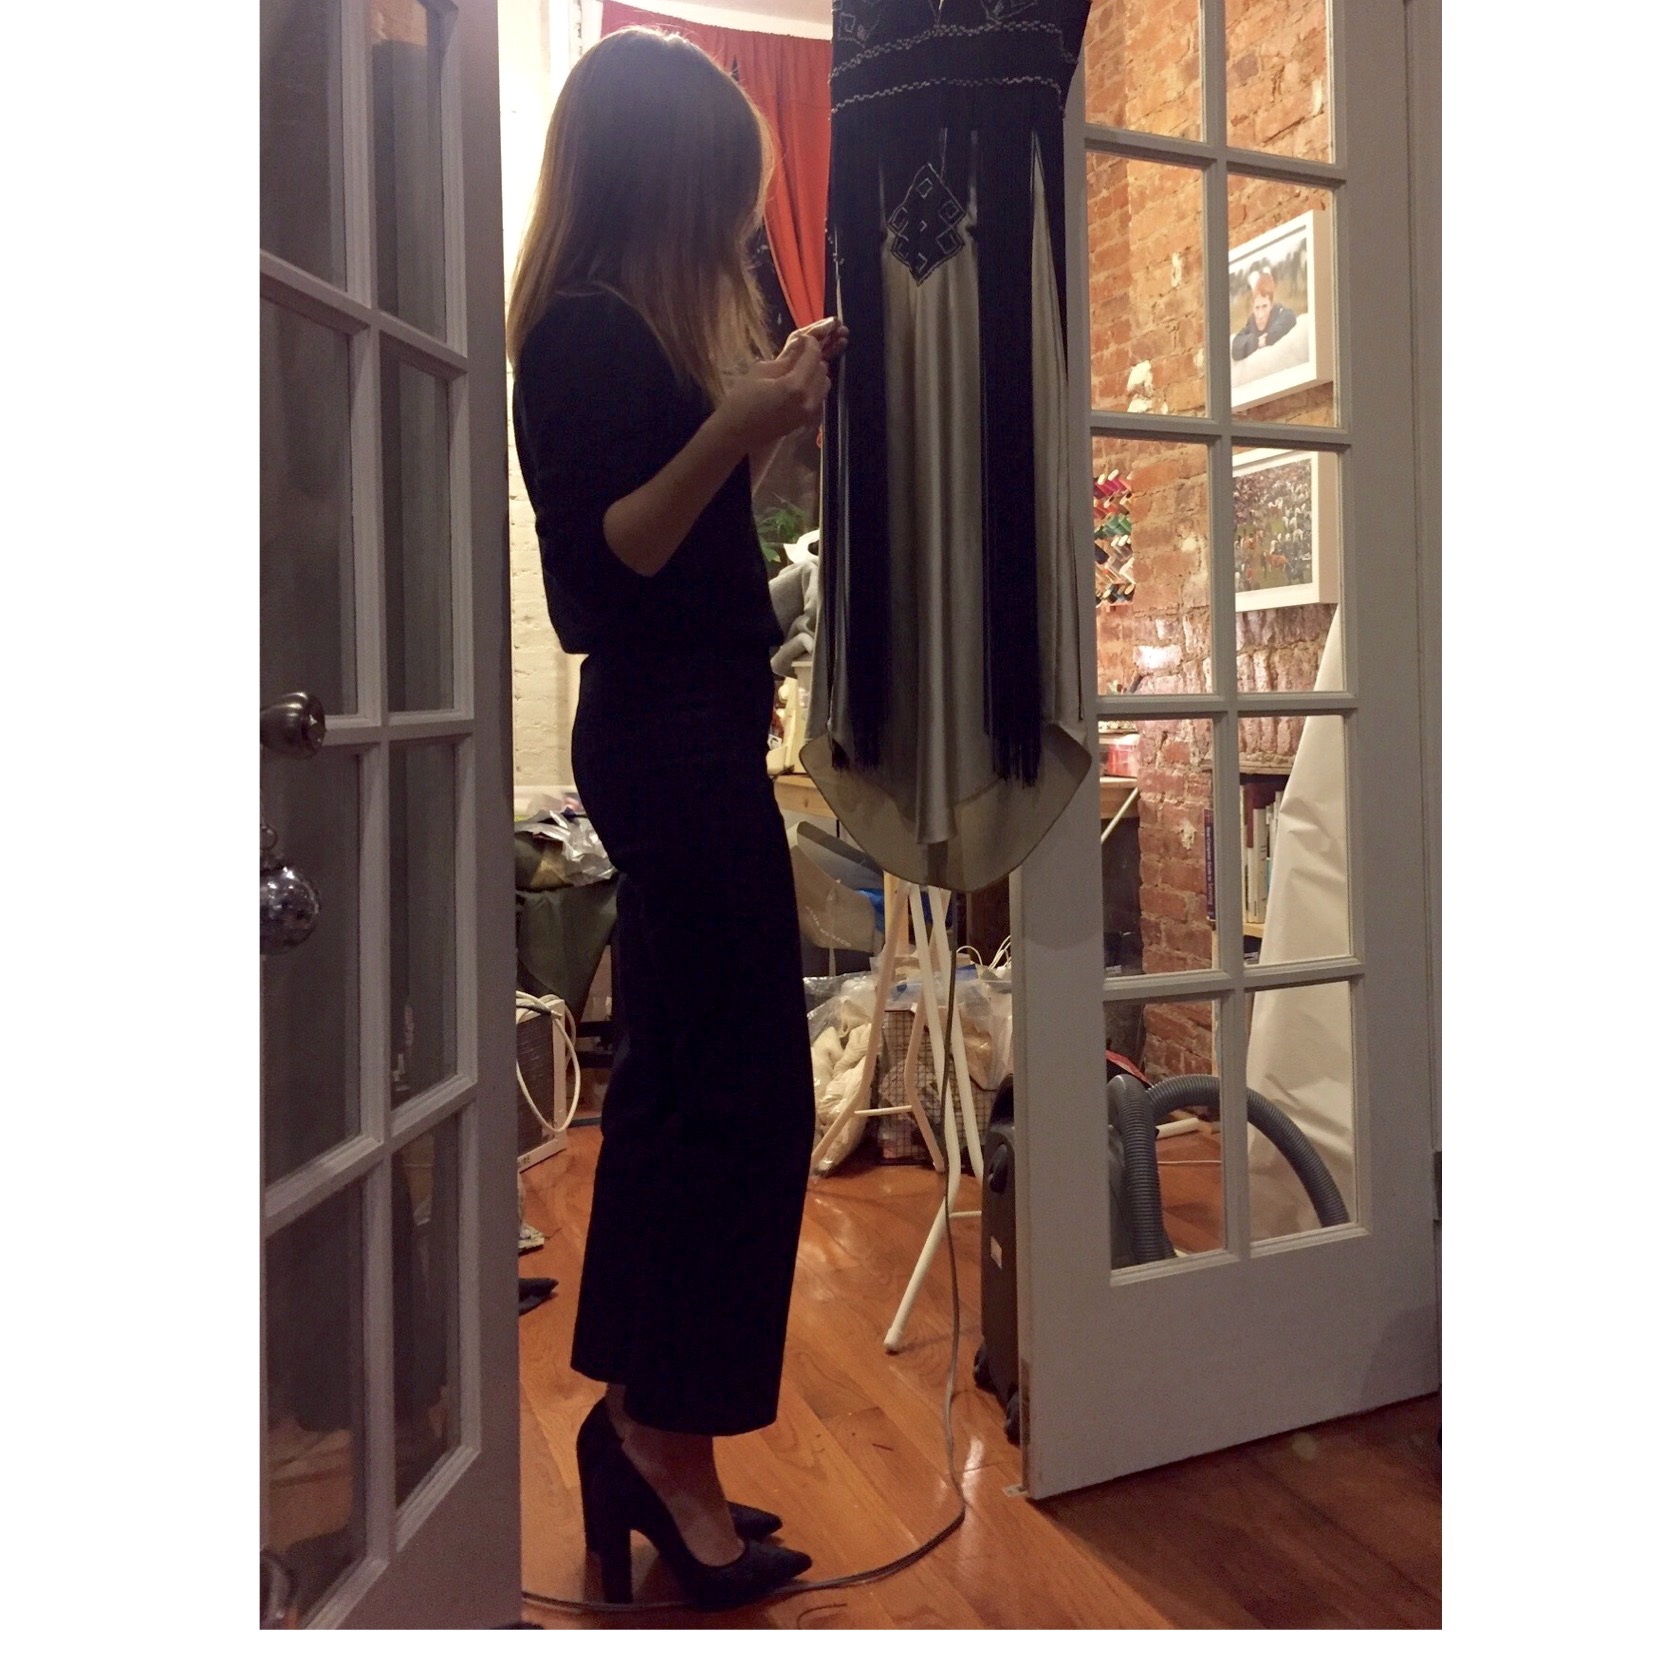
The most difficult part was embroidering the fringe into the satin. I have never been much of an embroiderer- so please bear with the atrocity of my technique for this. I drew the pattern onto muslin and then pinned it to the place where I wanted the pattern to be. I basted directly through the lines of the pattern and then cut away the muslin. Next, I threaded the individual fringe through a large-eye needle and then from top to bottom embroidered around the stitching. The beads attached to the fringe were sewn on by hand, and unfortunately it was just impossible to make the exact pattern as the illustration. By the time I got to this part, I was wishing I had interns and slowly going crazy. So, maybe it is better I went into fashion and not costume design! I hope Erte isn’t rolling in his grave over my lack of dedication to his design. The photo below shows how I did all the embroidery- not on a hoop but on a hanger. This probably was not the best technique, as it contributed to some puckering, but I could not think of a better way to create tension as the fabrics were very different (heavy, tightly woven twill and medium weight silk satin).

Progress Shot 3
Excuse the mess! And the heels! It was a hectic Saturday. This is not the normal situation!

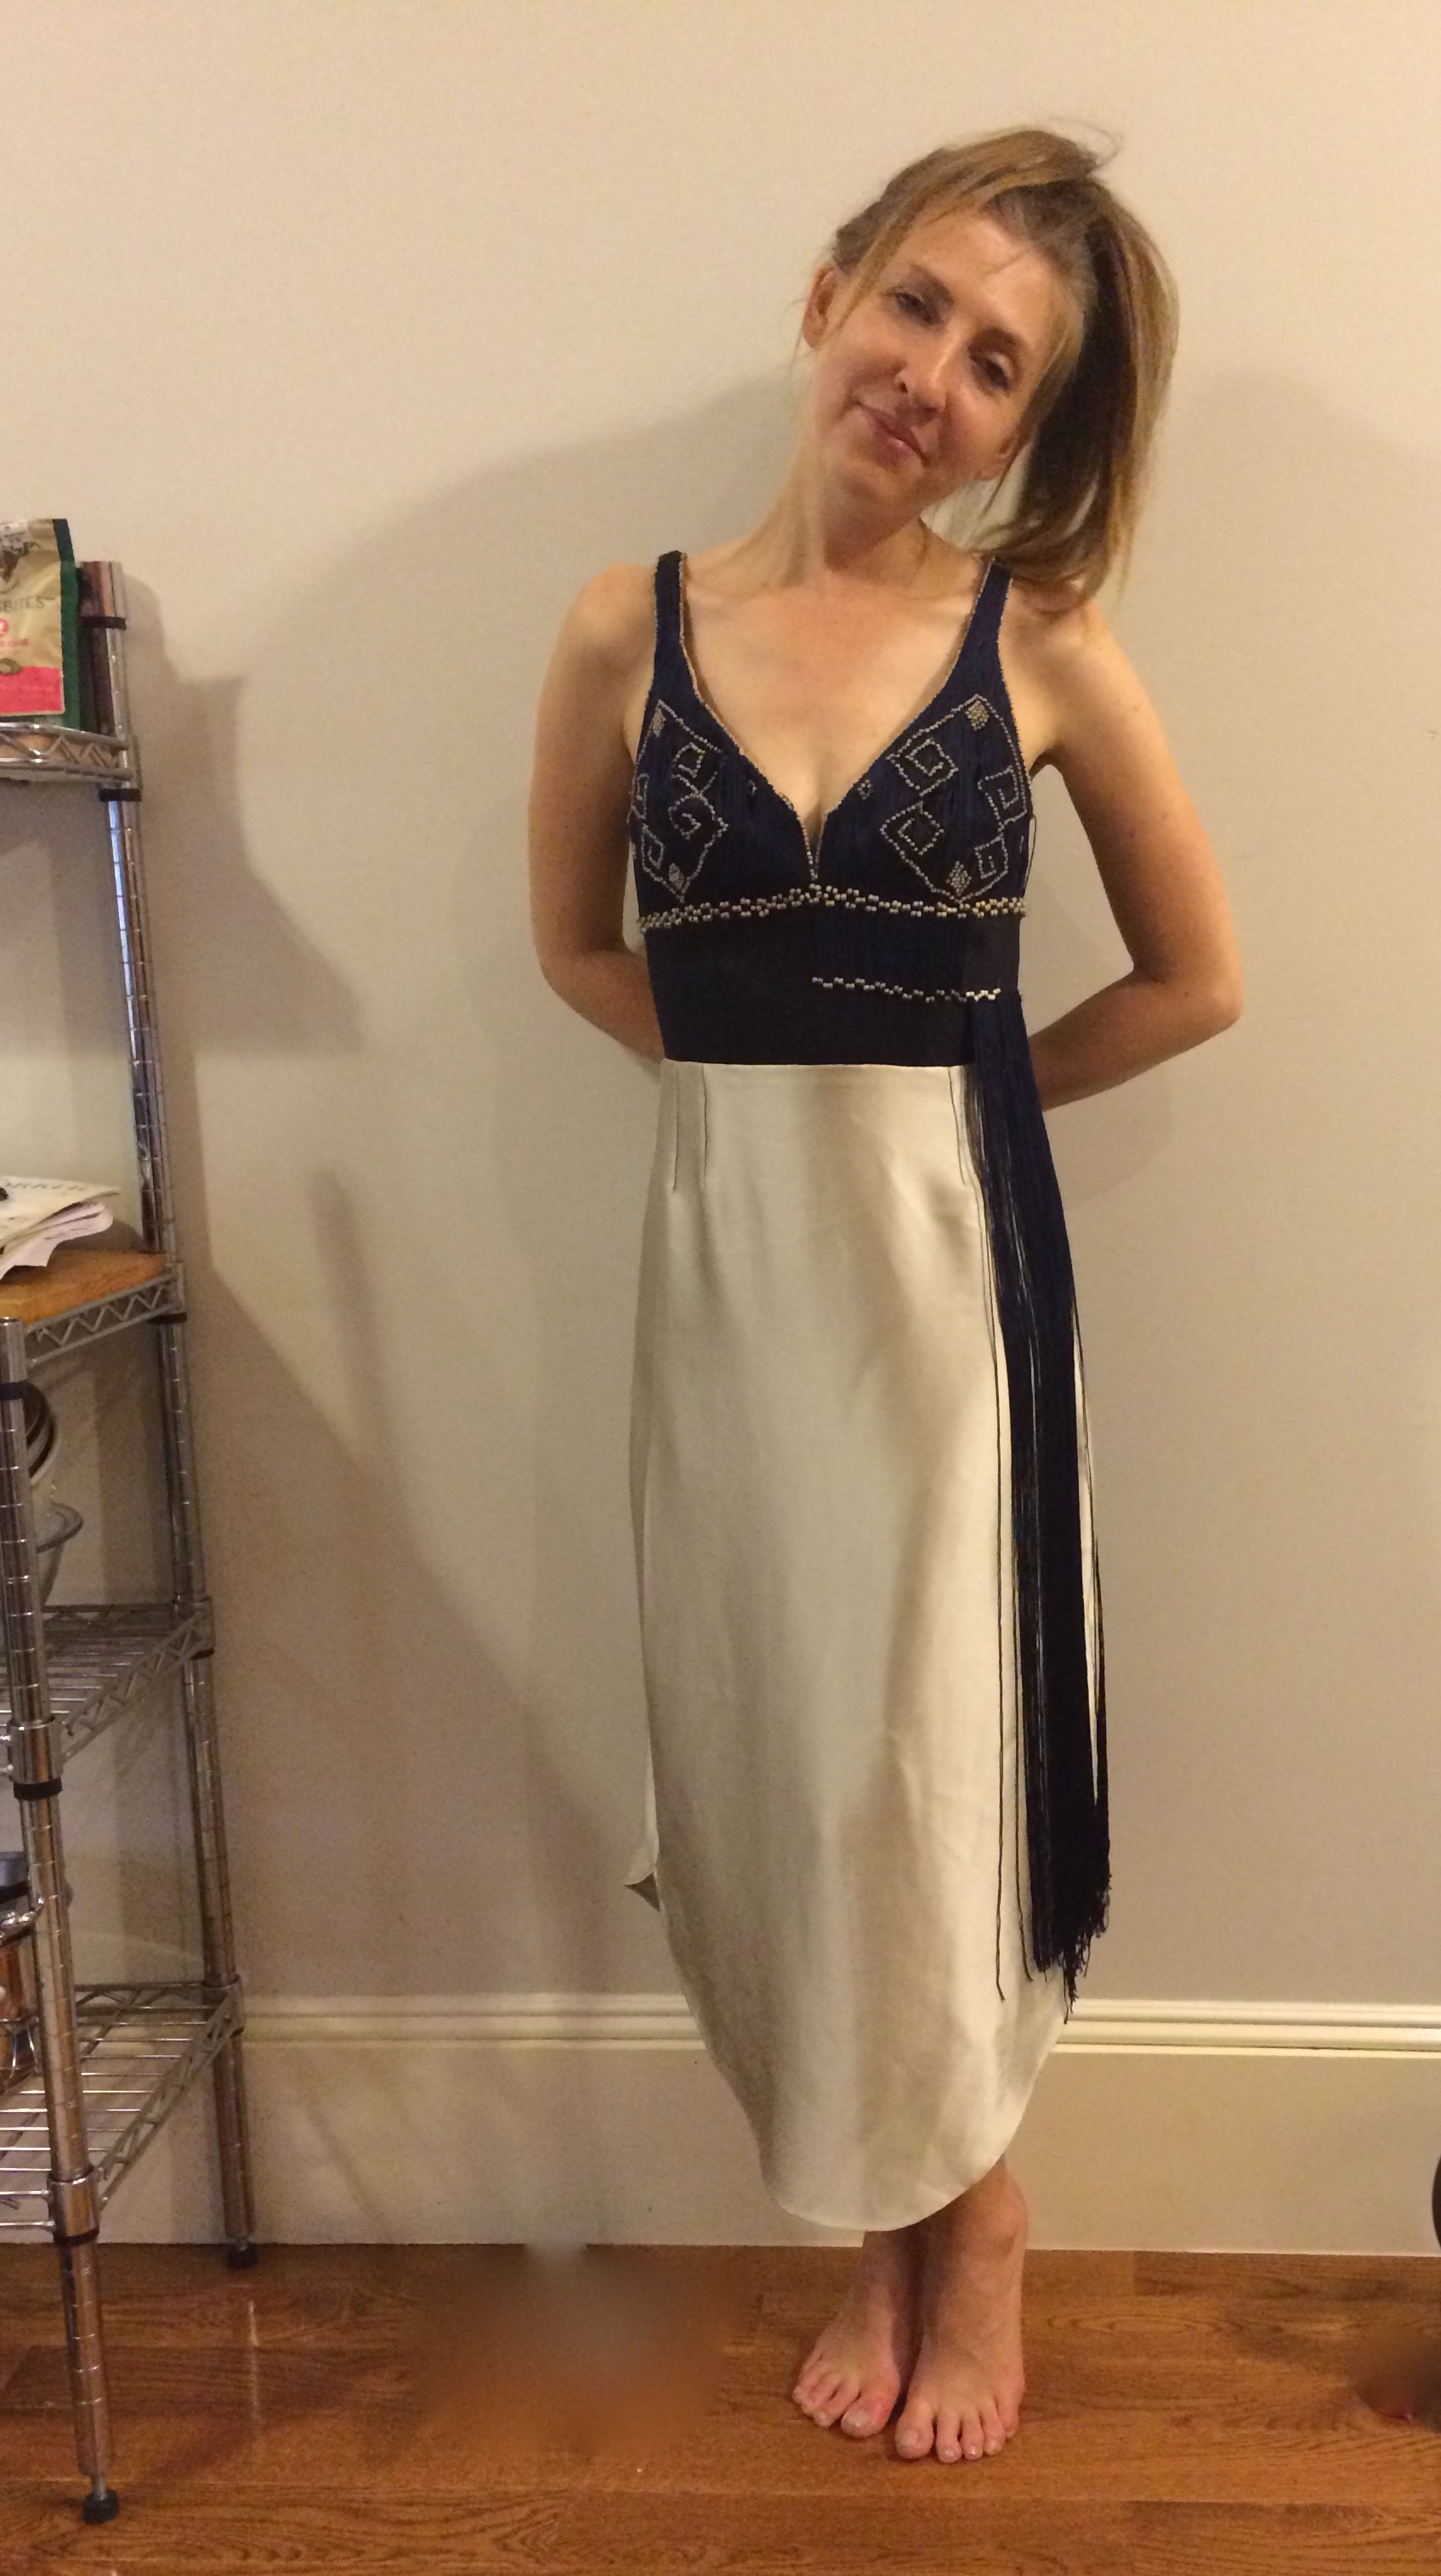
Anyway, the end result makes me just like Gloria’s understudy! It’s still a work in progress, I would like to add more of the original embroidery to the skirt (as soon as I get an intern… haha). I hope one day I will have somewhere nice to wear this, and not just traipsing around my apartment!

IMG_1043
Embroidery Detail 
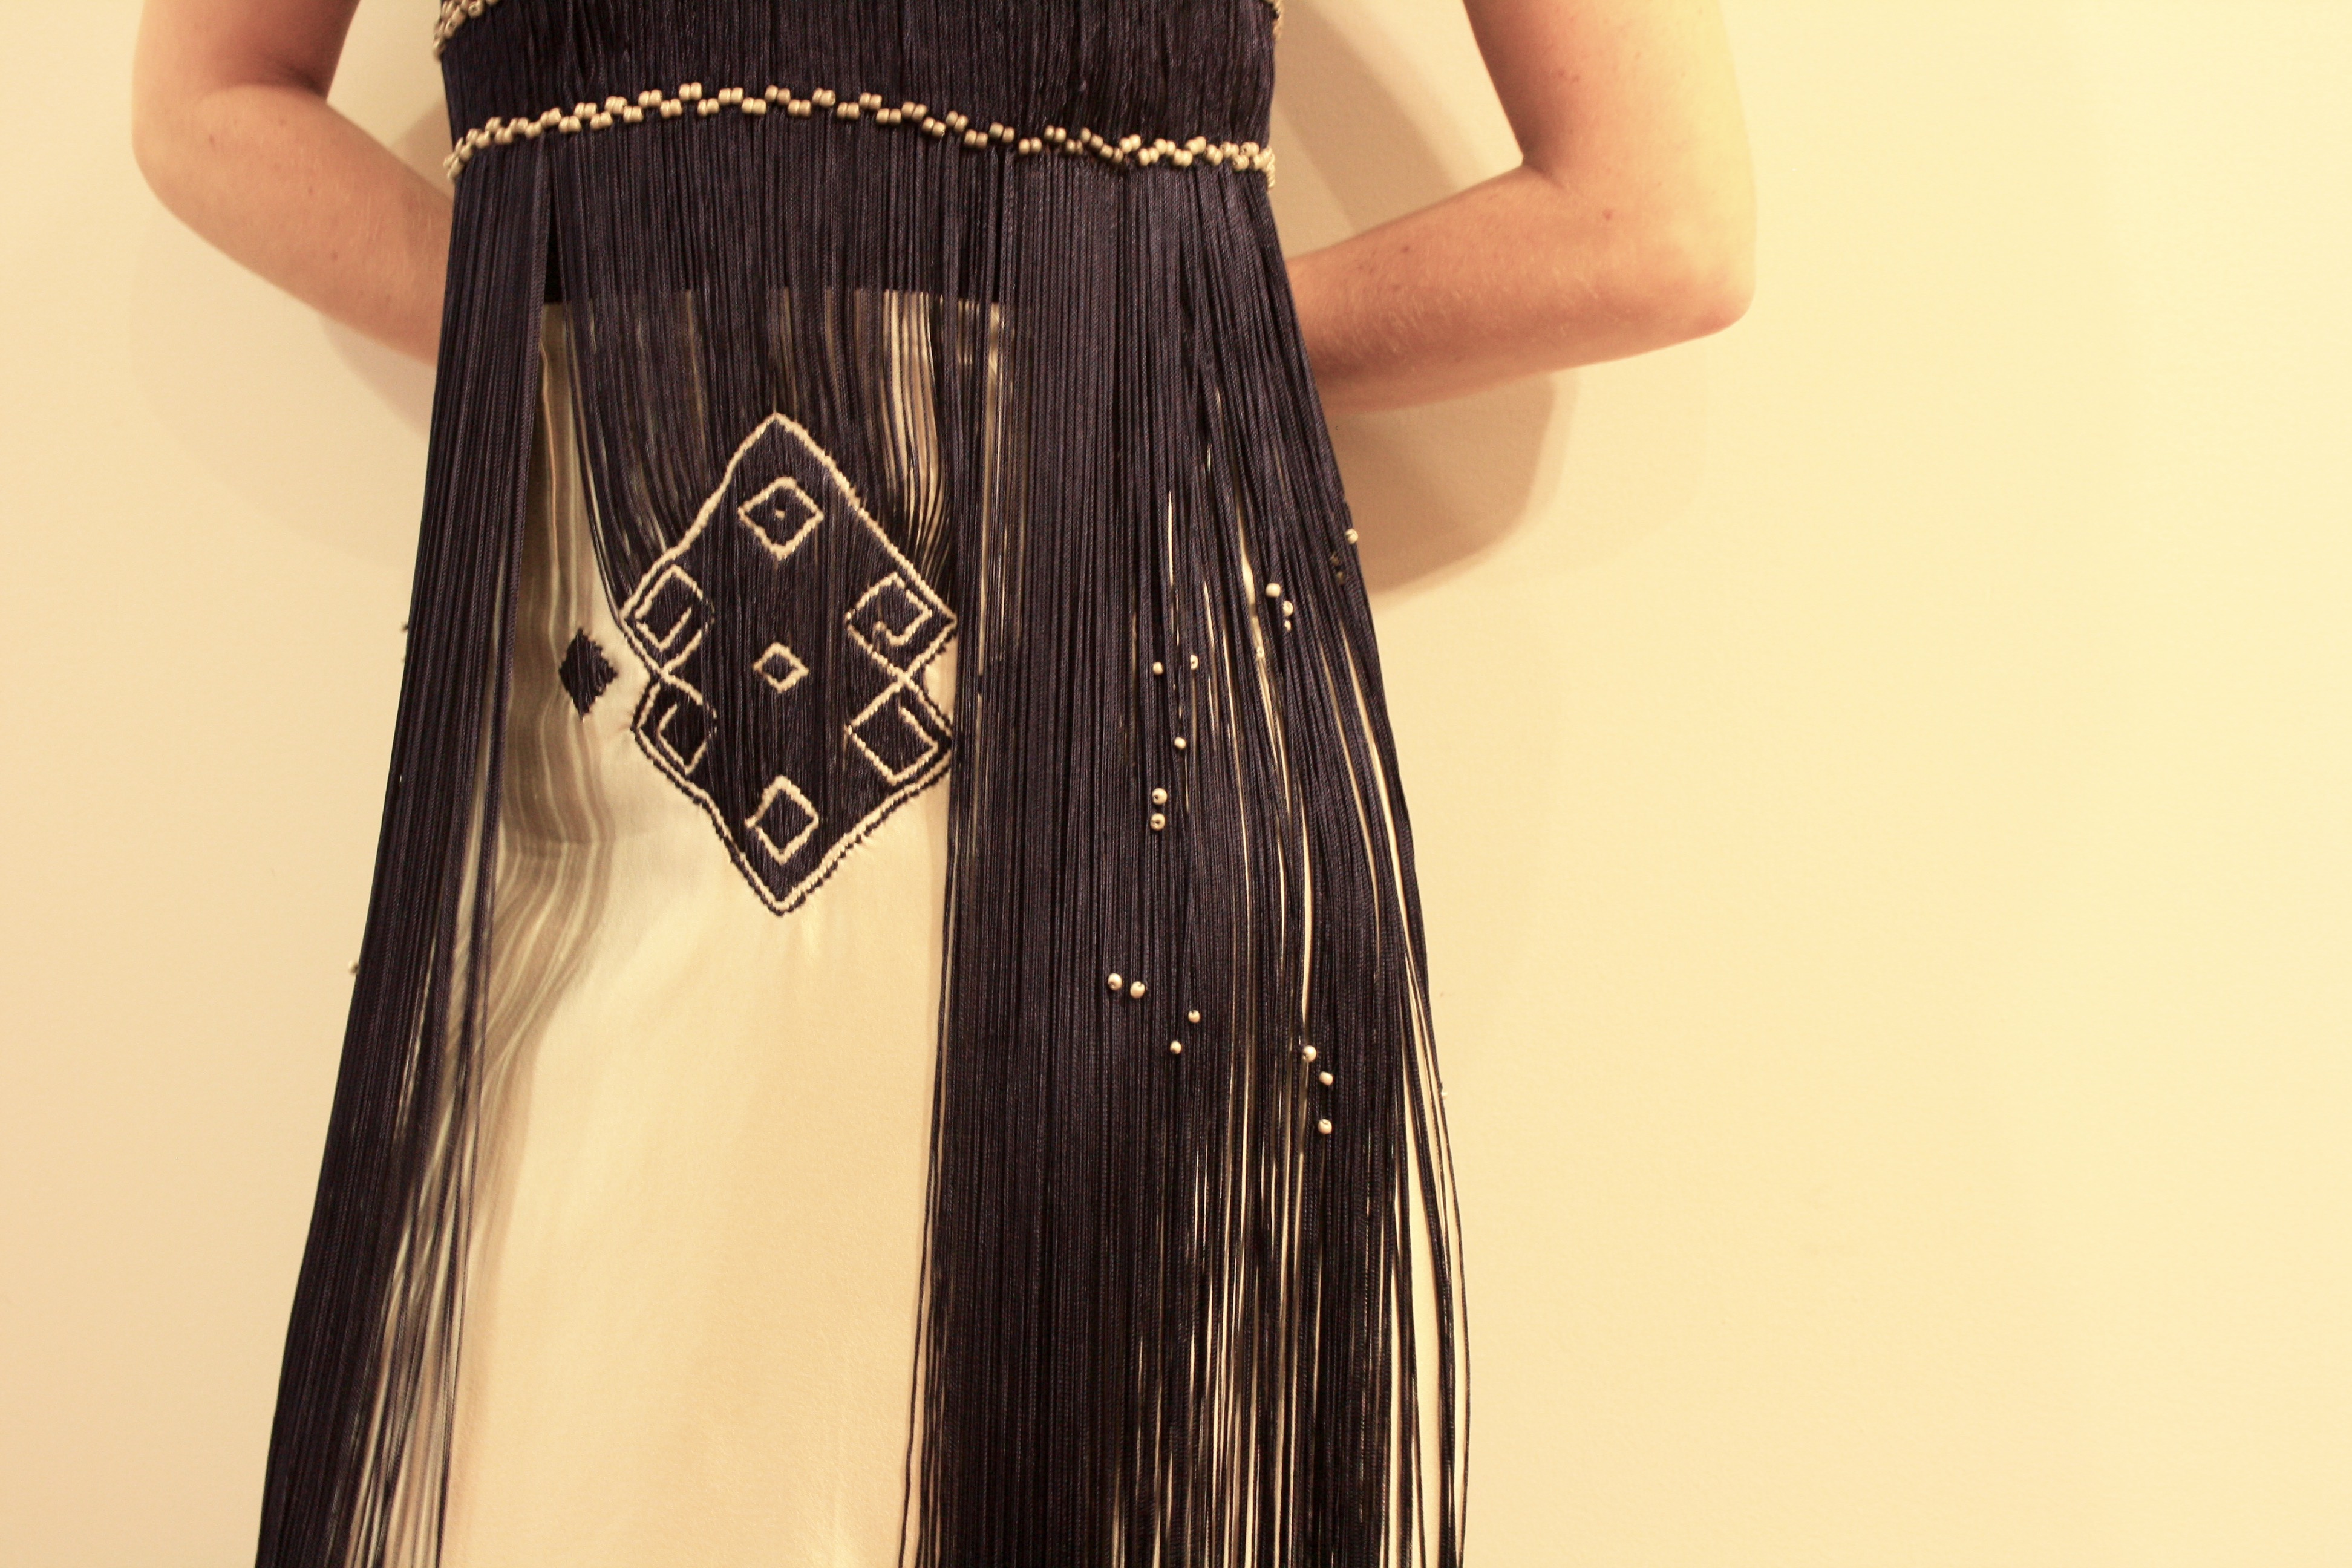
Finished Front Detail
Back Detail
Back Bodice Detail- Satin Buttons are hidden under a layer of fringe
IMG_0060
Back Detail – I didn’t get any good photos of the back while I was wearing this, but you can see how the buttons are partially hidden by a few layers of fringe

IMG_0973 IMG_1013

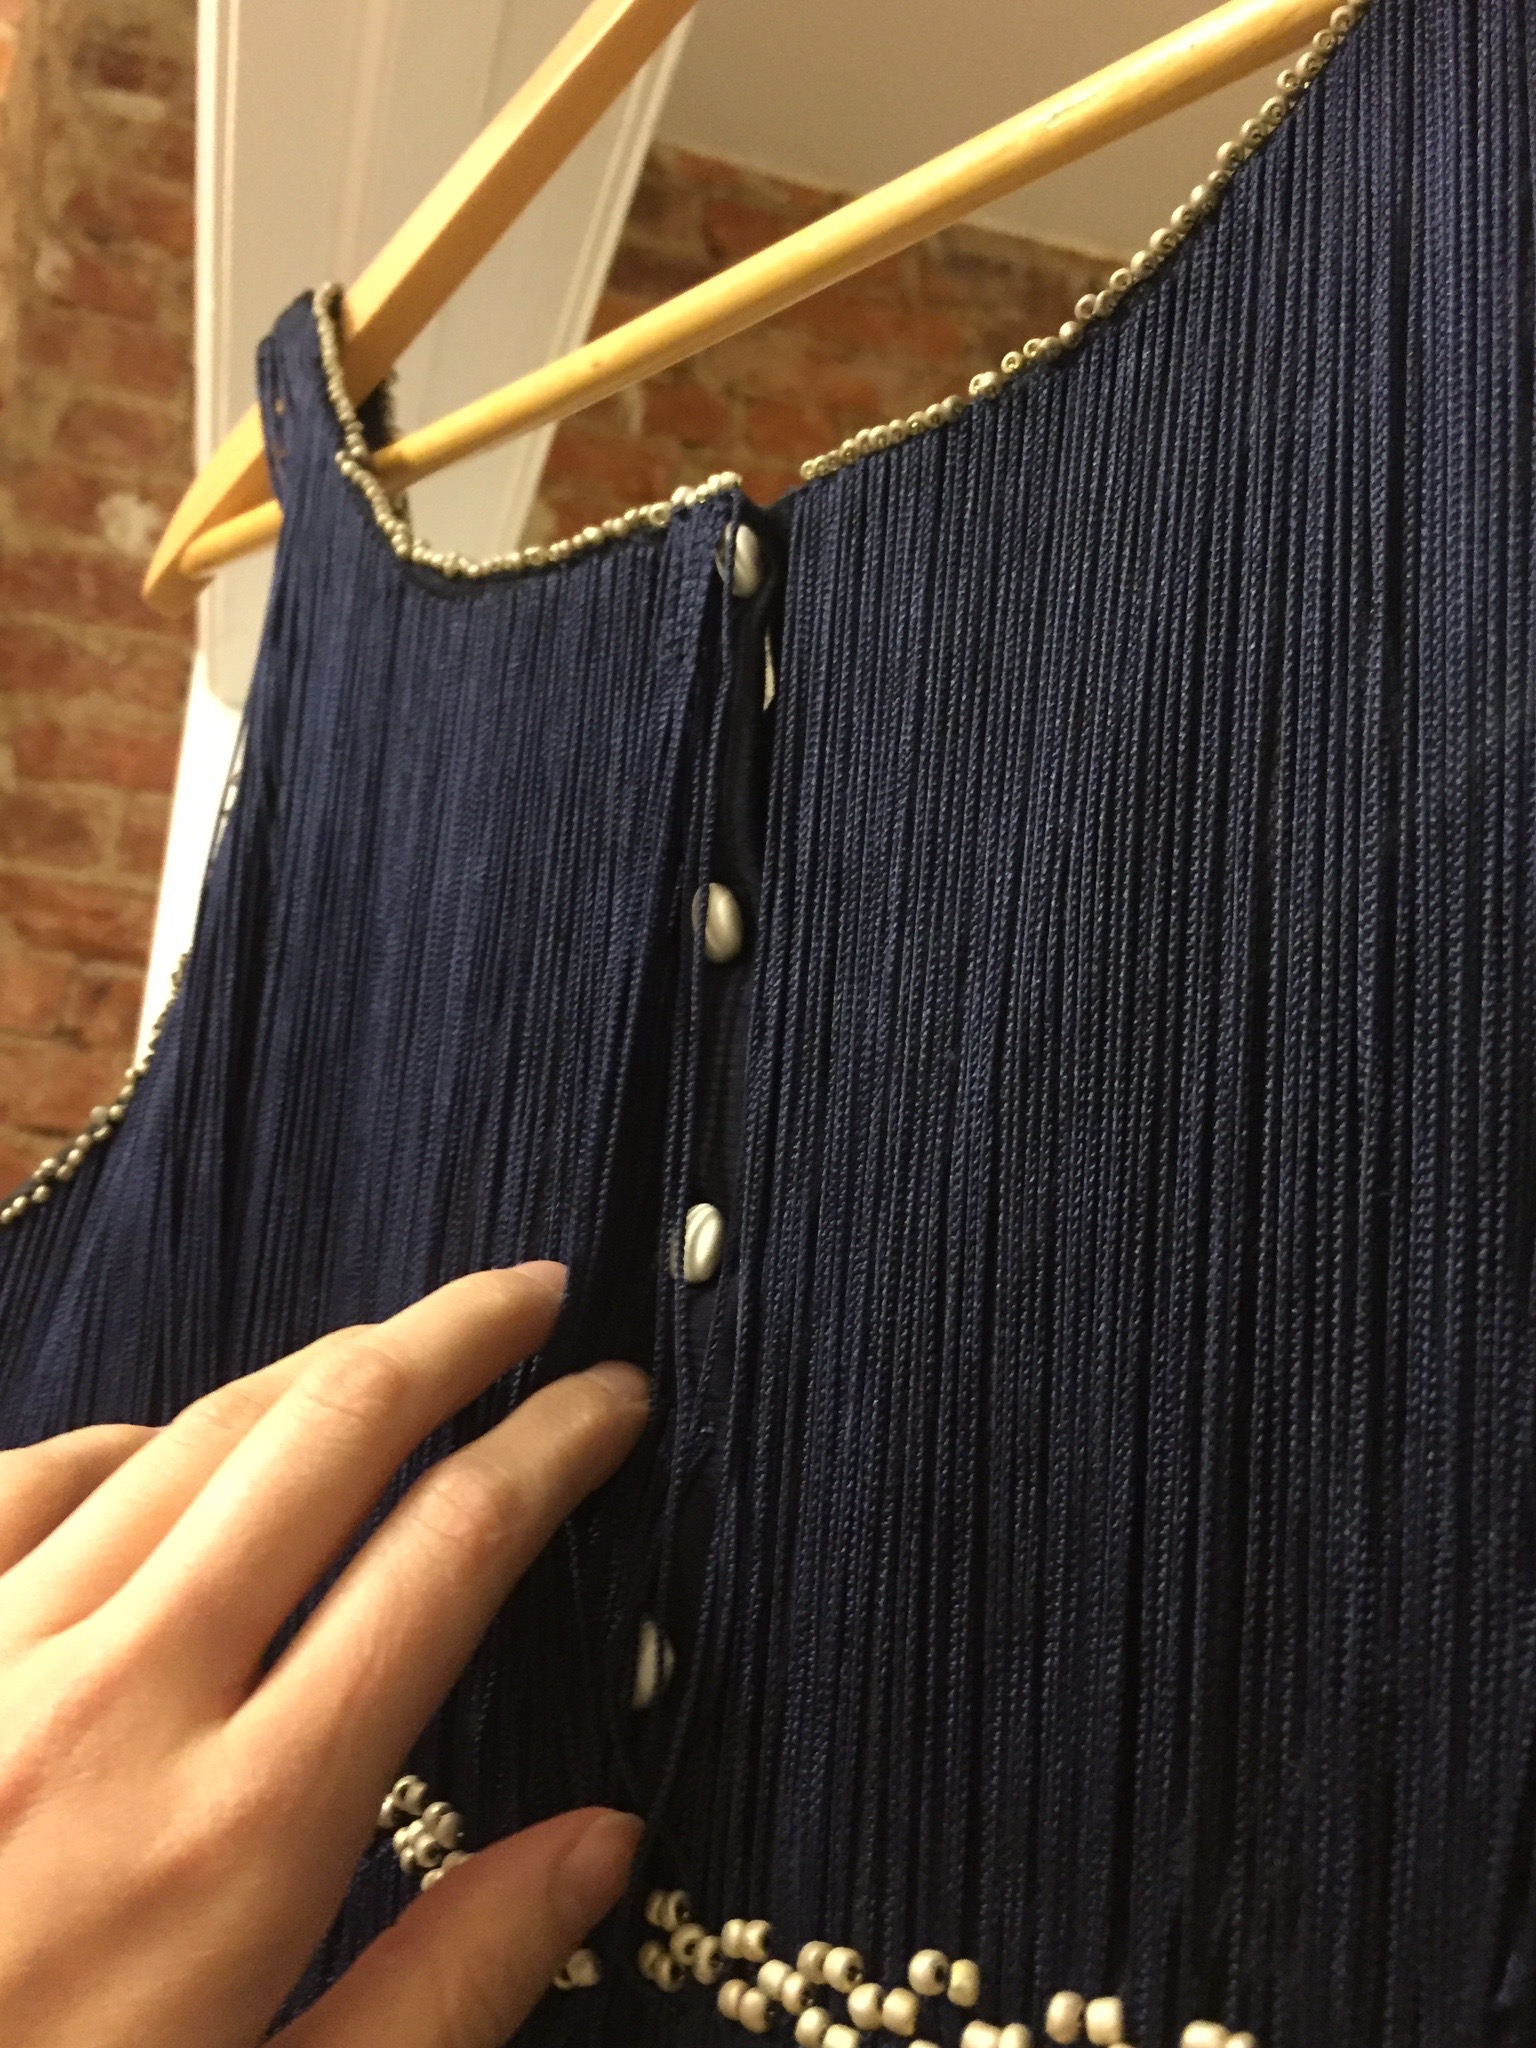
What the item is: Proposed costume for a Gloria Swanson movie, based on an Erté sketch from March, 1918
The Challenge: “Silver Screen”
What’s your onscreen inspiration?: Don’t Change Your Husband, 1919
Fabric: 100% Cotton Twill (base for bodice), 100% Cotton Muslin, black, for the bodice lining, 100% Rayon chain fringe, 100% Silk Satin (skirt)
Pattern: Self made
Year: 1918
Notions: Poly satin covered buttons, painted glass beads for embroidery, rayon chain fringe, thread.
How historically accurate is it? 80%- My embroidery technique was definitely not up to par, and some of the materials didn’t exist yet. However, I believe the shape and construction is otherwise faithful to real theater/stage costume/fancy dress of the time.
Hours to complete: 3 months (not working on it everyday, don’t worry!)
First worn: I wore an early incarnation of this dress that was missing many of the embroidery and closure details for Halloween, but the finished product has only been worn around my house, since I finished today!
Total cost: Around $75, cotton twill and lining were in the stash. $30 for the satin, $10 for beads, and I think $35 for the fringe?

A little update including HSM

Colorful Fashion on Vogue from the 1940s and 1950s (18)

Sophia here sorry for the absence! I am proud to announce I start training for a new costume seamstress job tomorrow at a company that makes over 2 million costumes a year. I’m also working on several Halloween costume commissions and a friends wedding dress. That being said I am running a little behind on HSM. So far I have missed War and Peace from April and Brown from September. I plan on completing every challenge this year by the end of the year even if I have to rearrange a little. Also Erin has been working abroad in China and Japan and planing for her upcoming wedding! We still love running this blog and reading the comments also looking at other historical costuming blogs.

HSM Challenge 8: My Western and Indian Heritage

RobeDeStyle06
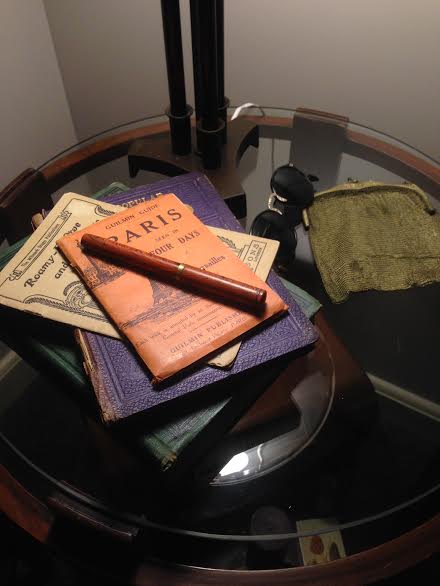
I don’t frequently make things that incorporate my Indian heritage so this project was a treat. My father’s parents were both born in India and he was born in Pakistan. My mother’s family has been in the U.S. since the 1800s. I decided to make a Robe De Style out of one of my grandmother’s Saris, I inherited boxes of them when she passed away. I felt that the gold woven border would make a great 1920’s dress and after looking through many styles I decided to make a robe de style due to it’s feminine cut. Although I probably never had a relative that wore such a style, I’m sure my Ammi Ji (Grandma) would probably have really liked this dress. She was born in 1943 and died in 2008 and I know her older relatives all dressed rather traditionally. My Ammi Ji loved fashion contemporary and traditional. My mother’s side of the family came from Appalachian farmer stock. I’m also wearing my Mother’s mother’s art deco ring. On the table is her gold mesh purse, a pen my grandpa turned, a Paris travel guide from 1921, underneath is my grandpa’s Hoffman radio and I am holding an 1880s Franklin Edition of David Copperfield. Sadly I did not take many in progress photos but the construction of this dress was fairly simple. The bodice is french seamed and the tiers are hand hemmed the rest of the inside seams are pinked.

RobeDeStyle03   RobeDeStyle05

RobeDeStyle07

unnamedRobeDeStyle

Milan 1929, 1920, Royal Ascot 1925, Unknown

Extant

British 1920, Worn by Mrs. John D. Rockefeller in 1920s, Callot Soeurs 1924

VintageIndia

Seeta Devi 1925, Maharani Vijayaraje Scindia, Sisters 1930s

What the item is: Sari Robe De Style

The Challenge: Heirlooms and Heritage

Fabric: My grandmother’s vintage silk sari

Pattern: self-drafted

Year: Early to Mid 1920’s

Notions: none

How historically accurate is it? Fairly accurate I would say it passes the recognizable in its own time.

Hours to complete: Around 12

First worn: To take photos

Total cost: $0 thread was stash/ sari was inherited

HSF #7: Accessorize – with shoes!

Hi everyone! Erin here, and I’m back!! Finally! It’s been a crazy few months of work and travelling, but I am finally getting back into a regular sewing schedule with some ambitious projects ahead.
For the July challenge, I had a few projects in order (as usual) but the quickest and most practical was a pair of early 1920s summer shoes. I wanted to make some more accurate shoes for this year’s Jazz Age Lawn Party, because in years past I was always a little disappointed with the bedazzled gold options or T-straps with 4″ heels that I would end up going with last minute. I decided to make some crisp white summer shoes that might work for a wider range of eras. I put together some inspiration on Pinterest, and found my favorite trends: D’Orsay with Louis or Cuban heel, Mary Jane strap, minimal, and preferably French.

Screen Shot 2015-08-02 at 8.18.16 PM
Clockwise from bottom left: Etsy, Etsy, The Closet Historian, La Vie Parisienne July 1923

I found a pair of faux leather Hush Puppies from the 70’s(?) on Ebay that I thought I could fix up to make into an easy pair of summer shoes. The heel is low enough and the style is simple enough to work for 1920-1926. I picked up some Tarago White Color Dye (even though the shoes are not real leather, I thought this paint would give the amount of flexibility necessary for shoes) and went to it. I won’t be getting into the step by step here because The Dreamstress already put together a great tutorial that needs no elaboration.

IMG_6742
The paint layer was already peeling off the toe very badly, I peeled even more until the toe looked smooth.
IMG_6740
The full dye kit.
IMG_6745
After one coat of dye
IMG_6747
On the left, two coats. On the right, three coats

In the end it took about 6 or 7  or 9 (I lost track!) coats of dye to make these completely white. I was a bit worried it would end up looking like I took a bottle of White-out to the pair, but they dried a lot better than expected. Though they are still not ideal, I’m sure this dye would look much better on actual leather than my pleather pair. I still have more than half the bottle of dye left, so I will definitely be trying this again on actual leather. Anyway, I will let you judge for yourself- here is the finished project! I’m wearing them here with a 1980s does 1920s drop waist dress.

IMG_0825
For a personal touch and to clean up the edges, I also painted the sole. I have never seen a historical example of this but I think it will be a nice touch for dancing!

IMG_0794IMG_0824IMG_0842IMG_0861

The Challenge: #7 – Accessorize

Fabric: Faux Leather, dye

Year: 1920-1926

Notions: Brushes, scrub pad

How historically accurate is it? 0% for technique, 80-90% for look. They will definitely elevate any 1920’s look I add them to!

Hours to complete: less than 1

First worn: Only for this photo shoot! Hope to wear them in two weeks for Jazz Age Lawn Fest on Governor’s Island!

Total cost: About $25 total for shoes, dye, and scrubbers

HSM Challenge 7: Accessorize a Slightly Political 18th Century Hat

IMGP0041

So you may have all ready had a glance of this hat in my out of my comfort zone post. I decided I wanted to represent the French Revolution at our local Bastille Day festival. And yes I know the dress I made has much more to do with the aristocracy, but I could fly my colors on my hat. I made a Tri-Color cockade and curled some turkey feathers to adorn the hat. I love making cockades now and want to put them on everything! Here is an article explaining the symbolism and history of cockades. Scroll for inspiration and more hat details.

extantexamples

Some simple extant examples of wide straw Bergère Hats

hatart

18th century hats in art

progress

Hat remaking and decorating

IMGP9963

IMGP9984

11745313_10153197664729821_1493001121449569036_n

A picture of me vending I styled a lot more funky and less historical day of.

What the item is: Bergère Hat
The Challenge: Accessorize
Fabric: Well it is a hat made out of a re-blocked men’s straw hat.
Pattern: None but I used this tutorial for the cockade.
Year:1720-1789 this style was popular for a long time but for my purposes 1789
Notions: synthetic tri color petersham ribbon, premade bias binding, 3 white turkey feathers
How historically accurate is it? Well my use of rather modern materials is not accurate but I think the look of the straw is very close especially compared to most modern straw hat bodies. But this style is a mishmash of a few different hats and it is only plausible that a hat like this existed especially this late in the 18th century.
Hours to complete: one afternoon
First worn: To accessorize my challenge 6 round gown shhhhh I made this first… but in public at my booth at the local Bastille Day Festival.
Total cost: The hat was $1 at a rummage sale, the other notions were about $8.

HSM: Challenge 6 Out of your Comfort Zone

RoundGown7

For this challenge I made a “muslin” round gown, this was my first go at a full pre 1900 ensemble. I made this look for an upcoming Bastille Day festival I am vending at. I will also be addressing the details of my hat in my Challenge 7 post. First Some inspiration and historical photos then I’ll get into the little details. You can view the Pinterest board for many more examples.

Art examples

Examples from Art

museumexamples

Extant Examples

When I first started thinking about this challenge I was going to make a Chemise a la Reine but I personally find them to be frumpy. I am rather short waisted and think the round gown’s more fitted bodice suits me better. Since I will be wearing this outfit and be working I decided to make it walking length. It will also be 90 degrees and humid in Florida at this time of year so a muslin gown is perfect.

fabric

Once I found the most perfect fabric ever I was set to go. The fabric came from a long closed tailor shop and I can’t even capture how fine the texture and feel is in photos. I am of course counting on the seller to be truthful, but this fabric truly unlike anything modern I have seen. I also did a burn test to determine fiber and I believe it is a cotton silk blend. The silk net is from a possibly Edwardian hat that was so moth ridden and shabby I removed all the trim. This is what I used for the cuffs. The petticoat is from modern 100% cotton broadcloth and the bumpad is made from a dissected pillow. For construction information I consulted many many round gown examples in the Met and V&A. I saw that many had hook and eye from closures in the front, I am not sure if the way the bodice attaches to the skirt in the back is accurate. Koshka the Cat’s blue linen gown helped a lot in showing how to wear and construct a round gown. I also looked at some of Janet Arnold’s diagrams for information on petticoats and dress construction. Demode Couture was hands down the best recourse I found on skirt supports that were not panniers. I decided to make a quilted bumpad like hers from Encyclopédie Méthodique, 1785. I will be following up this post with the details of getting dressed. Keep scrolling for more photos and the challenge details.

RoundGown9 RoundGown8 RoundGown6 RoundGown3 RoundGown1

The Details

What the item is (and why it was out of your comfort zone): A “Muslin” Round Gown, Belt, Petticoat, Bumpad
The Challenge: Out of your Comfort Zone
Fabric: The Gown; 8 yards antique cotton silk blend sheer fabric that came out of a closed down tailors shop, 1 yard cotton poly in navy blue for the belt, a length of pin tucked silk net that came off of an unsalvageable edwardian hat. The Petticoat; 100% cotton broad cloth. The Bumpad; an old pillow for the stuffing and covering.
Pattern: Self-drafted
Year:1780-1789
Notions: Hook and eyes and zip ties for boning at center front and back.
How historically accurate is it? The look is pretty spot on and my visible seams are had stitched. However because this was such a daunting task I sewed the long seams by machine and the underpinnings by machine. I am also wearing my transitional stays circa 1795-1800 underneath instead of earlier stays and a modern slip instead of a chemise GASP. I would say about 75%
Hours to complete: Hmm I lost track sorry.
First worn: To take photos, but I am going to be waring it for a Bastille Day street festival that I am going to be vending at.
Total cost: $37

HSM: Challenge 5 Practicality Dorothea Lange and the Dust Bowl

dorthea3

I always love working biography into my historical sewing. Exploring the lives of the people of the era you are emulating is fascinating to me. Dorothea Lange was a photojournalist that documented the people of the Great Depression and Dust Bowl. She was contracted by the Farm Security Administration, she freely distributed her photos to national newspapers. I decided to use her practical manner of dressing as my inspiration, I was drawn to her wide legged pants, short shirts and cropped hair. Temperatures during the Dust Bowl reached extremes so I thought cotton would have been practical.

DortheaOutfits

A selection of Dorothea’s photos although I would suggest looking at more of her work including the photography of Japanese Internment Camps during WWII.
DortheaPhotos

Some samples of wide legged pants looks I also took inspiration from.
FashionPhotos

I collect vintage notions and thought this would be the perfect challenge to use them.     image1        image2

dorthea1dorthea2Details

The Details:

What is it: I based this outfit on the life of Dorothea Lange and her work as a photographer during the dustbowl. She wore practical clothes for her line of work so I chose wide legged pants and a half placket peter pan blouse both in cotton. I admit Dorothea was a little more serious than rick rack but it suited the era and I wanted to use some depression era notions I had. The inseam and side seams on the pants are flat felled and they open with a sailor front. The blouse has a half placket with a single button at the neck and slightly puffed sleeves.

The Challenge: Practicality

Fabric: 1 yard white basic cotton for blouse, 2 yards yarn dyed striped cotton for the pants.

Pattern: Self Drafted

Year: 1935-1939 going off of Dorothea’s period working with the Farm Security Administration.

Notions: Pre-War Buttons and Rick-Rack going off packaging design

How historically accurate is it? Extremely including the notions although this isn’t as hard for the 30s

Hours to complete: 4 for the pants 6 for the blouse

First worn: Today for the shoot but I think I’ll be wearing these pants often this summer.

Total cost:$20

Things are going Swimmingly

Hello All,

Sorry for our absence, I have been busy working on a swim capsule collection and Erin has been busy on a work trip to China. I wanted to give you an update on the retro style swim line I have been making, this is only a fraction of the looks I need to photograph the rest still. My amazing photographer is from Howdy Girl Studios. I’ll be posting my Historical Sew Fortnightly Post in the next few days.

DSC_0045

DSC_0205

DSC_0143

DSC_0180

DSC_0922

DSC_0592

DSC_0864

HSF/M Challenge #3 Stashbusting Late 30s Rayon Dress

This challenge is pretty straight forward. I love late 30s early 40s fashion and feel like it fit in perfectly with stashbusting seeing make do and mend and the great depression.  I bought the blue rayon at a rummage sale in St. Louis I think it is 40s or earlier due to the type of dog and the style.

Processed with VSCOcam with a4 presetProcessed with VSCOcam with a4 preset

illustrationexamples

dressexamples

NoveltyPrints

Processed with VSCOcam with b5 preset Processed with VSCOcam with b1 preset Processed with VSCOcam with f2 preset

Processed with VSCOcam with se2 preset  Processed with VSCOcam with lv01 preset

The Details:

What the item is: rayon novelty print dress.

The Challenge: #3 stashbusting

Fabric: dog and dish print rayon and black cotton velveteen

Stashed for?: 5 years or more

Pattern: self drafted

Year: 1937-1942

Notions: one tiny vintage button and a pearl plastic buckle

How historically accurate is it? I would say 80% If the sleeves and hem were longer I would say 100%

Hours to complete: about 10

First worn: today for pictures but I love it and I am sure I will wear it again and again

Total cost: When I bought the materials I’m sure it was under $20